Settings
Review security settings
Add passkeys, review admin access, and build a simple security habit for protecting customer and billing data.
Security settings help protect your sign-in and who on your team can change billing, settings, and customer records.
Use this guide when you are setting up how you sign in, checking who has admin access, or building a simple monthly security habit for your facility.
What you will accomplish
- Open Settings > Security and add a passkey on the device you use every day.
- Understand when to use a passkey vs a magic link email.
- Review Settings > Team so only trusted people have admin access.
- Know what to do if someone leaves your company or loses a device.
Before you start
- Use your own account. Do not share sign-in links or devices with another staff member.
- Have the device you normally use for work, such as your laptop or phone.
- Know your device unlock method, such as Face ID, Touch ID, Windows Hello, a PIN, or a security key.
- Review Team permissions if you need to remove staff access or change admin access.
Open Security settings
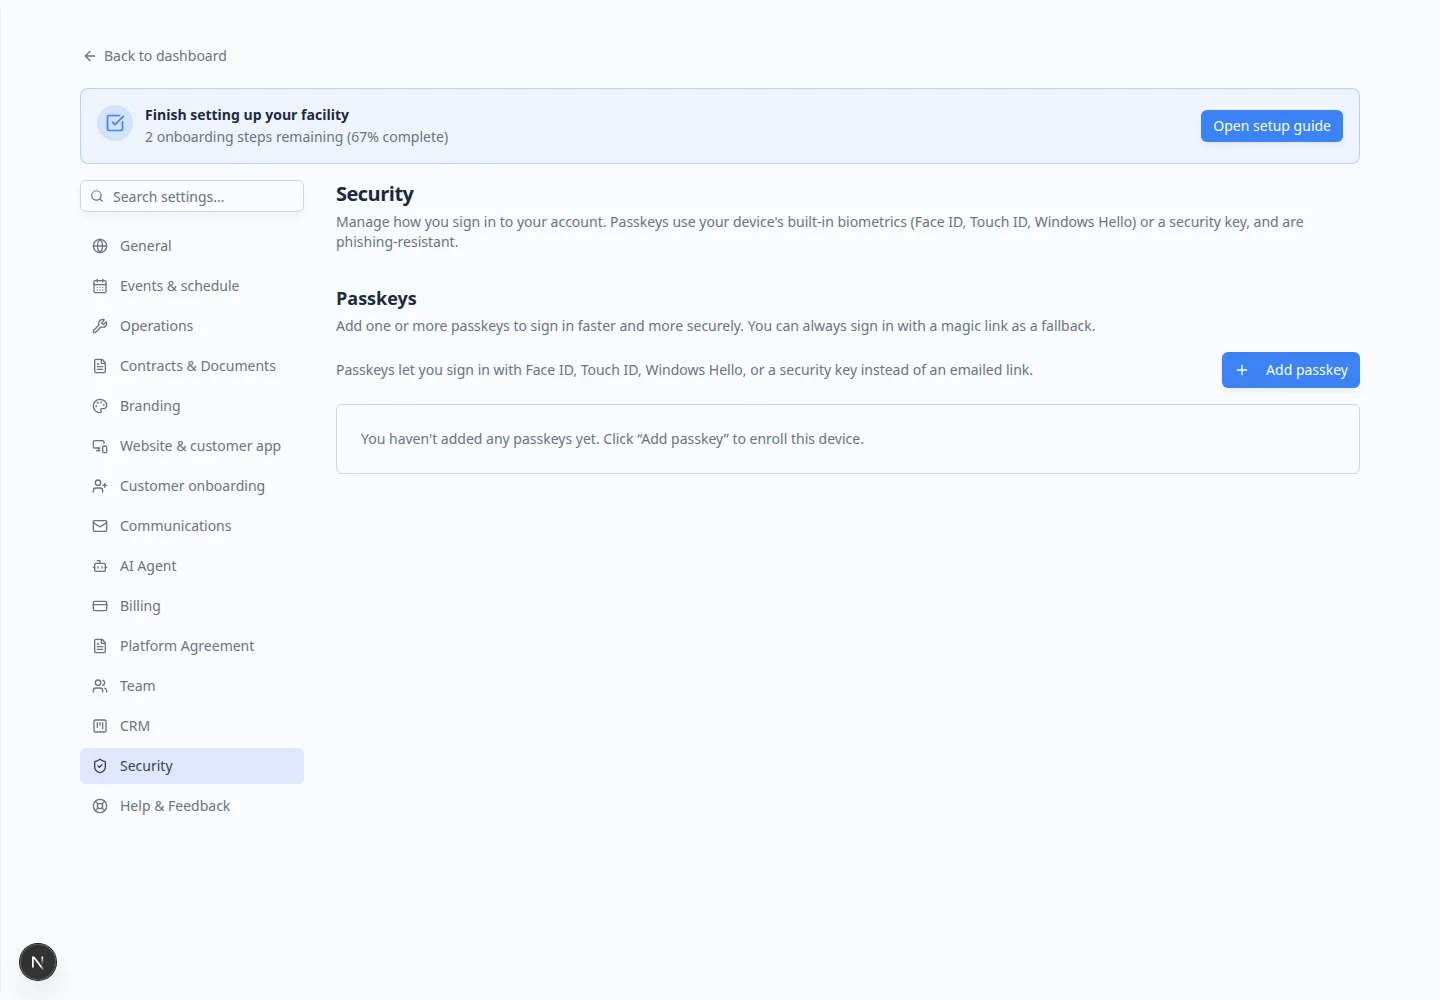
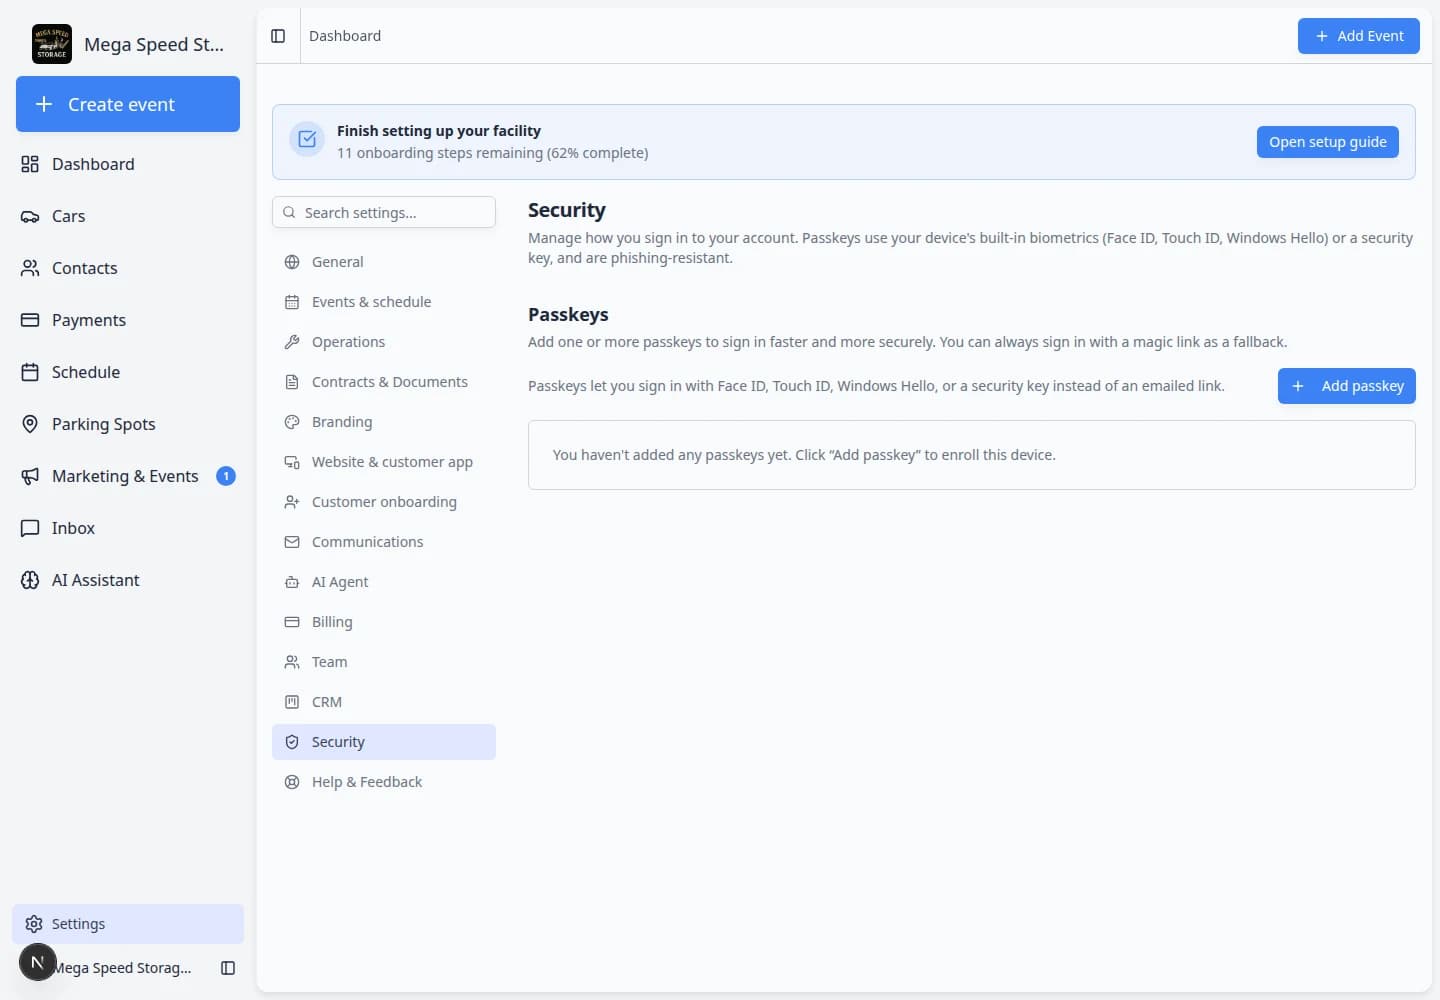
Go to Settings > Security.
The page title is Security.
Understand passkeys
A passkey lets you sign in using your device instead of typing a password.
Examples include Face ID, Touch ID, Windows Hello, your phone screen lock, or a physical security key.
Passkeys are safer because they are tied to your device and are much harder for someone to steal with a fake sign-in page.
Add a passkey
- Find Passkeys
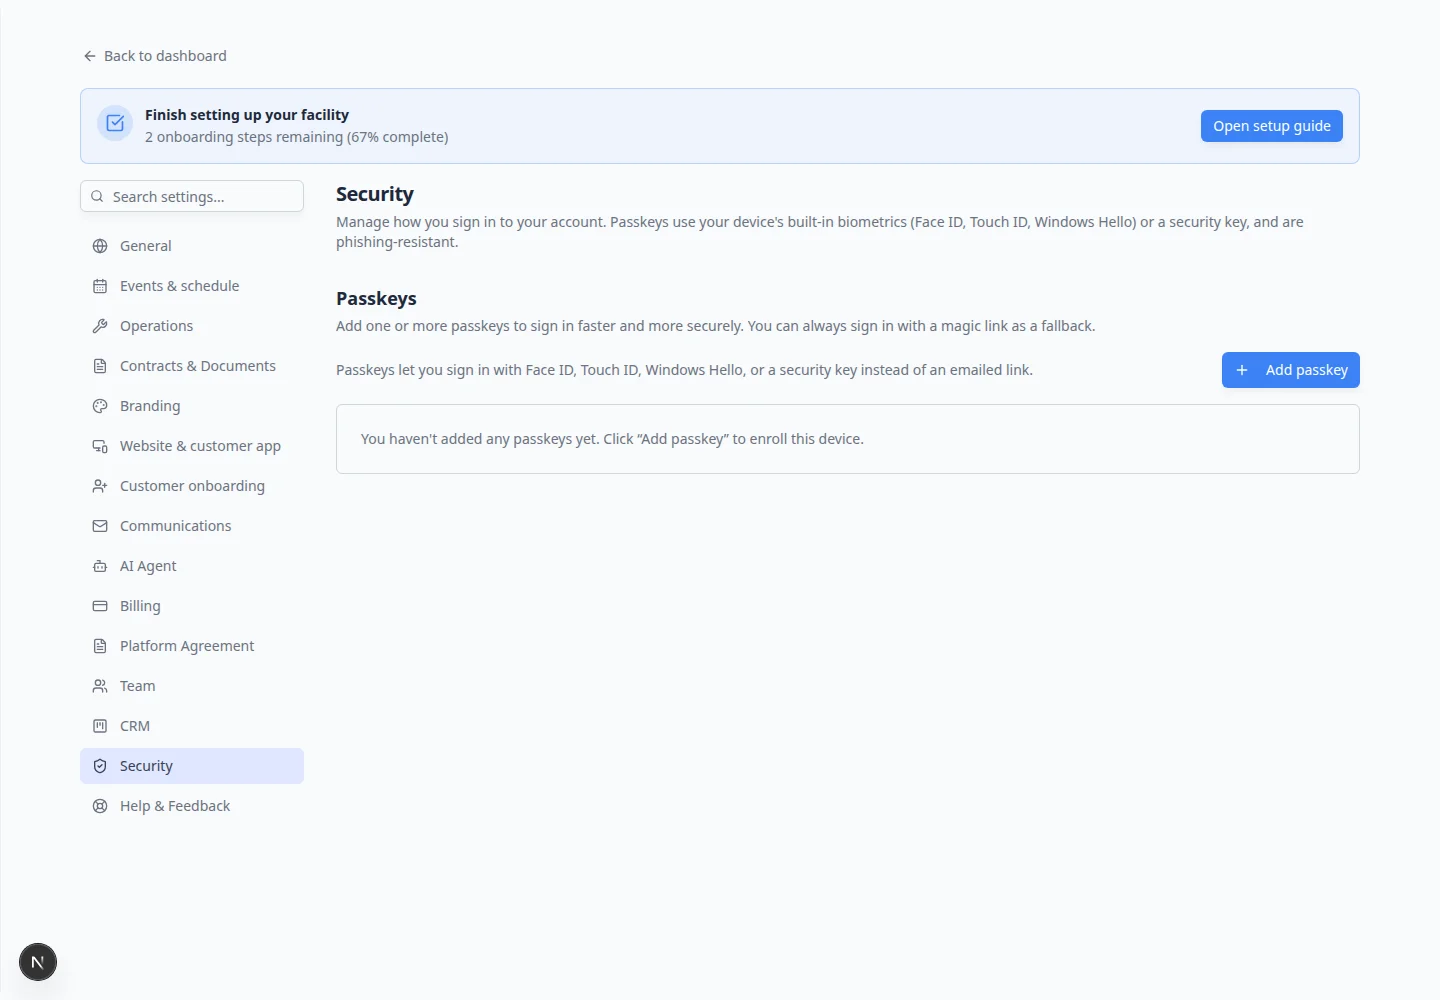
On Settings > Security, find the section named Passkeys.
- Click Add passkey
Click Add passkey.
Your browser or device may show a different prompt, but the button on this page is labeled Add passkey.
Why this matters: The button on this page starts setup. Your device then asks you to prove it is really you with Face ID, Touch ID, Windows Hello, or a PIN.
- Follow your device prompt
Your device may ask you to use Face ID, Touch ID, Windows Hello, your computer PIN, your phone, or a security key.
The exact screen depends on your browser and device. Common examples:
- iPhone or Mac: a Face ID or Touch ID prompt
- Windows: Windows Hello or a PIN window
- Android: fingerprint or screen lock
Follow the prompt shown by your device or browser. You do not type a new password on the Security settings page itself.
- Confirm it appears in the Passkeys list
After setup finishes, return to the Passkeys section and confirm the new passkey appears.
Expected result: You see at least one passkey listed for the device you used.
Expected result
You can use the passkey for faster, safer sign-in on that device. On your next sign-in, choose the passkey option instead of waiting for an email link when your device offers it.
Sign in with a passkey next time
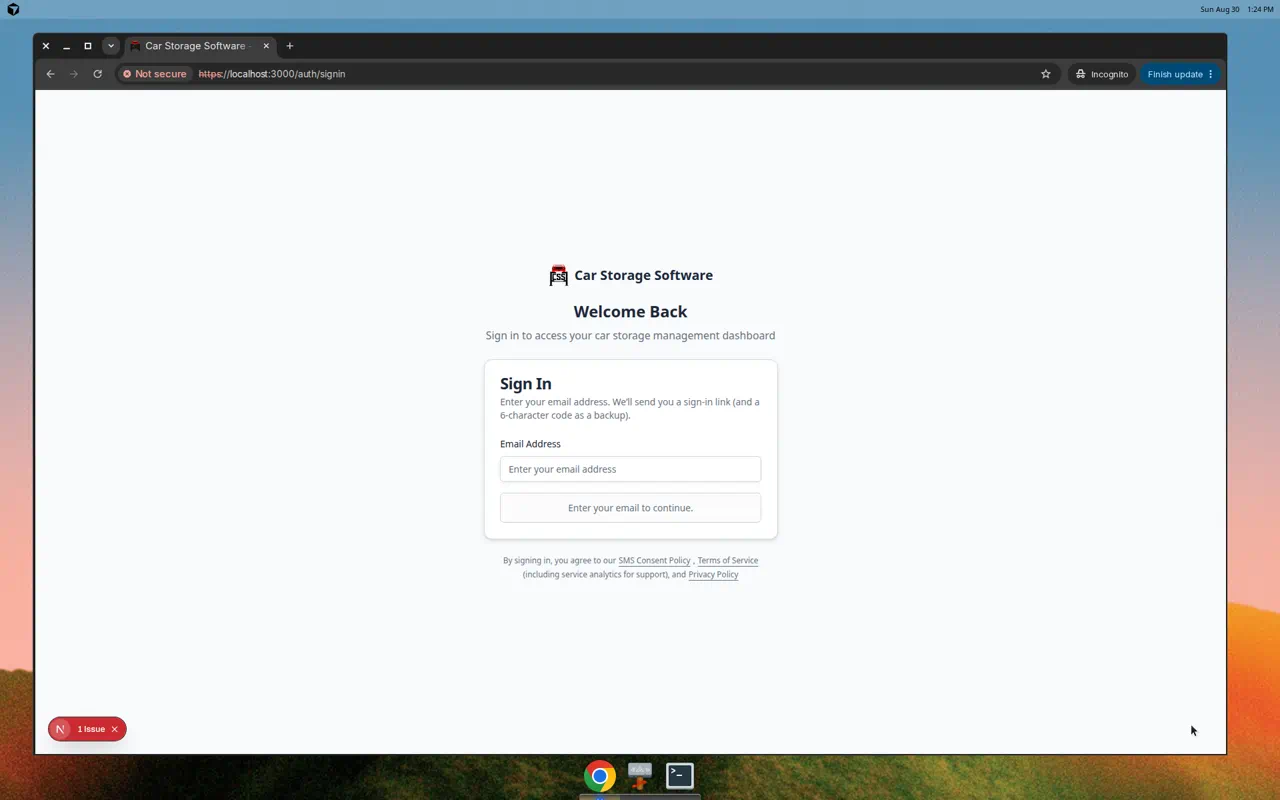
- Open the staff sign-in page
Go to your facility sign-in page (the same page you use today). Do not use a customer portal link.
The page title is Sign in and shows your facility name or Car Storage Software branding at the top.
- Enter your work email
Type the email address tied to your staff account—the same one that receives magic-link emails.
Click Continue or press Enter.
Expected result: The app sends a sign-in email to that address, or your browser offers to use a saved passkey.
- Choose the passkey option when it appears
Your browser or device may ask you to use Face ID, Touch ID, Windows Hello, or your phone.
Why this matters: A passkey proves it is really you without copying a link from email. That reduces the chance someone else signs in if they get access to your inbox.
- Use magic link only when needed
If you are on a shared computer, a device without biometrics, or passkeys are blocked by your company, open the email from Car Storage Software and click the Sign in link inside.
Expected result: You reach the Dashboard with your name and facility showing correctly.
Review admin access
Passkeys protect your own sign-in. Team permissions protect the facility.
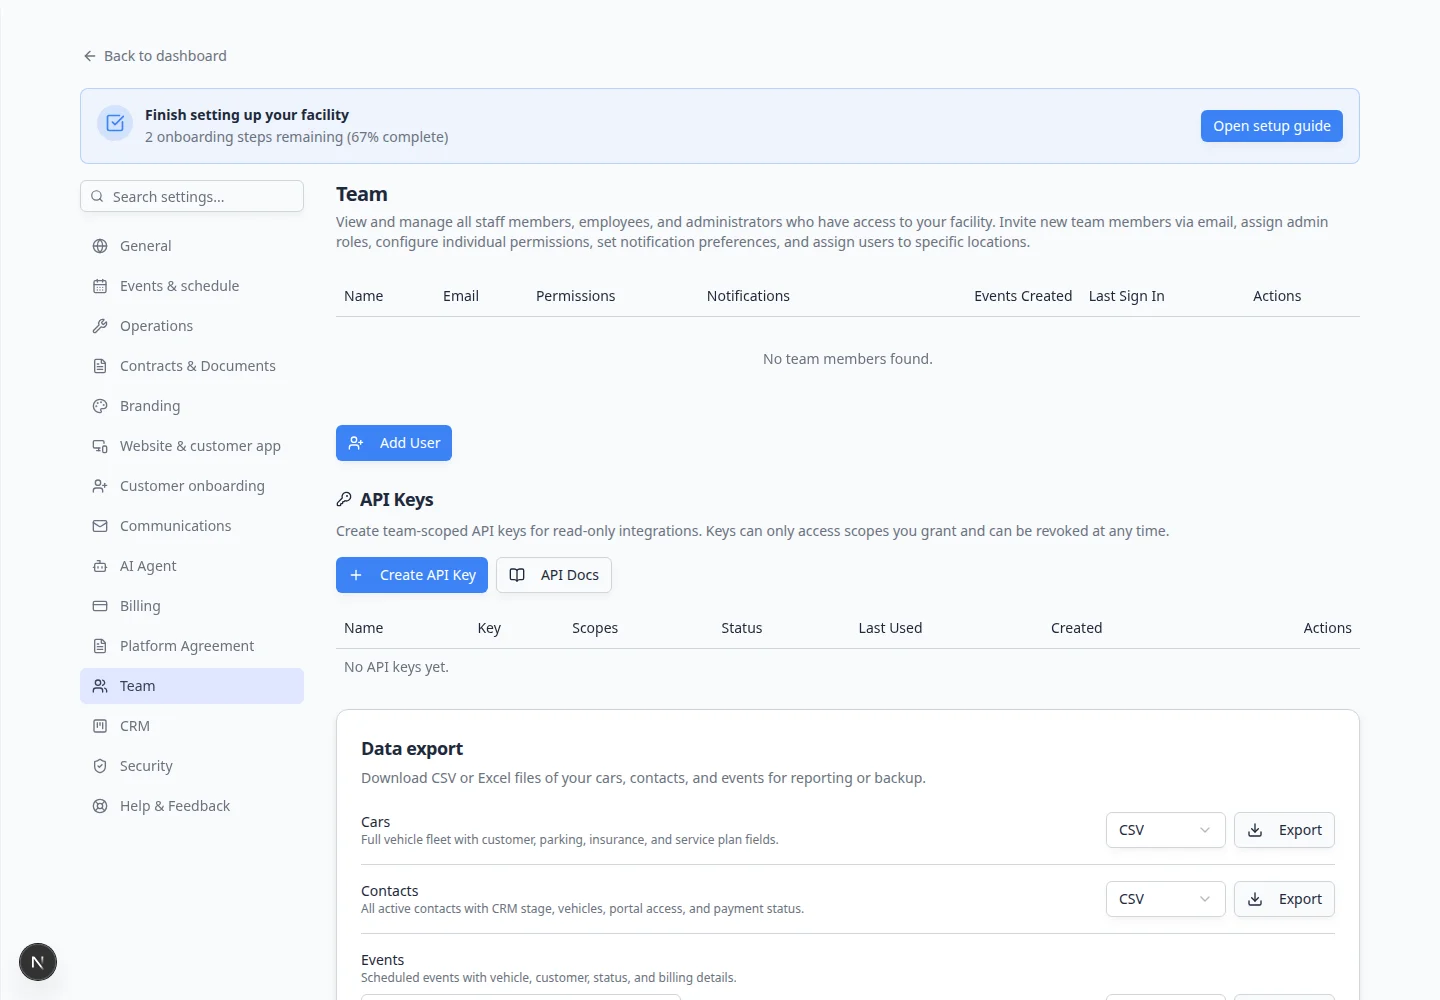
- Open Team settings
Go to Settings > Team.
Scroll past Default dashboard layout until you see the Team table with staff names and emails.
- Review who has admin access
In the Permissions column, look for teammates whose button shows Admin or Full Access.
Admins may be able to change billing, settings, team access, and other sensitive information. A button such as 4/10 means custom access to four areas out of ten.
- Open Manage Permissions for one teammate
In the Actions column, click Permissions (or Manage Permissions) on one row.
A window opens showing which areas that person can open—such as Cars, Contacts, Schedule, Payments, and Settings.
Why this matters: You can give front-desk staff access to Inbox and Schedule without giving them billing or team-admin powers.
- Remove access that is not needed
If someone no longer needs admin access, reduce their permissions in that window and save.
If someone left your company, remove their access from the Team table.
Expected result: The Permissions column shows Admin, a number such as 4/10, or another label that matches what you intended.
Use a simple monthly security review
Pick one day each month (for example, the first Monday) and walk through this short list. It usually takes less than 15 minutes.
- Check your own passkey
Open Settings > Security. Confirm your current device still appears under Passkeys.
Add a passkey on a new laptop or phone when you start using it for work.
- Review the Team table
Open Settings > Team. Look for people who no longer work with you and remove their access the same day they leave.
Expected result: Only current staff can sign in.
- Count admin accounts
In the Permissions column, note how many people show Admin or Full Access.
Ask whether each person still needs that level. Most day-to-day staff should use custom permissions instead. See Manage team permissions.
- Confirm billing access
Only people who send invoices, change prices, or connect Stripe should have Payments and Admin access.
Why this matters: Billing mistakes are harder to undo than a wrong appointment note.
- Each staff member uses their own account—no shared logins.
- Owners and managers add passkeys where possible.
- Admin access is limited to trusted people who need it.
- Former employees are removed from Team immediately.
- Nobody forwards magic-link emails to coworkers.
Troubleshooting
What to do next
If you are setting up a new team, ask each owner or manager to add a passkey on their primary work device. Then review Manage team permissions so staff have only the access they need—not full admin by default.
When someone starts on a new laptop or phone, repeat Add passkey on that device so sign-in stays fast and secure.