Parking Spots
Send a car to an outside vendor
Record when a vehicle leaves your facility for transport, detail, mechanical work, or other off-site services—and bring it back when it returns.
What you will accomplish
You will mark a vehicle as at an outside vendor so your team knows the car is not in your building—even though you still track it in Car Storage Software.
When you finish:
- The car record shows Vendor: and the company name (for example Elite Transport Co.).
- The vehicle no longer counts as parked in A1, Outdoor Lot, or another facility spot.
- The parking report can show a Vendor row for billing or history reviews.
When to use this guide
Use this when a vehicle physically leaves your property for work done elsewhere.
Good examples:
- Enclosed transport to another city or storage facility.
- Detail or paint work at a partner shop down the road.
- Mechanical repair at a dealership or specialty garage.
- Any off-site location where the car is not in your numbered spot or zone.
Before you start
- The car already exists in Cars.
- The outside company exists as a vendor in Contacts > Vendors. If not, add one first—see Manage vendors.
- You know the car is leaving (or has already left) your building.
- Your team understands this is a location update—not the same as paying a vendor invoice.
Step 1: Open the car record
- Go to Cars
Open Cars from the left sidebar.
Expected result: You see your facility's vehicle list with make, model, year, and customer columns.
- Open the correct vehicle
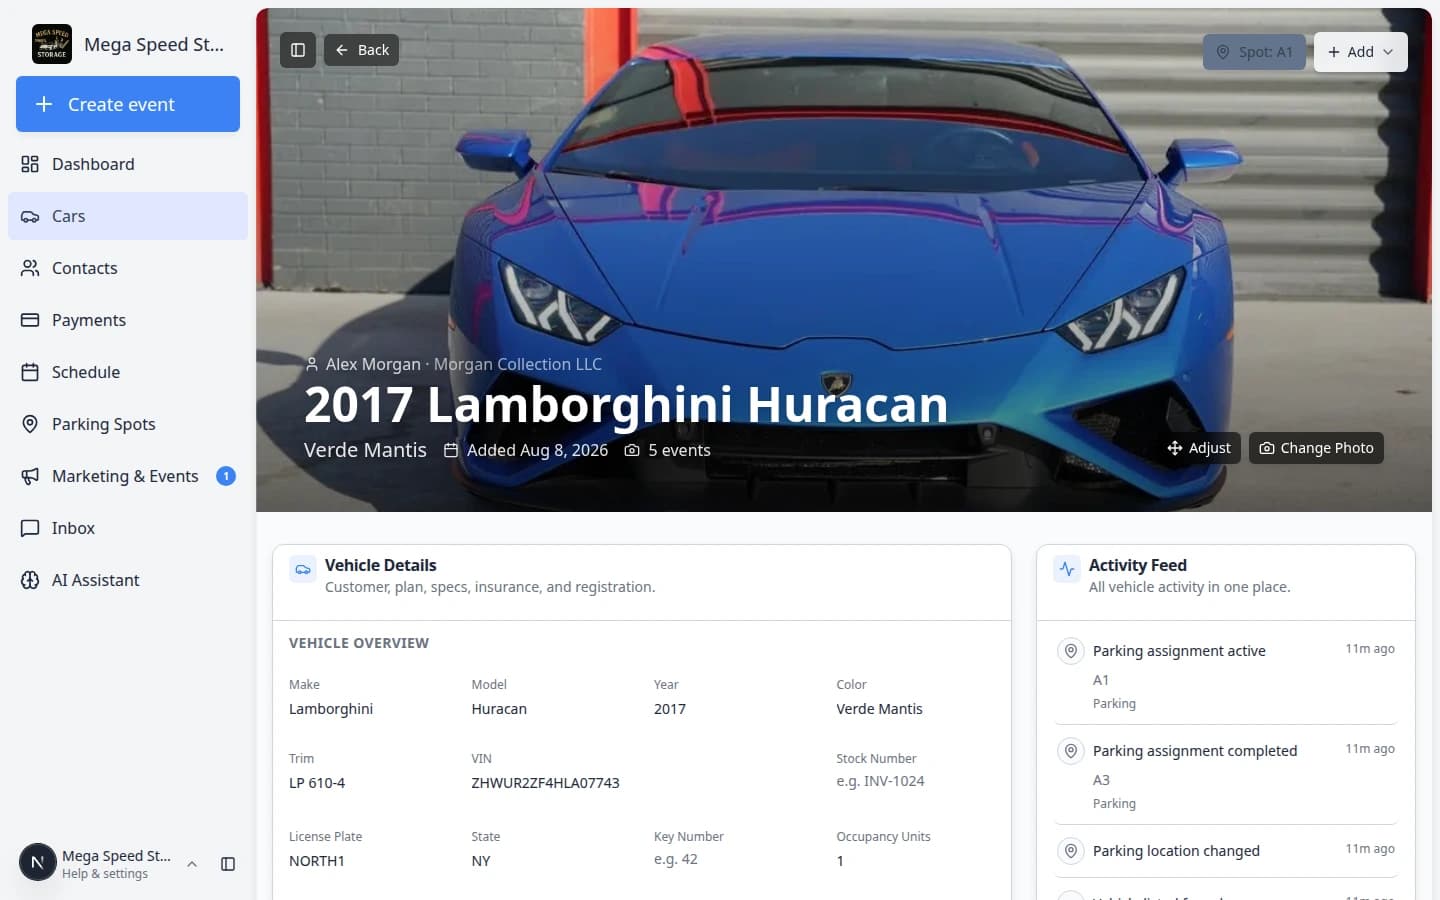
Search by customer name, plate, VIN, or make and model. Click the row to open the car detail page.
Why this matters: Sending the wrong vehicle to a vendor is hard to fix during a busy morning. Read the year, make, model, and plate before you continue.
- Find the parking location button
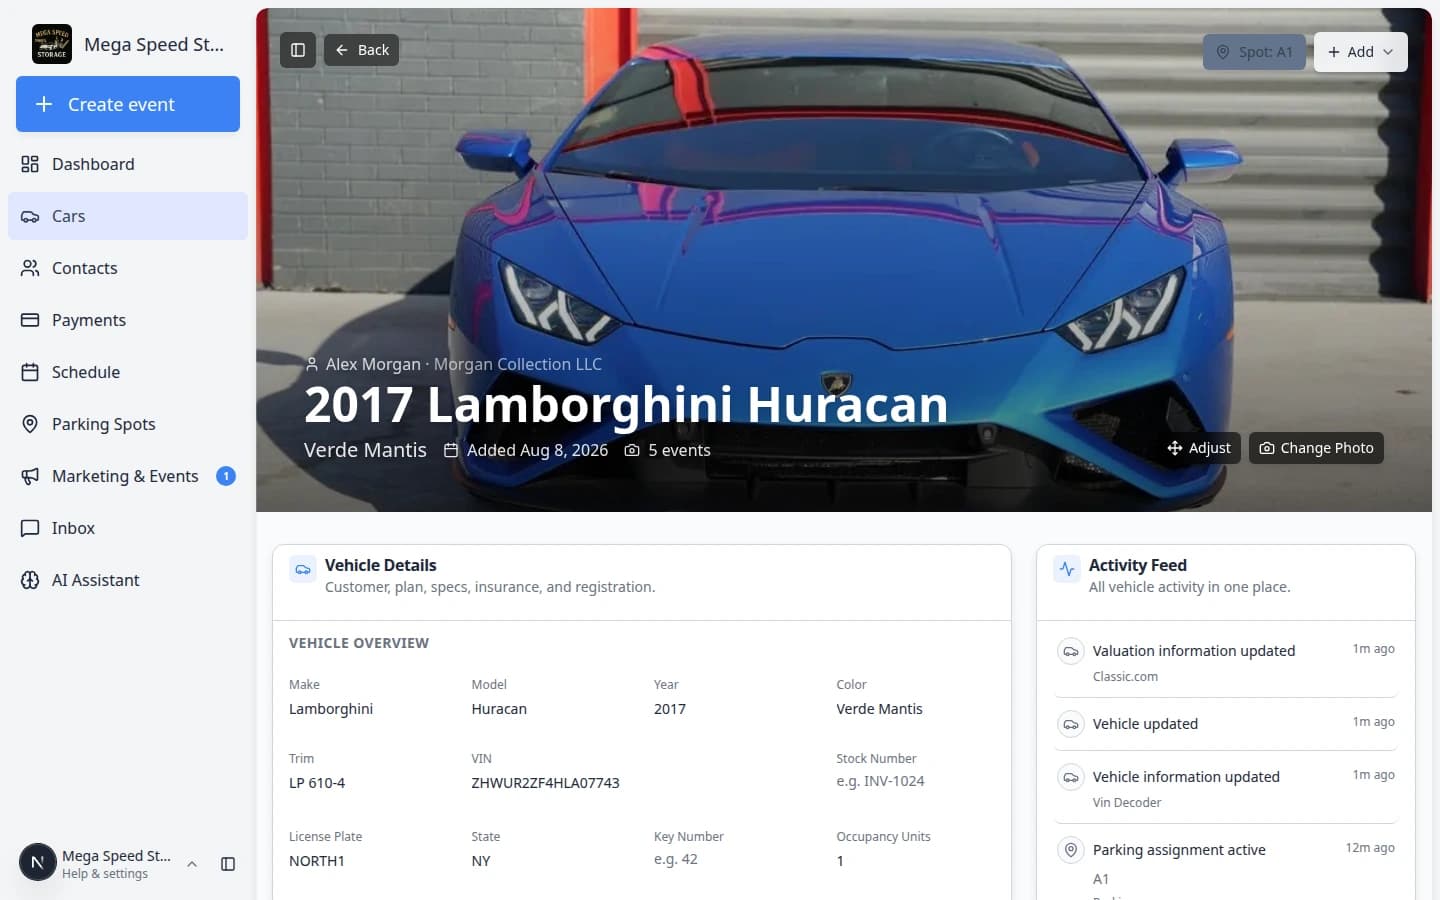
Near the top of the page, look for Spot:, Zone:, Vendor:, or Assign location.
Expected result: You see where the app thinks the car is right now—inside your facility or already at a vendor.
Step 2: Choose the vendor in the location picker
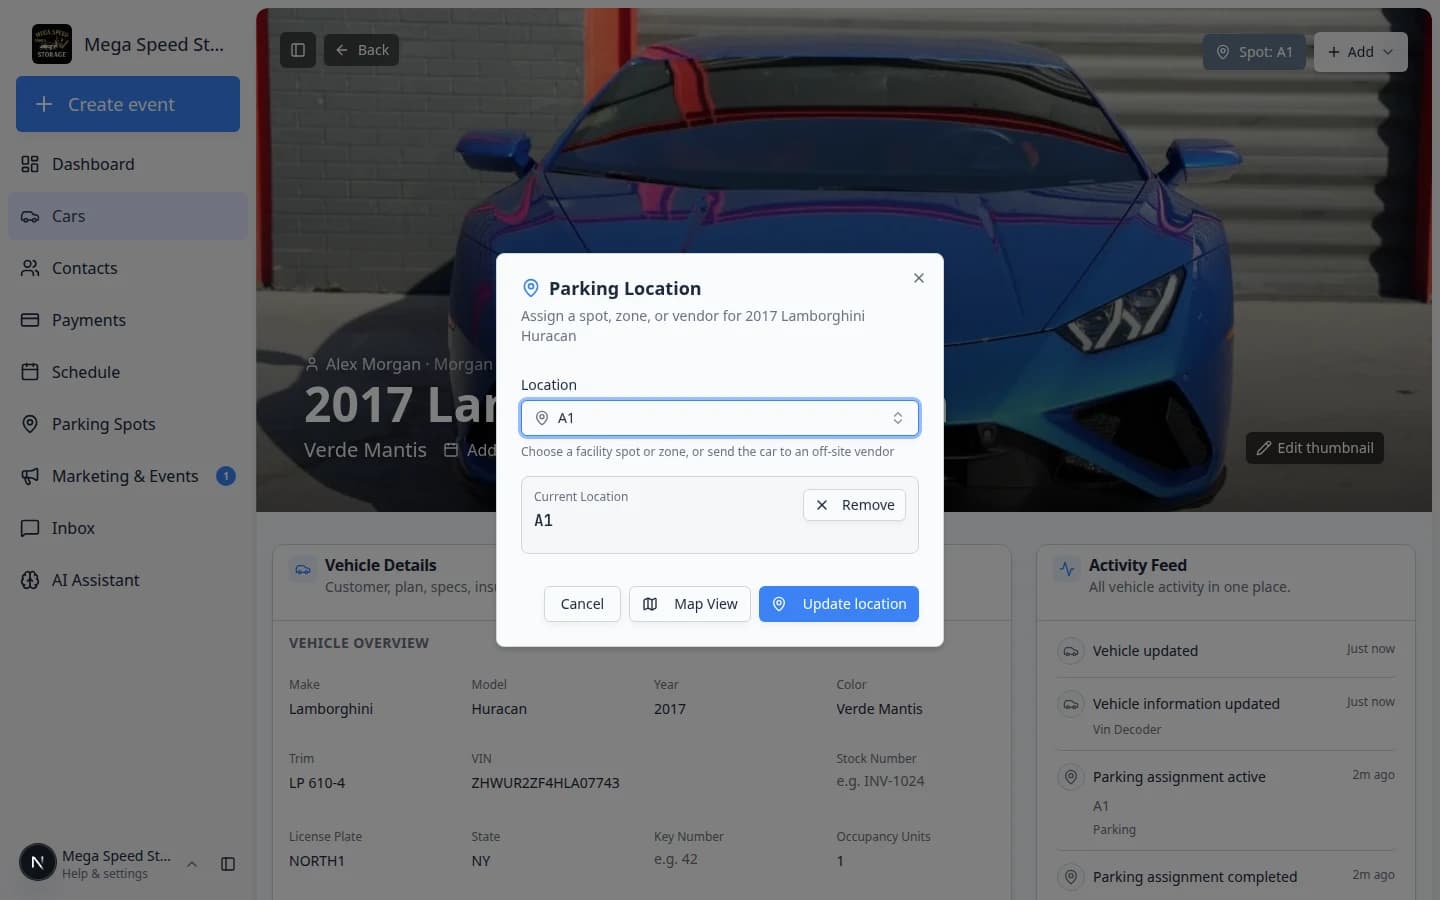
- Click the parking location button
Click Spot:, Zone:, Assign location, or the current location label.
Expected result: A window opens with a search field labeled Select zone, spot, or vendor… (or similar wording).
- Search under Vendors
Click the search field and type part of the vendor name (for example Transport or Elite).
Expected result: A Vendors section appears in the list with matching companies.
- Select the correct vendor
Click the vendor row. Read the company name one more time before you save.
Why this matters: Multiple transport or detail partners may look similar in search results.
- Click Send to vendor
The save button may read Send to vendor when you picked a vendor (instead of Update location for spots and zones).
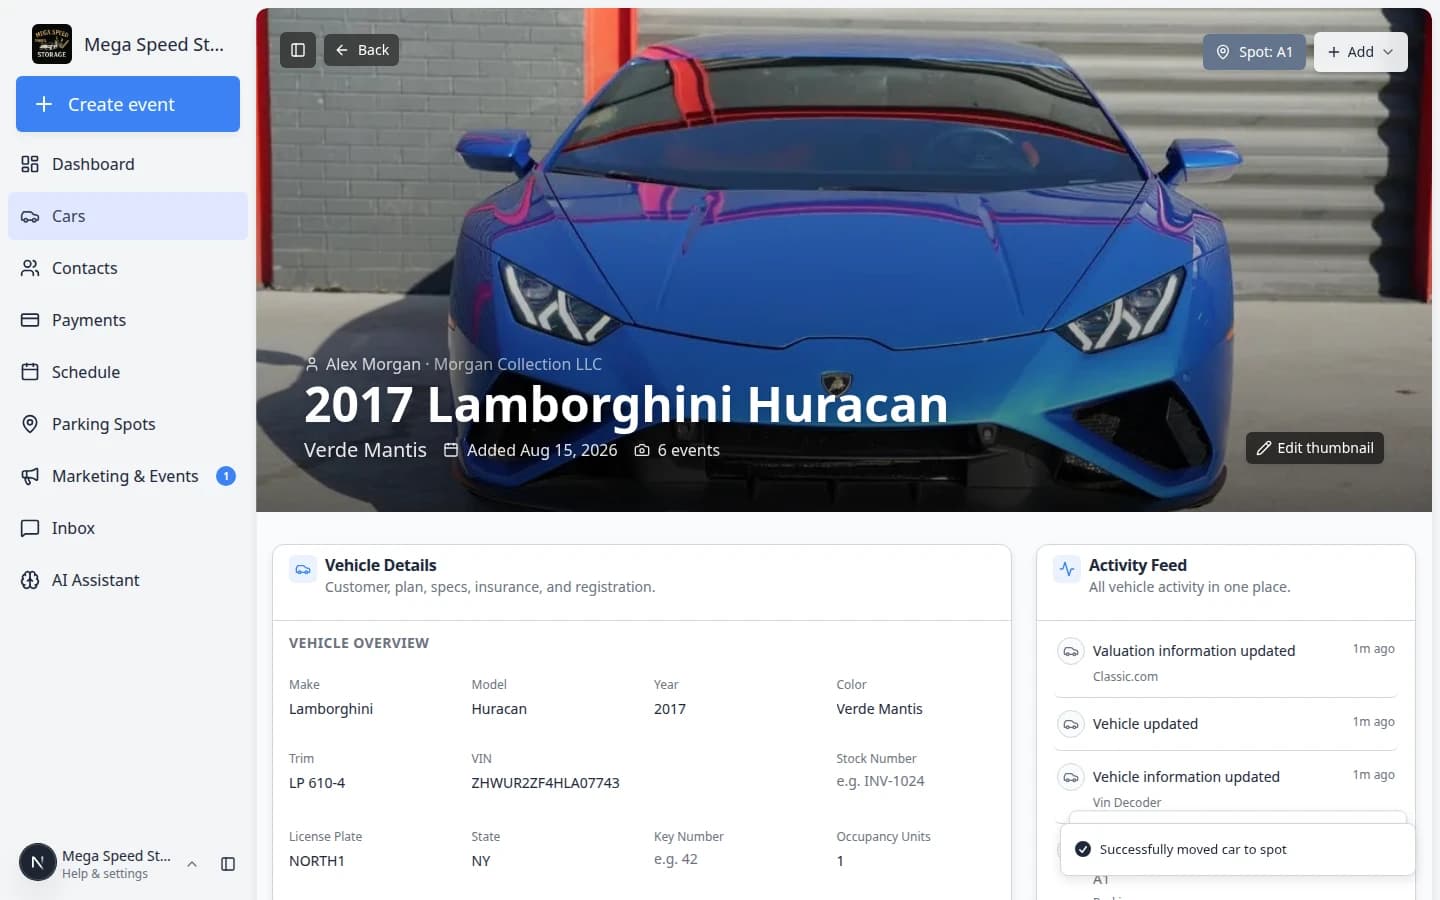
Expected result: A short success message appears. The car record now shows Vendor: and the vendor name near the top of the page.
Step 3: Confirm the facility map looks right
- Open Parking Spots
Go to Parking Spots.
- Check the old spot or zone
If the car was in A1 or Outdoor Lot, that space should now look Available or Open—not still occupied by this vehicle.
Why this matters: Staff should not walk to a spot looking for a car that left on a transport truck.
- Use search if needed
Search for the customer or vehicle on the Parking Spots page. The car should not appear as Present in a facility spot.
Expected result: The map matches the real building—the car is gone from your floor plan.
Bring the car back to your facility
When the vehicle returns, update the location again—do not leave it on the vendor forever.
- Open the car record
Go to Cars and open the vehicle. You should still see Vendor: and the company name.
- Open the location picker
Click the Vendor: button. The window may remind you the car is currently at that vendor.
- Pick a spot or zone inside your facility
Search under Spots or Zones and choose where the car is parked now (for example B3 or Indoor Bay).
- Click Update location
Save the change. The vendor label should disappear and Spot: or Zone: should appear instead.
Expected result: The map shows the car back in your building. The parking report records the end of the vendor stay and the start of the new facility assignment.
For step-by-step help assigning a numbered spot or zone, read Assign a parking spot.
See vendor history on the parking report
Managers and billing staff can confirm how long a car was off-site.
- Open the parking report
Go to Parking Spots Report or click Report from Parking Spots.
- Set the date range
Choose the weeks or months you want to review.
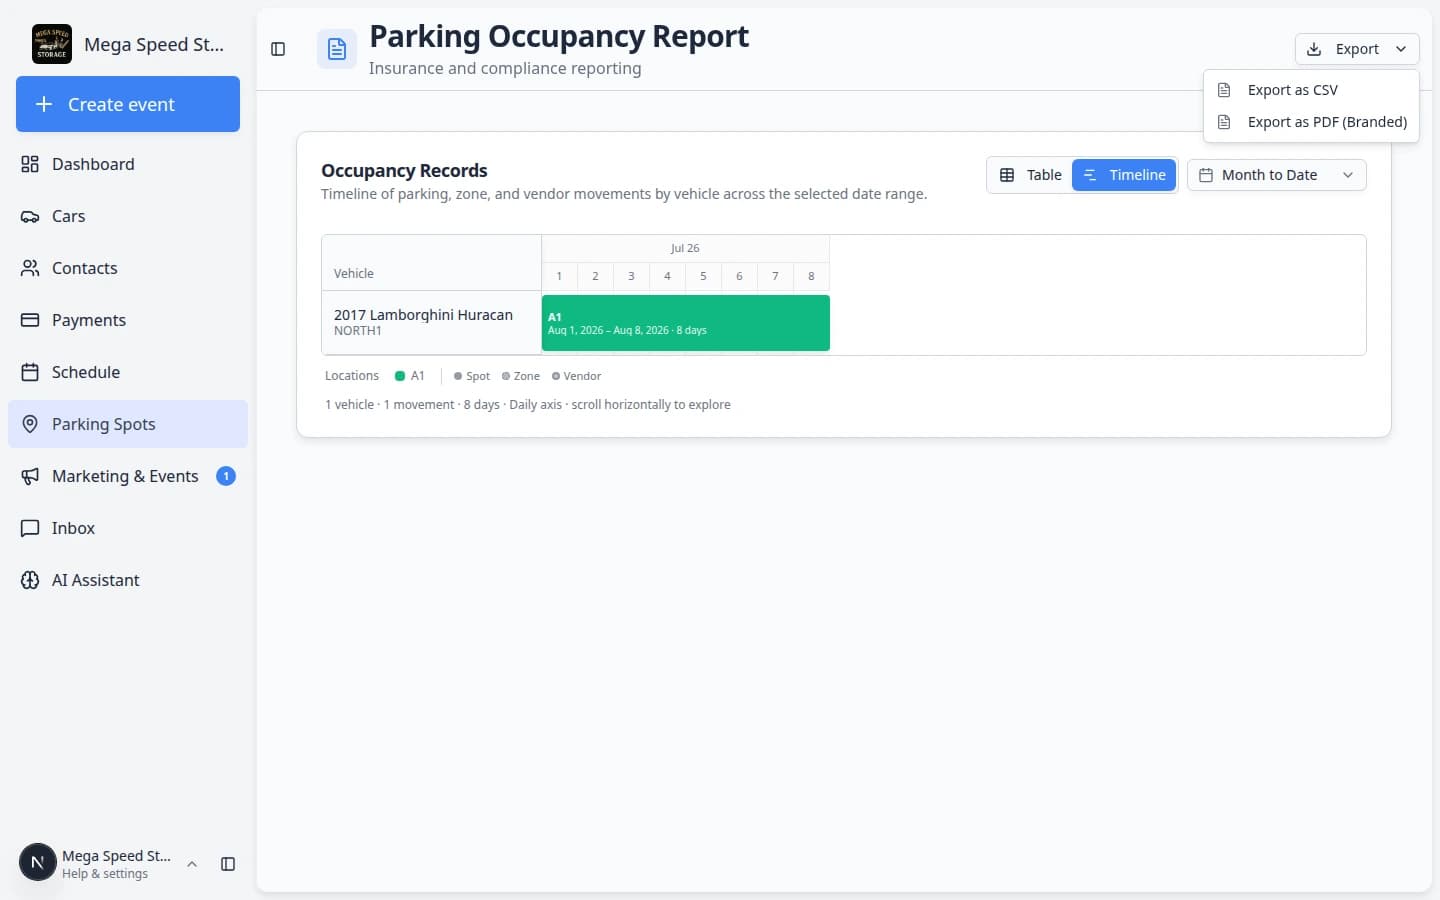
- Look for Type = Vendor
In Table view, read the Type column. Vendor rows mean the car was at an outside company during that period. Location shows the vendor name.
Expected result: You can explain off-site time without guessing from memory.
For full report help, read Review the parking report.
You can also send a car to a vendor from the map
If you are already on Parking Spots, you do not need to open the car record first.
- Click the spot that holds the car
On the map, click the spot where the vehicle is parked now (for example A1).
Expected result: A dialog opens showing the car currently in that spot.
- Start Move Vehicle
Click Move Vehicle or use the destination search field at the top of the dialog.
Why this matters: This is the fastest path when a transport truck is waiting and you are already looking at the map.
- Pick a vendor under Vendors
Type the vendor name in the search field. Click the company under the Vendors section—same as on the car record.
- Confirm the move
Click Send to vendor (or Update location). The spot should look Available on the map. The car record should show Vendor: and the company name.
Common mistakes to avoid
- Do not leave Vendor: on the record after the car returns—assign a spot or zone the same day when possible.
- Do not pick a zone when the car left the property entirely—use Vendor instead.
- Do not skip creating the vendor first—add transport and detail partners in Contacts > Vendors so names stay consistent.
- Do not confuse this with scheduling transport on Schedule—update location when the car actually leaves.
Troubleshooting
What to do next
- When the car returns, follow Assign a parking spot.
- To review off-site history, open Review the parking report.
- To add or edit vendor companies, read Manage vendors.
- Return to the Parking Spots overview.