Cars
Add a car
Create a vehicle record so your team can track storage, service, notes, and customer ownership.
Vehicle records are the center of the day-to-day workflow. Add a car when a customer brings in a new vehicle for storage, requests service, or when you need to track a vehicle in your facility inventory.
What you will accomplish
When you finish, a new vehicle appears on the Cars page. Your team can assign a parking spot, link the owner, schedule events, and capture photos from that record.
Expected outcome: You land on the new car's detail page (or return to the Cars list) and can see the vehicle ready for parking, billing, and scheduled work.
When to add a car
- A customer is storing a vehicle with your facility for the first time.
- You are creating a record before scheduling intake, inspection, or delivery work.
- You need a vehicle on file for billing, contracts, or customer portal access—even if photos come later.
There are two ways to add a car from the Cars page:
- With Photos — best when the car is in front of you and you want intake photos and readings saved during creation.
- Without Photos — best when you are entering vehicles from paperwork or need a record before photos are available.
For many vehicles at once, use Import vehicles and photos from a spreadsheet instead of creating records one by one.
Before you start
- Have the vehicle's year, make, and model ready — these are the only required fields.
- If you have the VIN, keep it handy — the system can auto-fill make, model, year, color, and trim from the VIN.
- Know which customer owns or manages the car (you can link the customer after creation too).
- If your facility uses multiple locations, know which location this car belongs to.
Choose your creation method
From the Cars page, click the Create New Car button in the top-right corner of the page header. A dialog appears with two options:
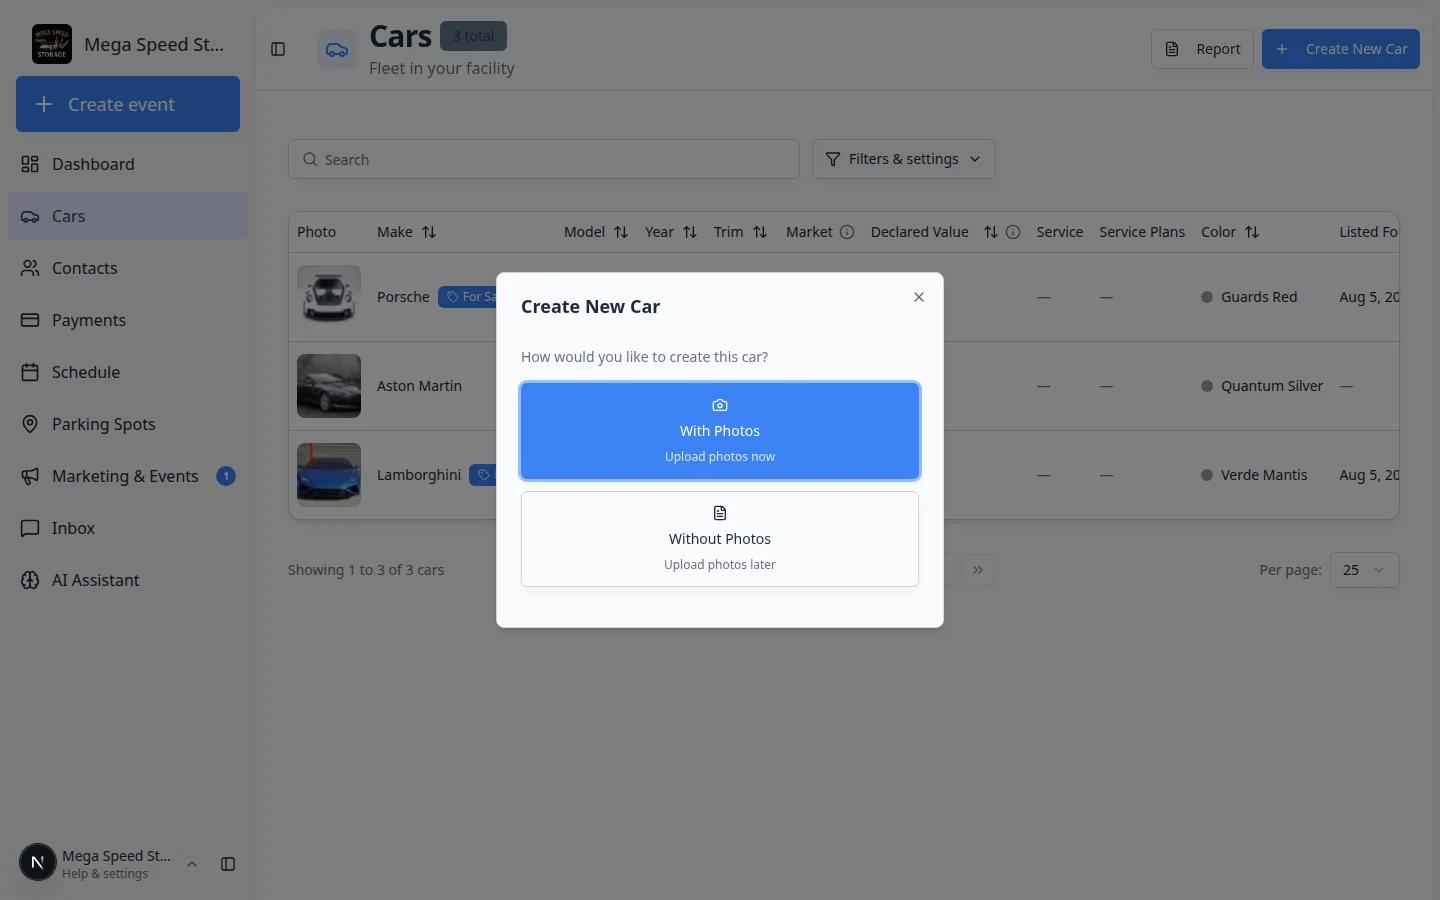
- With Photos — creates a photo session and takes you to the photo walkthrough screen where you can capture intake photos, damage documentation, and inspection images before the car record is saved. Best for vehicle intake when the car is physically in front of you.
- Without Photos — opens the quick create form right away. Best when you are entering vehicles from paperwork, importing records, or the car is not available for photos yet.
Option A: Add a car without photos
- Click Without Photos
After clicking Create New Car, select Without Photos. The create car form opens as a dialog.
Expected result: A window titled Create Car (or similar) appears with fields for VIN, Make, Model, and Year.
- Enter the VIN (optional but recommended)
If you have the vehicle's VIN, type or paste it into the VIN field and click Autofill Info. The system decodes the VIN and automatically fills in the make, model, year, color, and trim fields. This saves time and reduces data-entry errors.
Why this matters: A correct VIN helps insurance, transport, and registration paperwork stay tied to the right vehicle later.
Expected result: Make, Model, Year, and other decoded fields fill in automatically when the VIN is recognized.
- Fill in the required fields
The Without Photos form stays short on purpose. You only need Make, Model, and Year to save the record. You can also add:
- VIN — paste it and click Autofill Info when you have it
- Stock Number — your team's internal ID (for example
INV-1024)
Why this matters: Your team can park the car, schedule work, and link the customer first. Plate numbers, insurance, color, and photos can wait until you open the full car page.
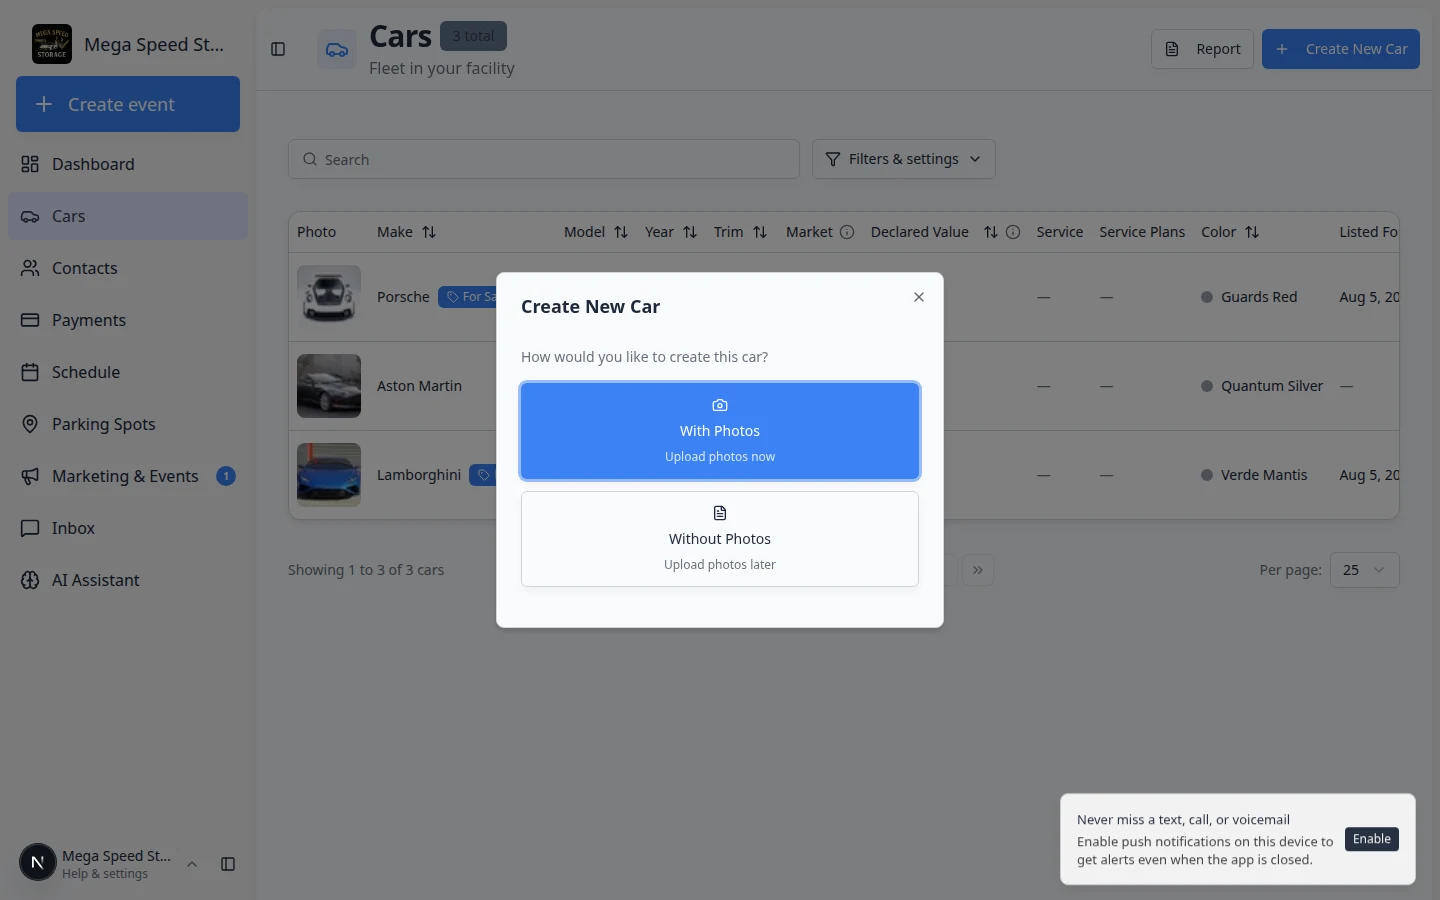
The quick create form asks for identification basics only. Open the car record after saving to add plate, insurance, customer link, and parking. - Select a location (multi-location facilities only)
If your team has enabled multiple facility locations, a Location dropdown appears. Select the location where this car will be stored or serviced.
Expected result: The location you pick is shown in the dropdown before you save.
- Click Create Car
Click Create Car. The system saves the vehicle record and opens the new car's detail page.
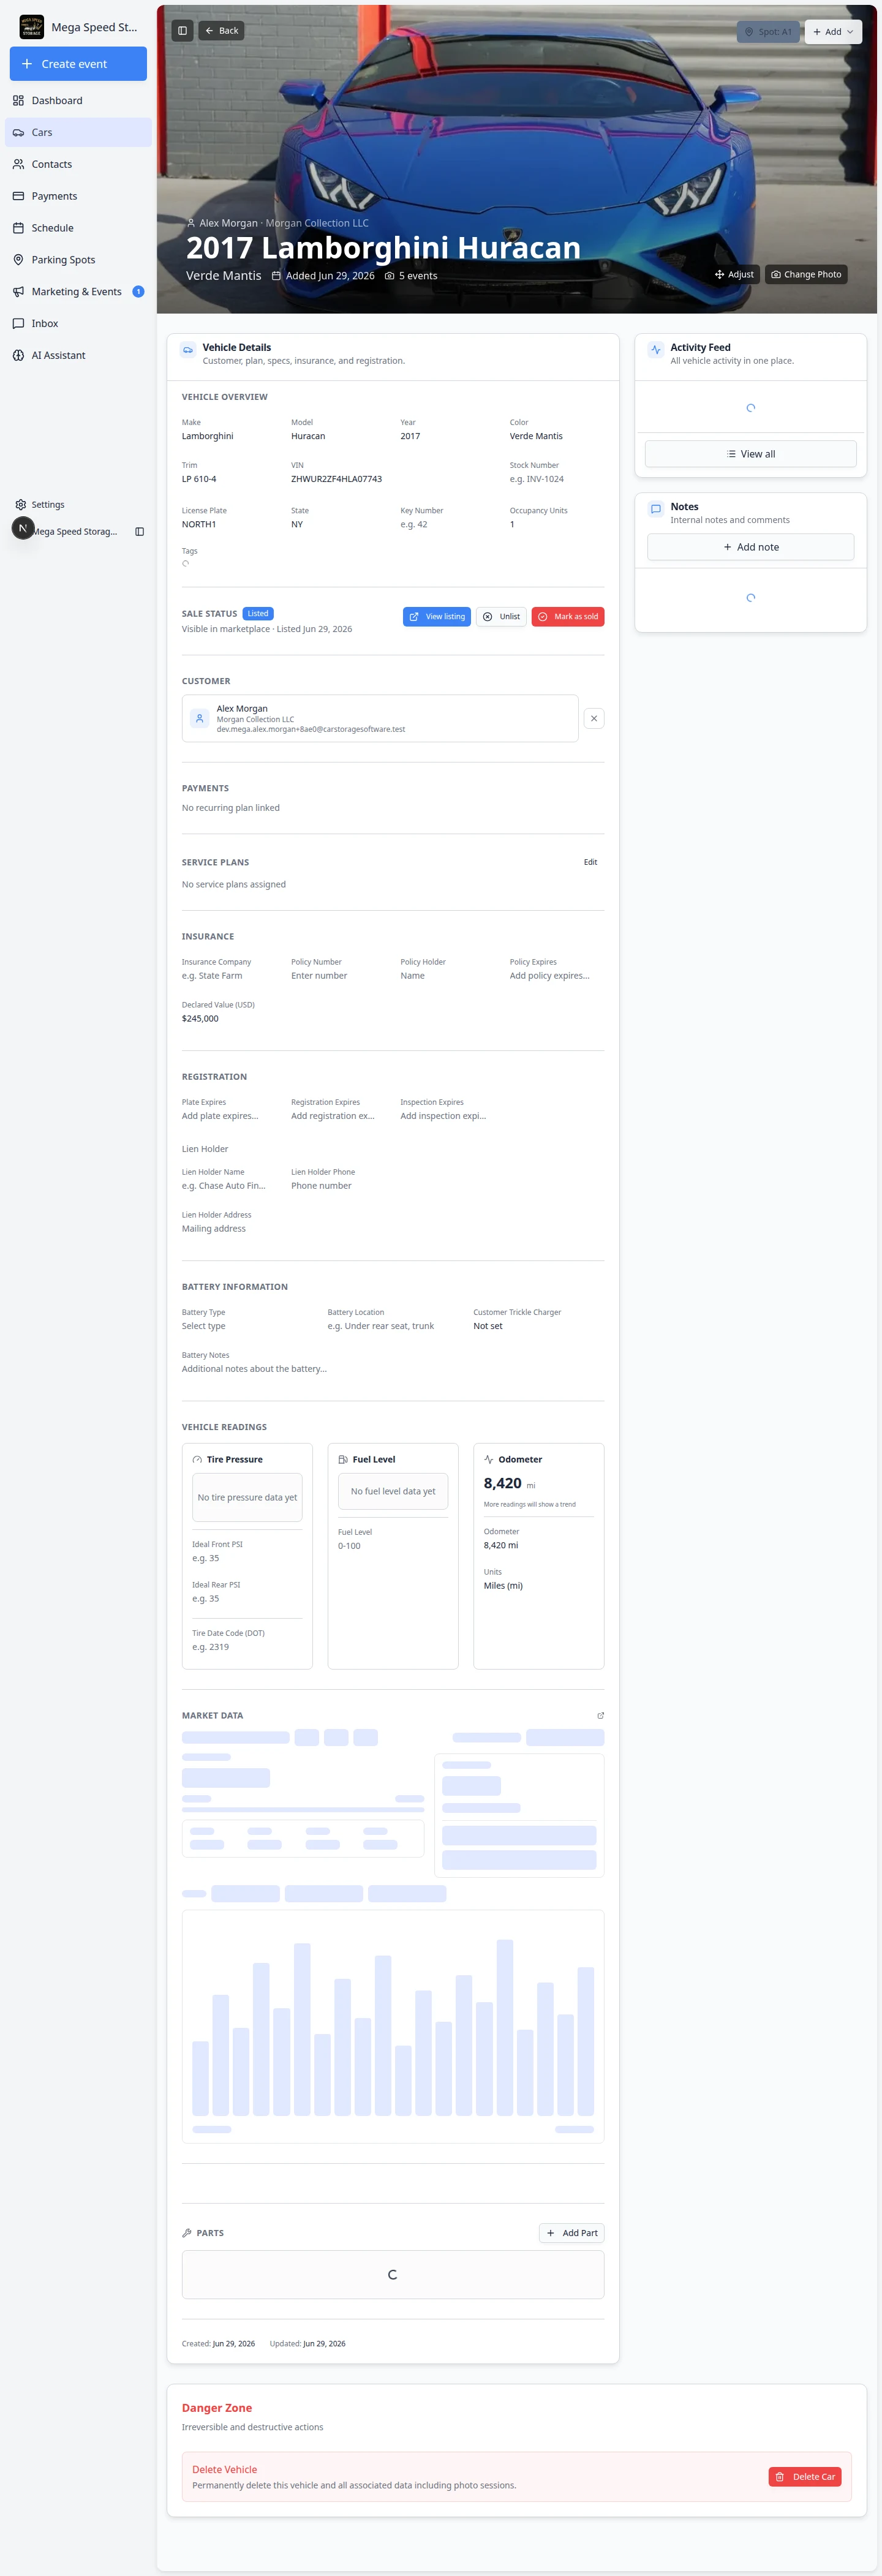
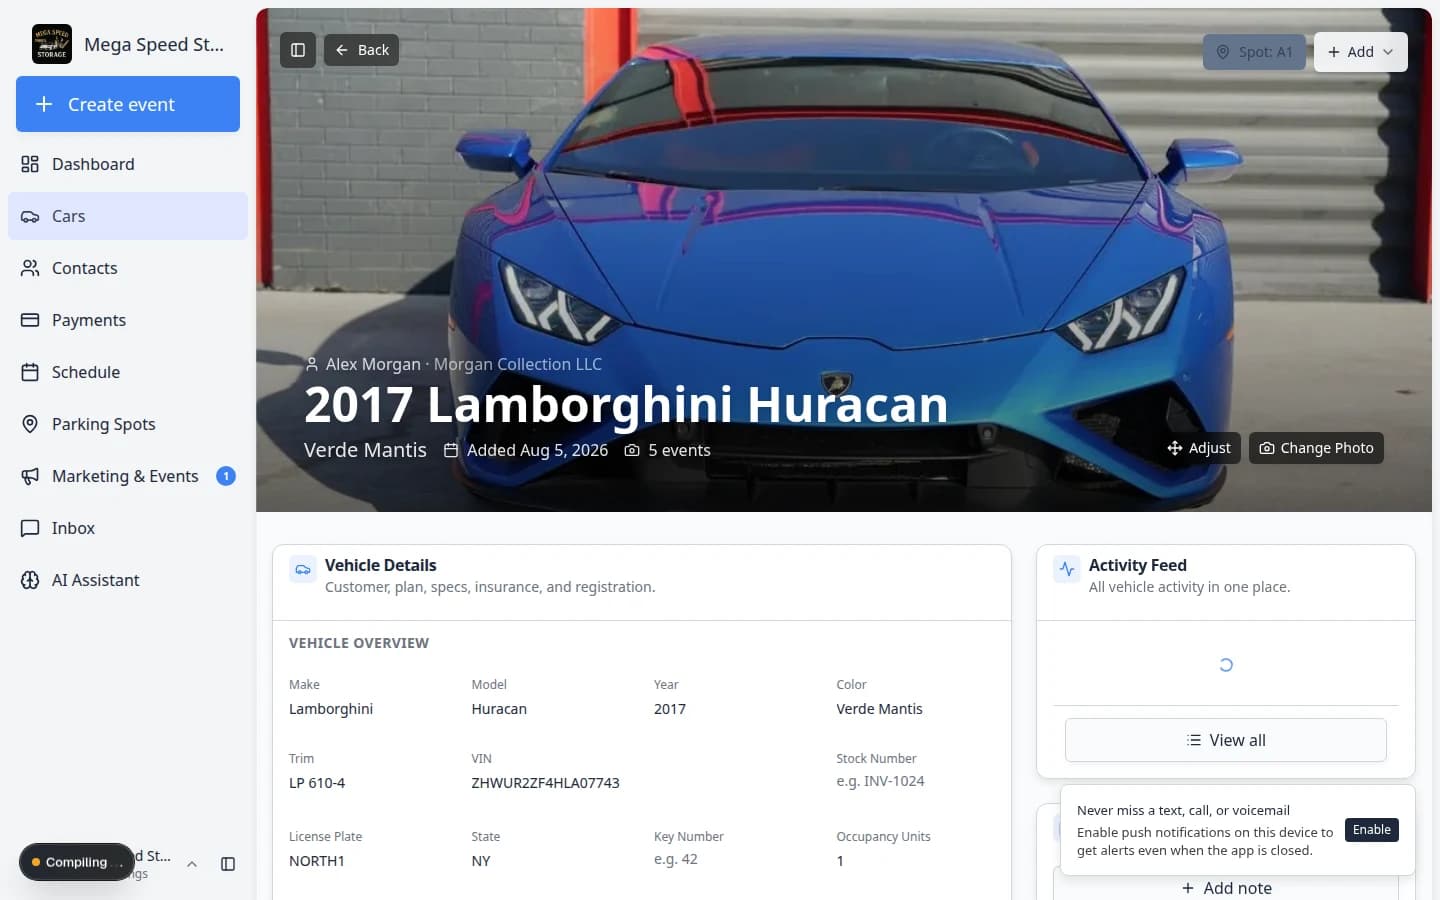
Expected result: You land on the new car's detail page (the banner shows year, make, and model). Scroll through Vehicle Details on the left to add plate, color, insurance, and registration. Use the steps in After creating the car below for customer link and parking.
Option B: Add a car with photos
Use With Photos when the vehicle is in front of you and you want intake photos, damage notes, and readings saved with the new record from the start.
- Click With Photos
After clicking Create New Car, select With Photos. The app opens a photo walkthrough screen — a step-by-step guide that tells you which photo or reading to capture next.
Expected outcome: You leave the Cars list and see the walkthrough screen with the first step highlighted.
- Complete the photo walkthrough
Follow each on-screen prompt. Depending on how your admin set up intake, you may be asked to:
-
Take exterior and interior photos from specific angles
-
Document existing damage with close-up photos
-
Record a video walkthrough
-
Scan the VIN
-
Record the odometer reading
-
Check the fuel level
-
Complete a checklist of condition items
Take your time on each step. The walkthrough will not let you skip required steps unless your facility allows it.
-
- Finish the walkthrough
When every required step is done, submit the walkthrough. The app creates the car record, attaches the photos and readings, and opens the session detail page so you can review what was captured.
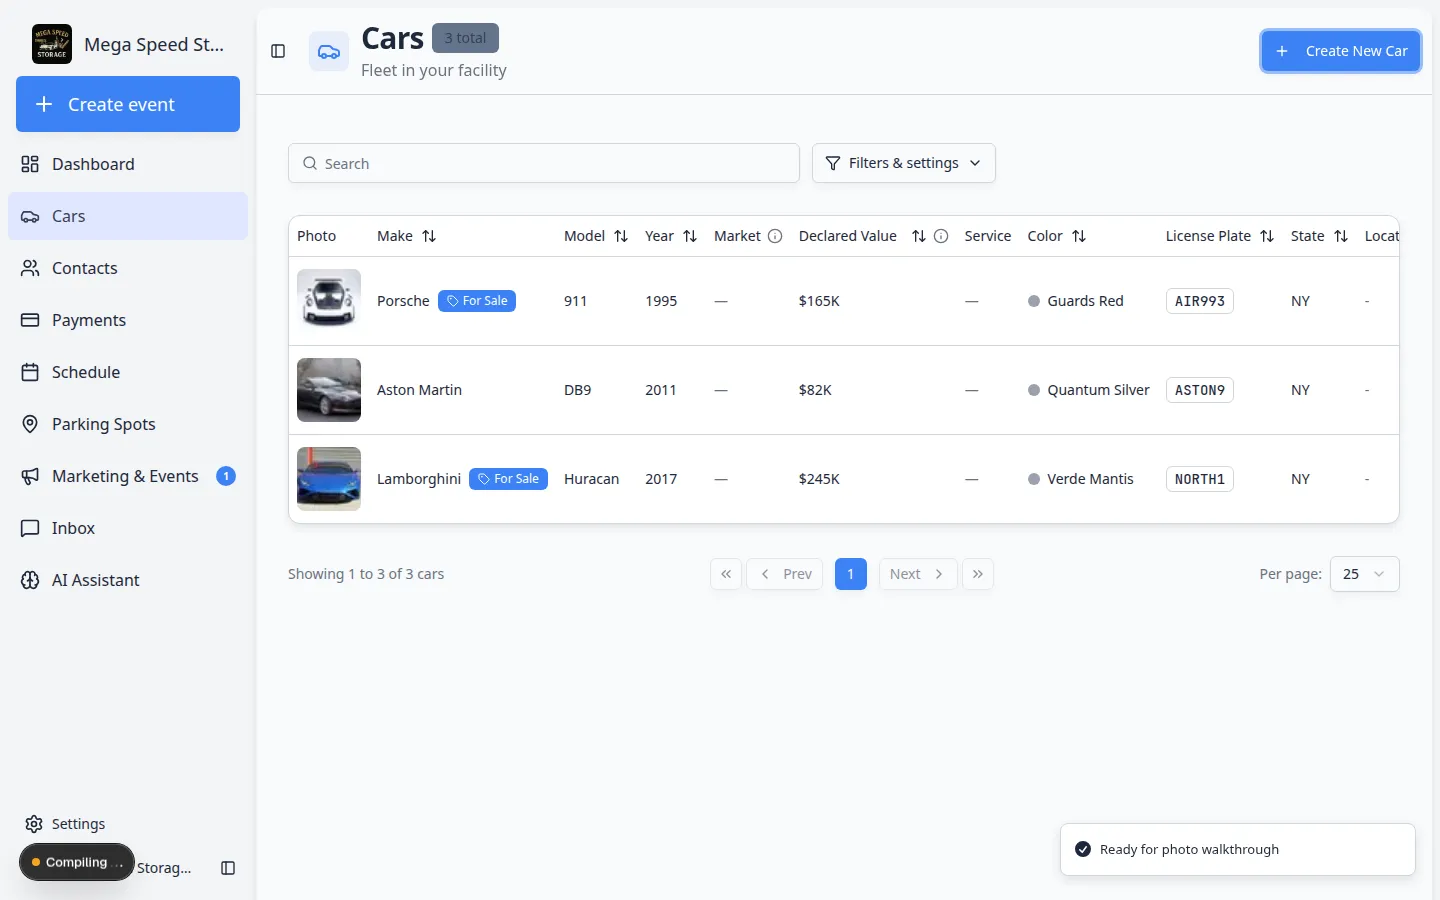
Expected outcome: The new car exists in Cars and already has photos and activity on its record.
After creating the car
Once the car record exists, open it from the Cars list and complete these recommended steps in order. Doing them now prevents billing mistakes and keeps your parking map accurate from day one.
- Link the customer
On the car banner, click No customer linked (or the customer name to change it). You can also click Link customer inside the CUSTOMER block in Vehicle Details. Search for the correct owner and select them.
Expected result: The banner and CUSTOMER block show the owner's name and email. Invoices, messages, portal access, and Upload document will work for this car.
Why this matters: A car without a linked customer is easy to lose track of when billing or follow-up work starts.
- Assign a parking spot
Click Assign location on the banner (it later shows Zone: or Spot: with the location name) to place the car on your facility map.
Expected result: The parking button shows where the car sits in your building. See Move a car.
- Add insurance, registration, and value
Scroll through Vehicle Details and fill in insurance company, policy number, expiration dates, and Declared Value (USD) when you have them.
Expected result: Your team can spot expiring paperwork from the Cars list without opening every record.
- Add a note for your team
Use the Notes section to record condition details, special handling instructions, or anything the next teammate should know.
Expected result: The note appears on the car record for staff only—it is not sent to the customer automatically.
Good car records include
A complete car record helps your team find the vehicle, communicate with the customer, and stay on top of billing and service. Aim for:
- Enough detail to identify the vehicle without walking the lot — year, make, model, color, and plate at minimum.
- A linked customer so invoices, messages, and portal access work correctly.
- A parking spot so the floor plan stays accurate.
- Insurance and registration dates so your team is alerted before anything expires.
- Notes that help the next teammate take action without guessing.
What success looks like
When you have added a car the right way, you should see:
- The vehicle appears on the Cars list with correct year, make, and model.
- The car detail page opens and the banner shows the vehicle name (for example 2024 Ford Mustang).
- A customer is linked when you know who owns the car—so billing and messages go to the right person.
- A parking spot or zone is assigned when the car is physically on site—so your team can find it on the map.
- Insurance, registration, or intake photos are added when you have them—not left for "later" if the paperwork is in your hand.
Common mistakes to avoid
- Do not save a car with only year, make, and model and walk away. Link the customer and assign parking while the vehicle is in front of you.
- Do not assume VIN autofill is always correct. Read the decoded fields before saving—especially on older, imported, or specialty vehicles.
- Do not create a duplicate record because search failed. Try Find and filter cars with the plate or customer name first.
- Do not skip photos when the car is on site. Use With Photos or Start a car session so condition is documented from day one.
- Do not type the customer name into Notes instead of linking them in CUSTOMER. Notes do not connect the car to billing, contracts, or the customer portal.
Troubleshooting
What to do next
- Add many vehicles at once
If you are migrating from a spreadsheet, use Import vehicles from a spreadsheet after customers are in the system.
- Assign parking when the car is on site
Follow Move a car so Parking Spots matches the real floor.
- Run intake or inspection
When the vehicle is in front of you, use Start a car session or Create New Car → With Photos next time for a full photo walkthrough.
- Send paperwork or billing
After the customer is linked, continue with Send a contract for signature or Create an invoice when your team is ready.