Settings
Manage custom statuses and amenities
Create clear work status labels and bookable facility amenities so staff can track progress and reserve the right spaces.
Use this guide when staff need clearer progress labels or when your facility needs to reserve bays, rooms, or equipment.
This guide covers two related Operations tools:
- Settings > Custom statuses: the labels staff use to describe work progress.
- Settings > Operations: the amenities list for bookable bays, rooms, and equipment.
What you will accomplish
You will create a custom status label and add facility amenities that staff can recognize when scheduling work.
Before you start
- You should be signed in as a team admin or manager.
- Write down the status labels your staff already use in conversation.
- Write down the bays, rooms, and equipment staff may need to reserve.
- Use short, plain names. These names appear in tables, boards, schedules, and dialogs.
Create a custom status
Custom statuses help staff answer, "What is happening with this job right now?"
Many facilities start with three labels:
- Waiting on customer — work is paused until the owner replies
- In the bay — the car is in a service bay right now
- Ready for pickup — work is done and the customer can collect the vehicle
You can add more later (for example Ordering parts) once your team is comfortable with the basics.
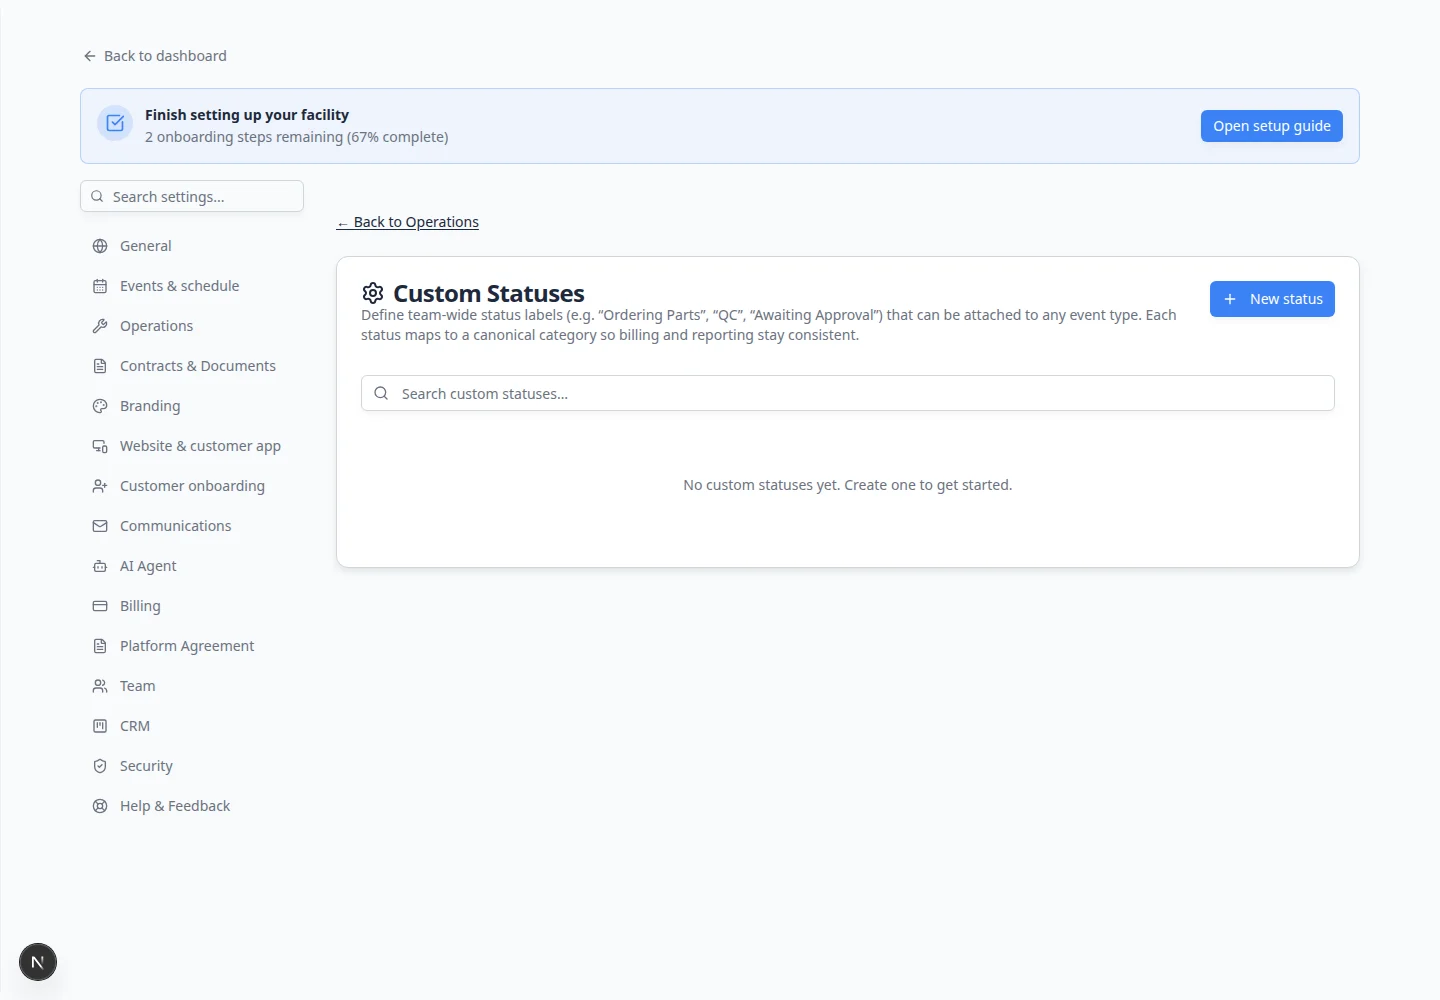
- Open Custom statuses
Go to Settings > Custom statuses.
- Click New status
Click New status.
A window named New custom status opens.
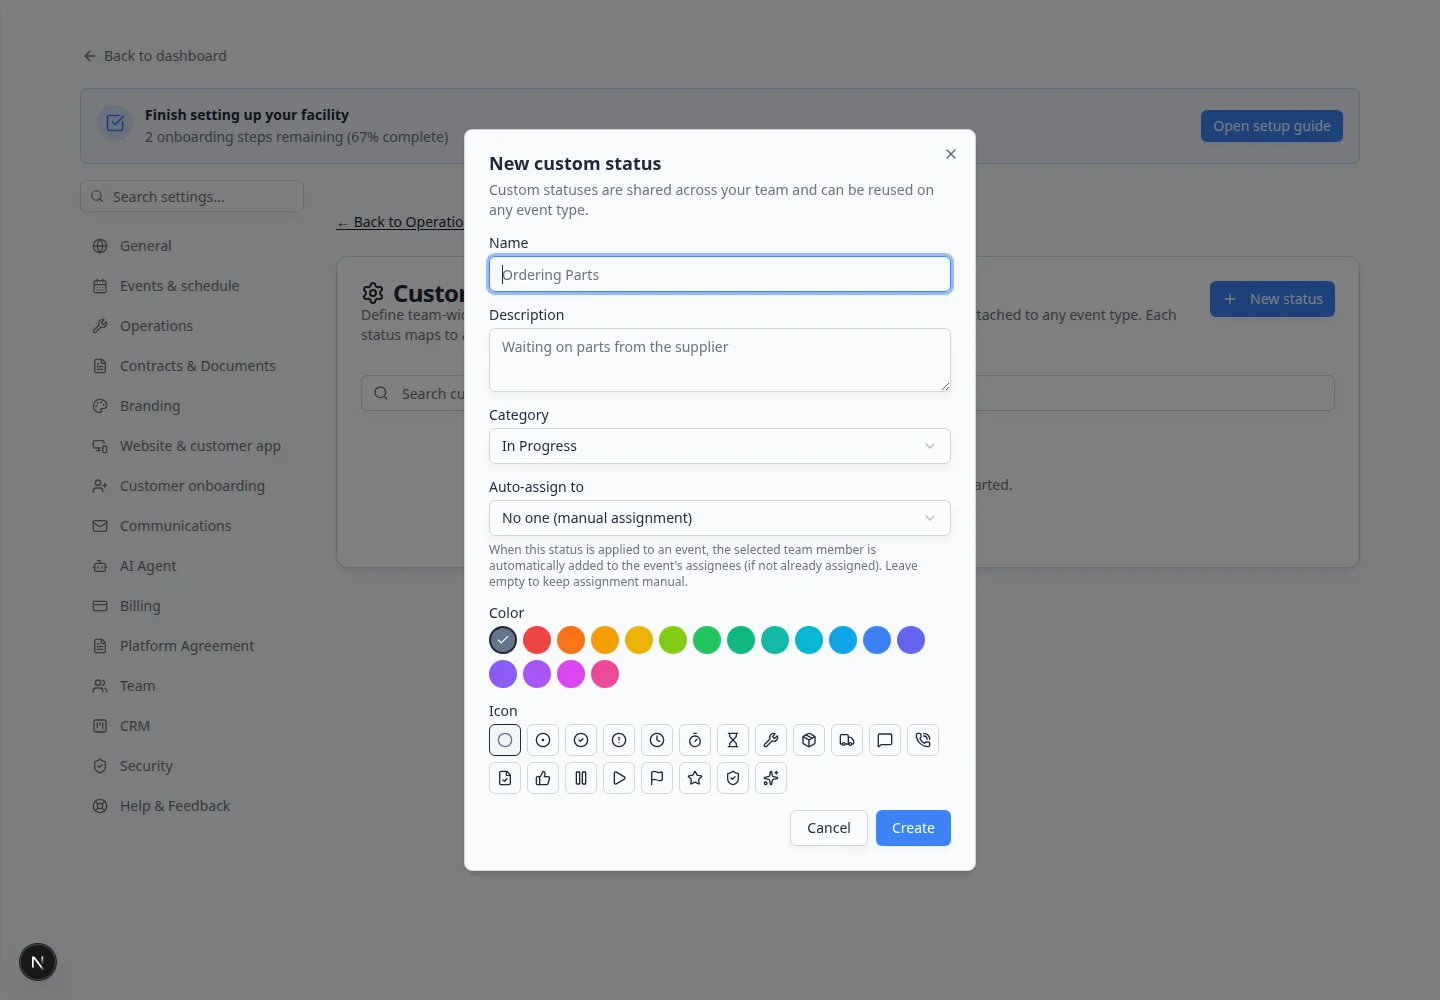
Create a status with a plain name, category, color, and icon. - Enter the status name
In Name, type the exact label staff should see.
Keep it short. A good status is easy to scan on a busy day.
- Add a description
In Description, explain when staff should use the status.
Example: Work is paused until the customer responds.
Why this matters: A clear description helps new staff use the status the same way as experienced staff.
- Choose the category
In Category, choose the broad stage that best matches the status.
Common choices include:
- To Do for work that has not started.
- In Progress for work happening now.
- Blocked for work that is paused.
- Done for work that is complete.
Why this matters: The category keeps reporting and work boards organized.
- Choose Auto-assign user only if one person should always own it
Use Auto-assign user when the same teammate should be added every time this status is used.
Example: if Ordering parts should always go to your parts manager, choose that person.
Leave it blank if ownership changes from job to job.
- Choose a color and icon
Pick a color and icon that make the status easy to spot.
Use colors consistently. For example, orange can mean waiting, blue can mean work in progress, and green can mean ready or done.
- Click Create
Click Create.
Expected result: The new status appears in the Custom statuses table.
Keep your status list simple
Good starting statuses for many facilities:
- Waiting on customer
- In the bay
- Ready for pickup
Edit an existing custom status
Names and descriptions change as your shop learns what works. You do not need to delete and recreate a status.
- Open Custom statuses
Go to Settings > Custom statuses.
Expected result: You see your status table with Name, Category, and action buttons such as Edit.
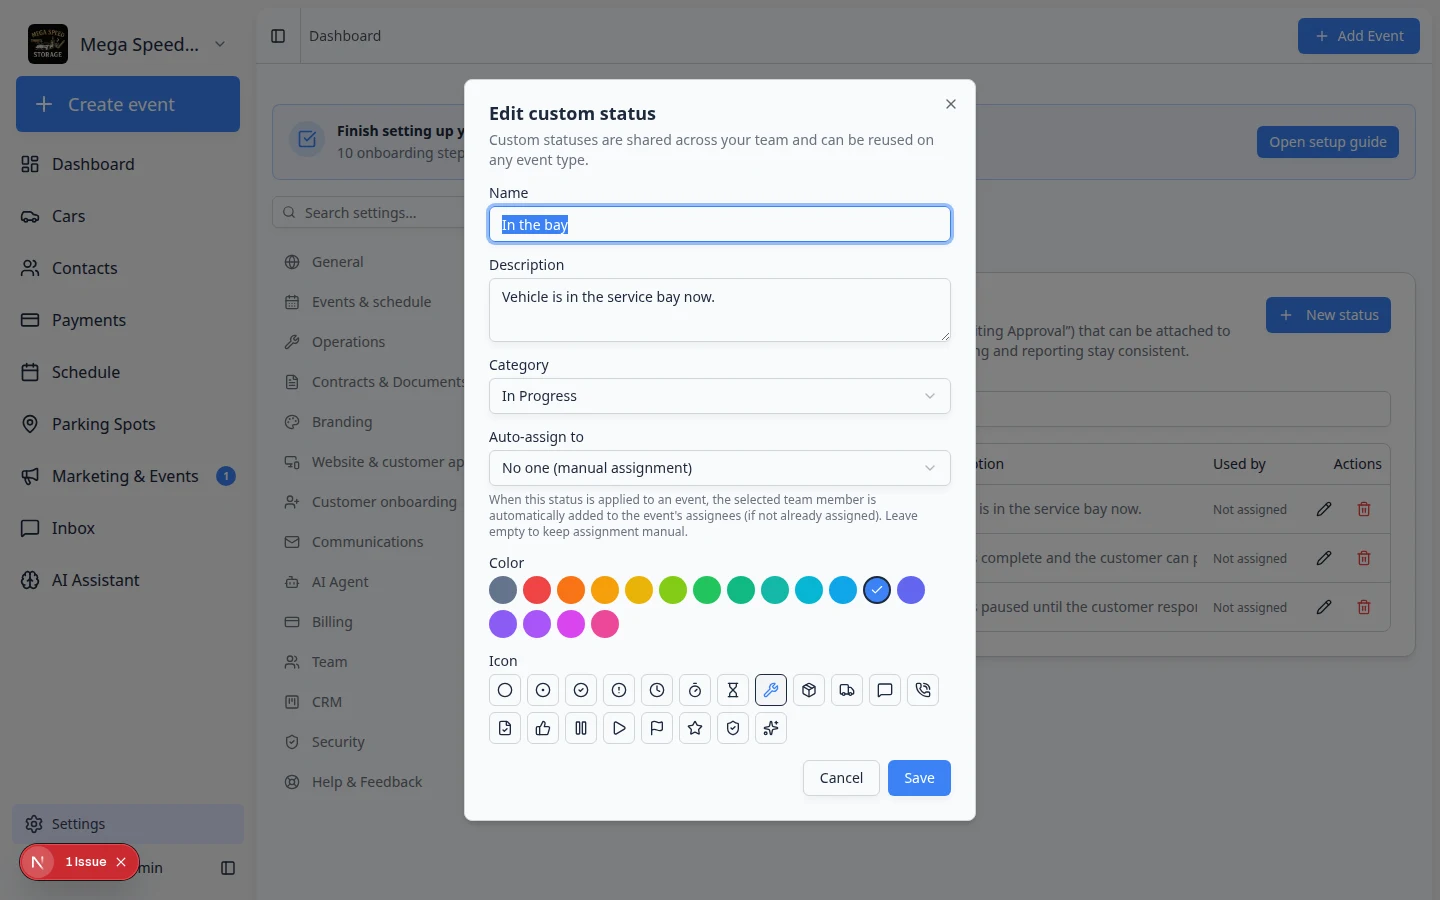
- Click Edit on the status
Click Edit on the row you want to change.
A window opens with the same fields you used when creating the status.
- Update the fields and save
Change the Name, Description, Category, Color, or Icon as needed.
Click Save (or Update).
Expected result: The table shows the new wording. Existing jobs that already used the old label keep their history.
Archive a status you no longer use
When staff stop picking a label, archive it instead of deleting history.
- Open the status row
On Settings > Custom statuses, find the status that is outdated.
- Click Archive
Click Archive on that row (or open Edit and turn Active off, if your screen shows that option).
Why this matters: Archived statuses disappear from new work but stay on old records so reports stay accurate.
- Confirm if asked
Read the confirmation message, then confirm.
Expected result: The status no longer appears when staff assign progress on new jobs. Past events and cars still show the old label in history.
Where staff see custom statuses
Custom statuses only help when staff know where to pick them. After you create labels, show your team these spots:
| Where in the app | What staff do |
|---|---|
| Schedule Progress view | Drag event cards between To Do, In Progress, and Done—and use custom labels when your event type has them turned on |
| Car or event workflow | Open a job and change status when work moves forward or pauses |
| Job boards and filters | Scan color-coded labels instead of reading long notes |
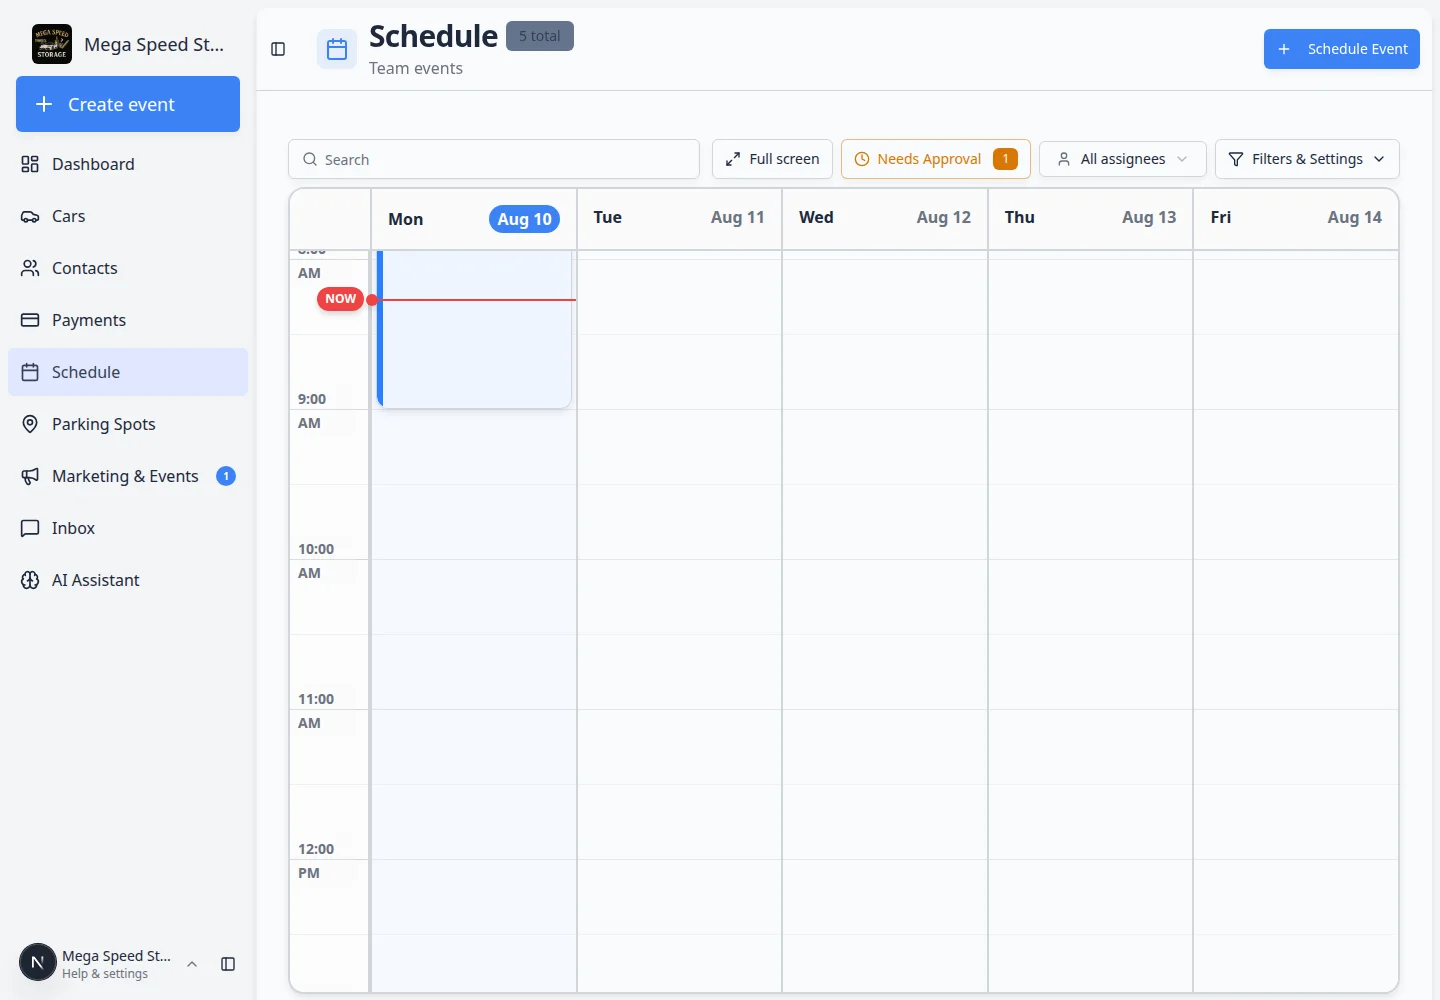
- Open Schedule in Progress view
Go to Schedule.
Open Filters & settings, then choose Progress.
Expected result: You see columns such as To Do, In Progress, and Done with event cards inside.
- Practice moving one event
Drag a test event from To Do to In Progress when work starts.
Why this matters: The whole team sees the same picture of what is waiting, active, and finished—without walking the lot.
Add bookable amenities
Amenities are the spaces or equipment staff may need to reserve.
Examples:
- Detail Bay 1
- Wash Bay Large
- Photo Room
- Transport Trailer
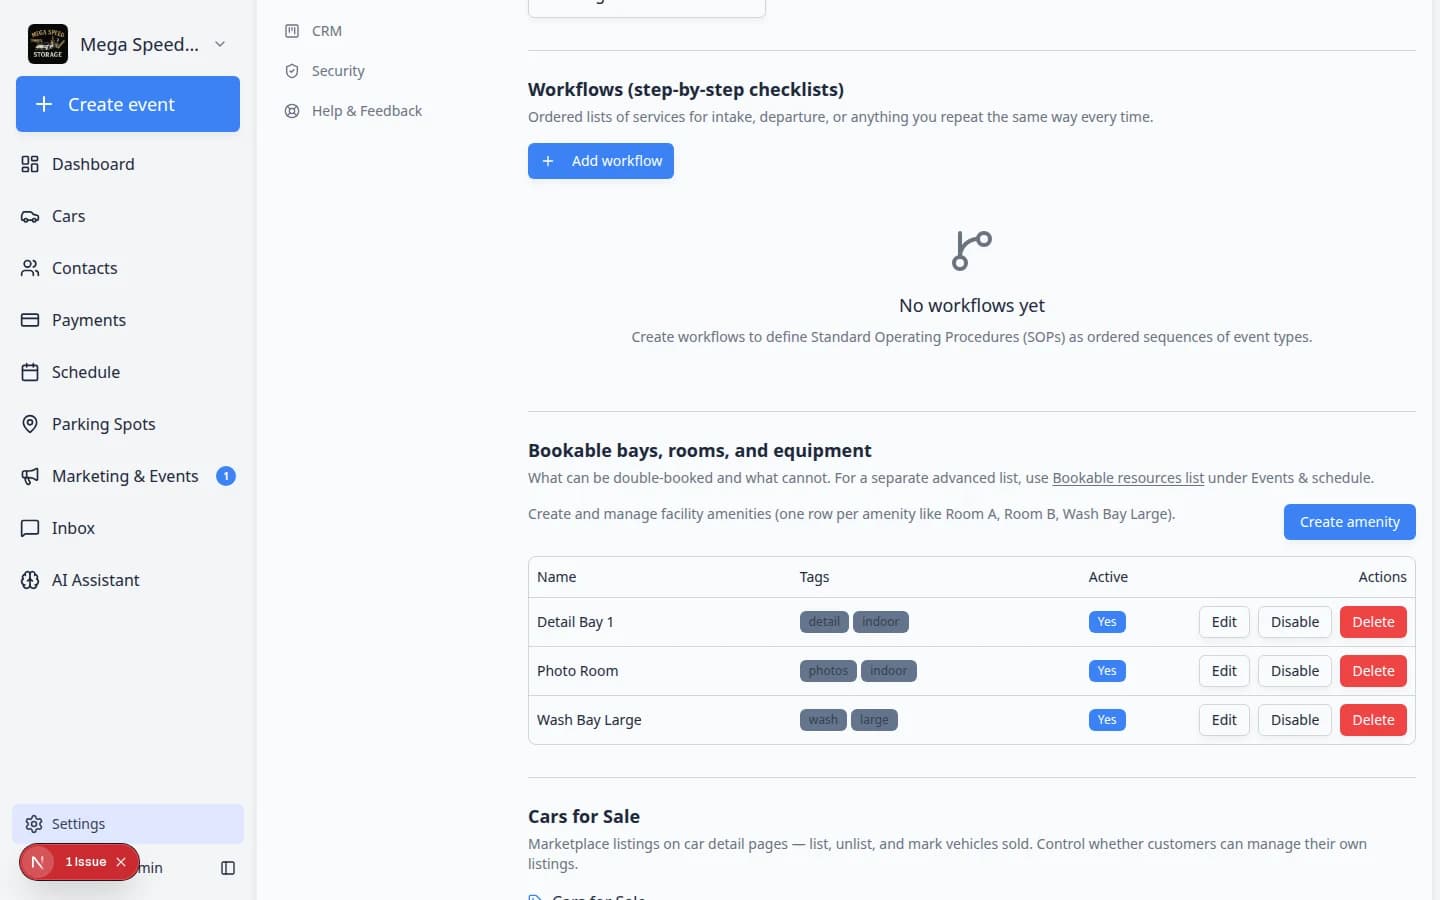
- Open Operations settings
Go to Settings > Operations.
Scroll to Bookable bays, rooms, and equipment.
- Click Create amenity
Click Create amenity.
A window named Create amenity opens.
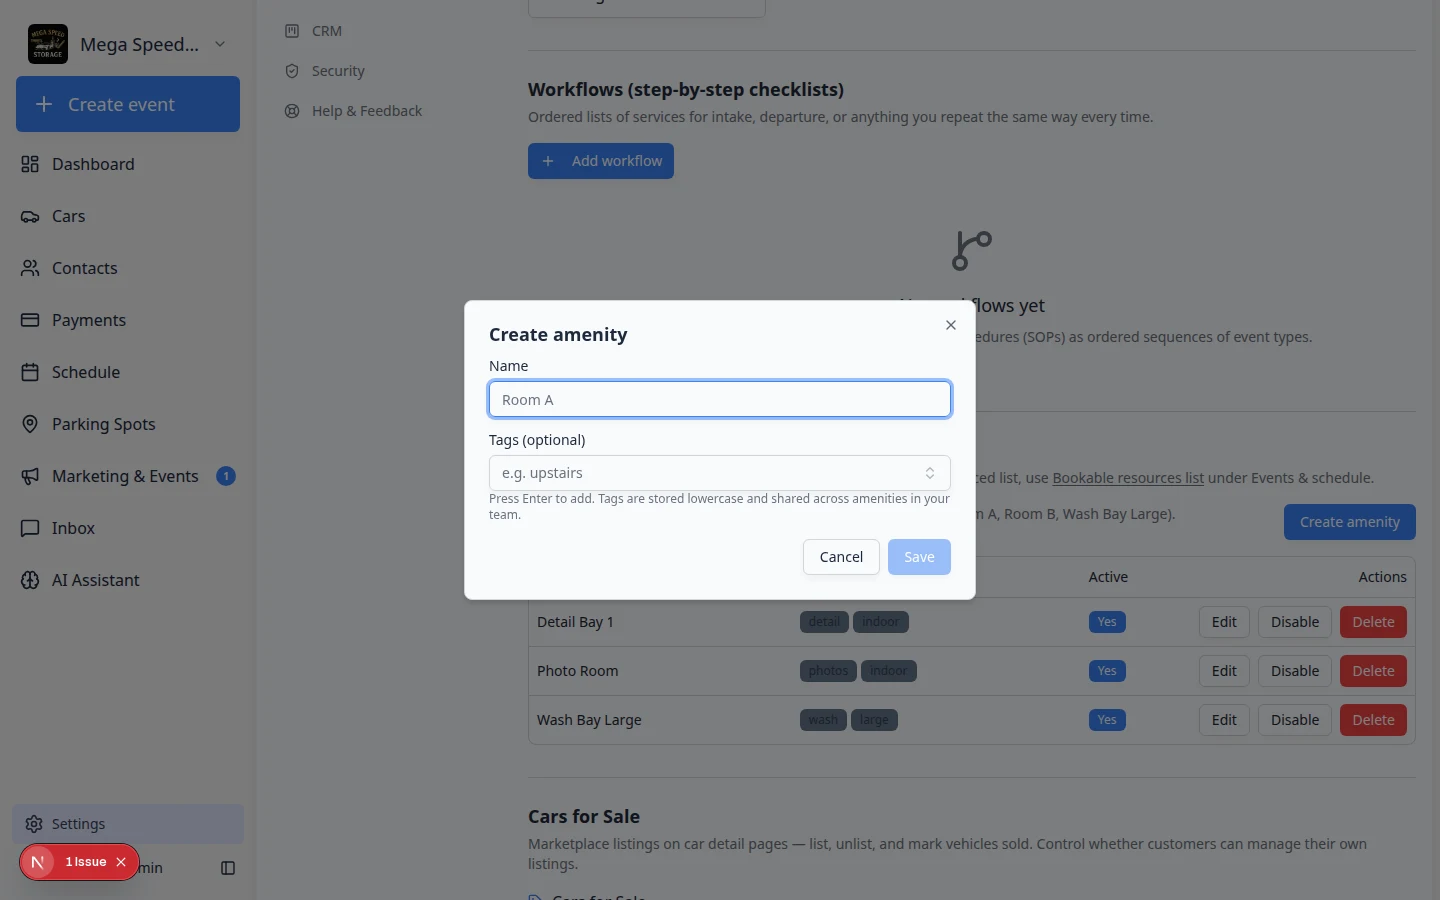
Use names your staff say out loud, such as Detail Bay 1 instead of Bay. - Enter the amenity name
In Name, type the space or equipment name.
Use the name staff say out loud. For example, Detail Bay 1 is clearer than Bay.
- Add tags if they help staff filter or group amenities
In Tags (optional), add helpful words such as indoor, large, wash, detailing, or photos.
Tags are optional. Use them only if they make choices easier.
- Click Save
Click Save.
Expected result: The amenity appears in the table with its tags and active status.
Where staff use amenities
Amenities matter when someone books time in a bay, room, or on equipment. After you add names staff recognize, show them how to pick the right space.
- Create or edit an appointment
Open Schedule and follow Create an appointment—or open an existing event and click Edit Event.
- Look for bay, room, or amenity fields
On the appointment form, find the field for Amenity, Bay, Room, or similar wording (it depends on your event type).
Choose the space that matches where the work happens—for example Detail Bay 1 for a detail job.
- Save the appointment
Save the event.
Expected result: The calendar shows the visit at the right time, and other staff can see which bay is reserved. If two details are booked at once, each event should name a different bay (for example Detail Bay 1 vs Wash Bay Large).
Disable or delete an amenity
- Use Disable when the amenity may come back
Click Disable when a bay, room, or piece of equipment is temporarily unavailable.
Example: a wash bay is closed for repairs.
- Use Delete only when the amenity should be removed
Click Delete when your team no longer needs the amenity in the list.
Tip: If you are unsure, disable it instead of deleting it.
What success looks like
- Staff use the same short status labels on busy days (Waiting on customer, In the bay, Ready for pickup).
- Schedule Progress view shows work moving from waiting to active to done.
- Bays and rooms have names staff say out loud (Detail Bay 1, not Bay).
- New hires can read status Descriptions and know when to use each label.
- Outdated statuses are Archived instead of deleted, so history stays readable.
Troubleshooting
What to do next
After statuses and amenities are ready:
- Test labels on a real appointment in Schedule Progress view.
- Build a checklist for intake or pickup in Create operations workflows.
- Return to Configure operations settings for the full Operations overview.