Cars
Cars overview
Understand the vehicle workflows available from the Cars section of the dashboard.
The Cars section is the operational center of your facility dashboard. Every vehicle your team stores, services, or tracks lives here as a car record — connecting the vehicle to its owner, parking spot, billing history, activity, documents, photos, and notes.
What you will accomplish
After reading this overview and the linked guides, you and your team will know how to:
- Find any vehicle quickly from the Cars page.
- Keep vehicle details, customer links, and parking assignments accurate.
- Run intake, inspection, and service work using events and photo sessions.
- Review the Activity Feed, notes, and photos before talking with a customer.
When to use the Cars section
- A vehicle is arriving for storage, service, or consignment and needs a record before work starts.
- Someone asks where a car is parked or who owns it.
- You need to document intake, inspection, delivery, or other work with photos and a timeline.
- Plate, VIN, insurance, or customer details changed and the record must stay accurate for billing and messages.

Before you start
- You can sign in to the dashboard and open Cars from the left sidebar.
- Your facility has at least one customer in Contacts when you plan to link owners to vehicles.
- If you will assign parking spots, your team has set up spots or zones in Parking Spots.
What you can do from Cars
- Add a car — create a vehicle record with or without a photo walkthrough so your team can start tracking it immediately.
- View and edit vehicle details — update make, model, year, color, VIN, license plate, insurance, mileage, fuel level, declared value, tags, and customer ownership from one detail page.
- Move a car — assign or change the vehicle's parking spot, zone, or vendor location so the record matches the physical floor plan.
- Create events and tasks — schedule work, log a quick task, start a quick photo session, or upload a document from the Add menu on a car record.
- Review market trends — when your facility uses Classic.com, see Market Data on the car record next to declared value.
- Scan plan health from the list — turn on the Service column on the Cars page to see which vehicles have plan work due.
- Review activity history — see every past and upcoming event, status change, and note in the Activity Feed.
Quick links by job
| I need to… | Open this page | Step-by-step guide |
|---|---|---|
| Add a car that just arrived | Cars → Create New Car | Add a car |
| Find a car by plate or customer | Cars → Search | Find and filter cars |
| Answer "where is this car?" | Open the car → check Zone: or Spot: at the top | Move a car |
| Update plate, VIN, insurance, or owner | Open the car → Vehicle Details | View and edit vehicle details |
| Log a quick reminder for the team | Open the car → Add → Quick task | Start a car session |
| Upload insurance or registration | Open the car → Add → Upload document | Start a car session |
| Check if plan work is overdue | Cars → Service column | Find and filter cars |
| Schedule intake, detail, or pickup | Open the car → Add → Create event | Start a car session |
| See what happened at intake | Open the car → Activity Feed and Notes | Review car activity, notes, and photos |
Finding cars quickly
The Cars list supports search, filters, and two view modes so you can find the right vehicle fast:
- Search — type any part of the make, model, year, VIN, plate, stock number, or customer name. The search bar may show removable chips for parts of your query (such as a year).
- Table view — a sortable table with columns you can show or hide. Turn on Inline edit only when you mean to change fields directly in the list.
- Card view — a responsive grid of vehicle cards with thumbnail photos. Useful on tablets or when you recognize cars by photo.
- Filters — narrow the list by facility location, make, model, color, year range, for sale status, insurance status, service plan, and tags.
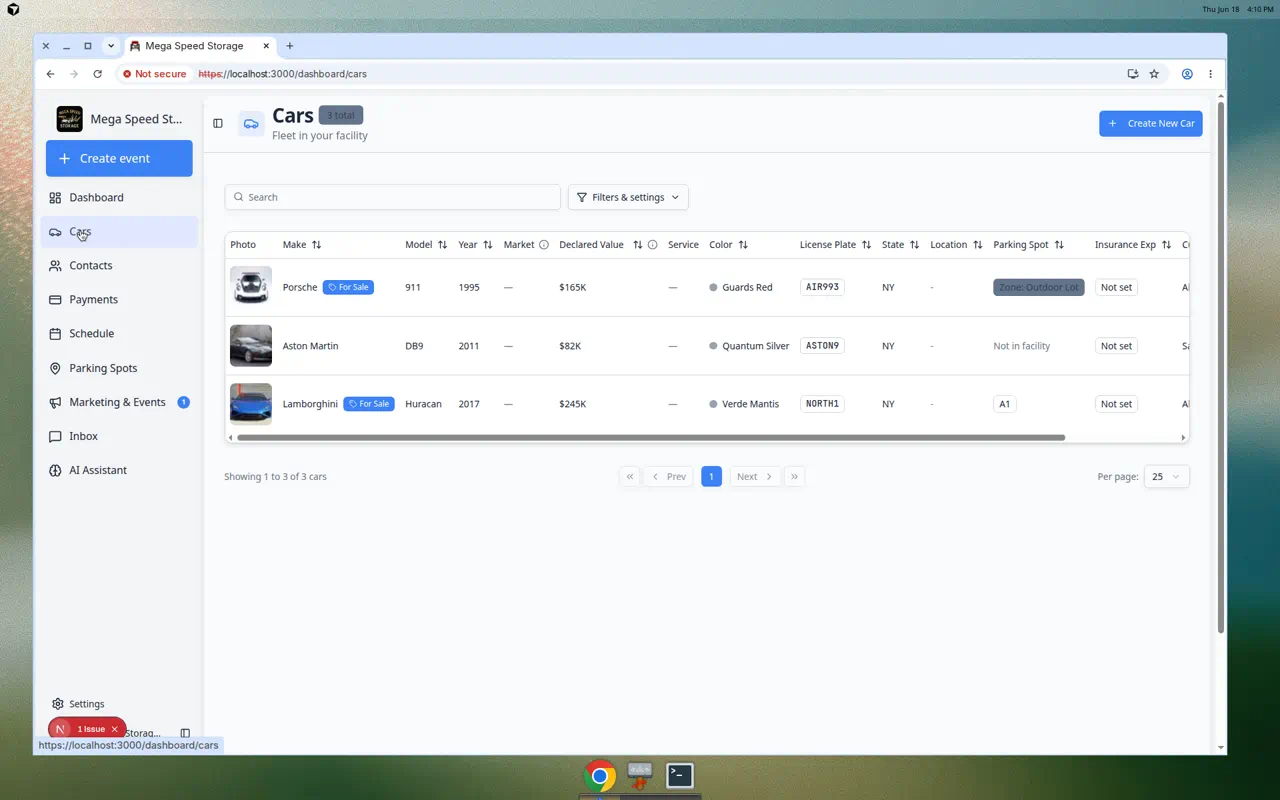
To open a car, click View in the Actions column (or click the vehicle row when inline edit is off).
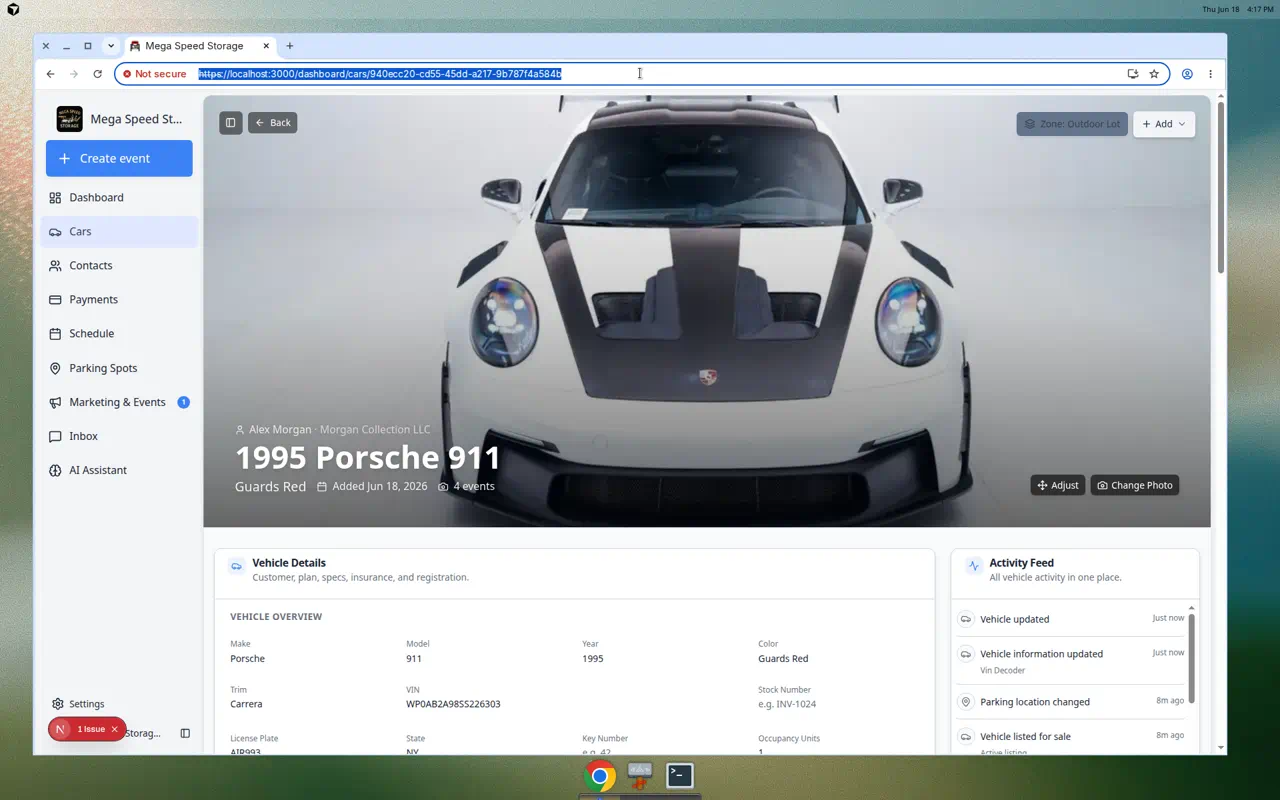
The car detail page
Click any vehicle to open its detail page. This single page is the source of truth for everything about the car.
On wide screens, the page is split into two main areas:
- Vehicle Details (left) — specs, customer, insurance, registration, service plans, marketplace listing, photos, and readings.
- Activity Feed and Notes (right) — timeline of work plus internal team notes.
At the top of the page you will also see:
- Back — return to the Cars list.
- Zone: or Spot: (or Assign location) — open the parking assignment dialog.
- Add — menu with Create event, Quick task, Quick photo, and Upload document (upload requires a linked customer).
- Market Data — inside Vehicle Details, optional Classic.com price trends when your facility enables them.
- Adjust / Change Photo — update the banner image when a photo exists.

How-to guides
- Add a car
Create a new vehicle record with or without a photo intake walkthrough. Read the guide →
- Find and filter cars
Search by customer, plate, year, make, model, VIN, or tag. Adjust filters, views, columns, and inline editing so the Cars list shows what you need. Read the guide →
- View and edit vehicle details
Update vehicle information, customer ownership, insurance, registration, declared value, readings, and service details from one car record. Read the guide →
- Move a car
Assign or change a vehicle's parking spot, zone, or vendor location when it moves within or outside your facility. Read the guide →
- Start a car session
Schedule an event, run a quick photo session, or continue work already shown in the Activity Feed. Read the guide →
- Review car activity, notes, and photos
Read the vehicle timeline, internal notes, and photo sections so your team understands what happened and what should happen next. Read the guide →
Recommended order for new teams
If your facility is just getting started with vehicle records, use this order:
- Add your first cars
- Assign parking spots
Place cars on your floor plan with Move a car so everyone knows where vehicles are parked.
Expected result: The header button shows Zone: or Spot: and the Parking Spots map matches the real floor.
- Run intake or inspection sessions
Document condition and readings with Start a car session.
Expected result: The Activity Feed on each car shows completed work with photos and statuses—not only paper notes.
- Keep records current
When details change, use View and edit vehicle details. When you need history, use Review car activity, notes, and photos.
Expected result: Your team can answer customer questions from the record instead of searching email or clipboards.
Related guides outside Cars
Cars work connects closely with other parts of the dashboard:
- Contacts — add customers before or while you link cars.
- Parking Spots — set up your floor plan so Move a car has spots to choose from.
- Schedule — see facility-wide appointments in addition to each car's Activity Feed.
- Payments — invoice storage or service after the car and customer records are correct.
Common mistakes to avoid
- Do not leave Inline edit turned on on the Cars list after you finish quick edits—rows may not open the full record when you click them.
- Do not forget to update the parking assignment when a car physically moves. The map is only useful when it matches reality.
- Do not assume a note was sent to the customer. Notes on the car record are usually for your team only.
Troubleshooting
What success looks like
When your Cars section is working well:
- Every vehicle in your building has a car record with correct year, make, model, and customer link.
- Parking spots on car records match where cars actually sit on the Parking Spots map.
- Intake and service work show up in the Activity Feed with clear statuses—not only on paper clipboards.
- Your team can find any car in seconds using search or filters on Cars.
What to do next
If a vehicle is arriving today, start with Add a car. If you already have records but need to find one quickly, open Find and filter cars.