Marketing & Events
Check in social event attendees
Use the event check-in tools to confirm who arrived at a customer event.
What you will accomplish
On event day, you will mark attendees as checked in so your team knows who arrived, who is still expected, and whether a ticket was already used.
This guide is for staff at the door or front desk. You do not need technical skills—only the event page open on a phone, tablet, or computer.
When to use this guide
Use check-in when:
- Customers arrive with a QR code or ticket code from email or their phone.
- You need a head count for food, parking, or capacity limits.
- Paid tickets should only be used once.
- You want a clear record of who was physically present.
Before you start
- The social event is already created. If not, follow Create a social event first.
- Customers received the event link, RSVP confirmation, or ticket email before they arrive.
- If you plan to scan QR codes, use a device with a working camera and allow the browser to use it when asked.
- Charge the tablet or phone you will use at the door.
- Have a backup plan: search the attendee list or type a ticket code by hand.
Set up at the door (5 minutes before guests arrive)
- Open the event detail page on a charged phone or tablet (see Step 1 below).
- Tap Check in once so you know the check-in screen loads.
- If you use QR codes, allow the browser to use the camera when prompted.
- Post the event QR code from Share near the entrance if guests should scan to RSVP or check in.
- Brief staff: confirm the guest name on screen before tapping Check in.
- Keep Enter code manually ready as a backup when a guest's phone screen is too dim to scan.
Step 1: Open the event detail page
- Open Marketing & Events
Go to Marketing & Events.
- Find the event
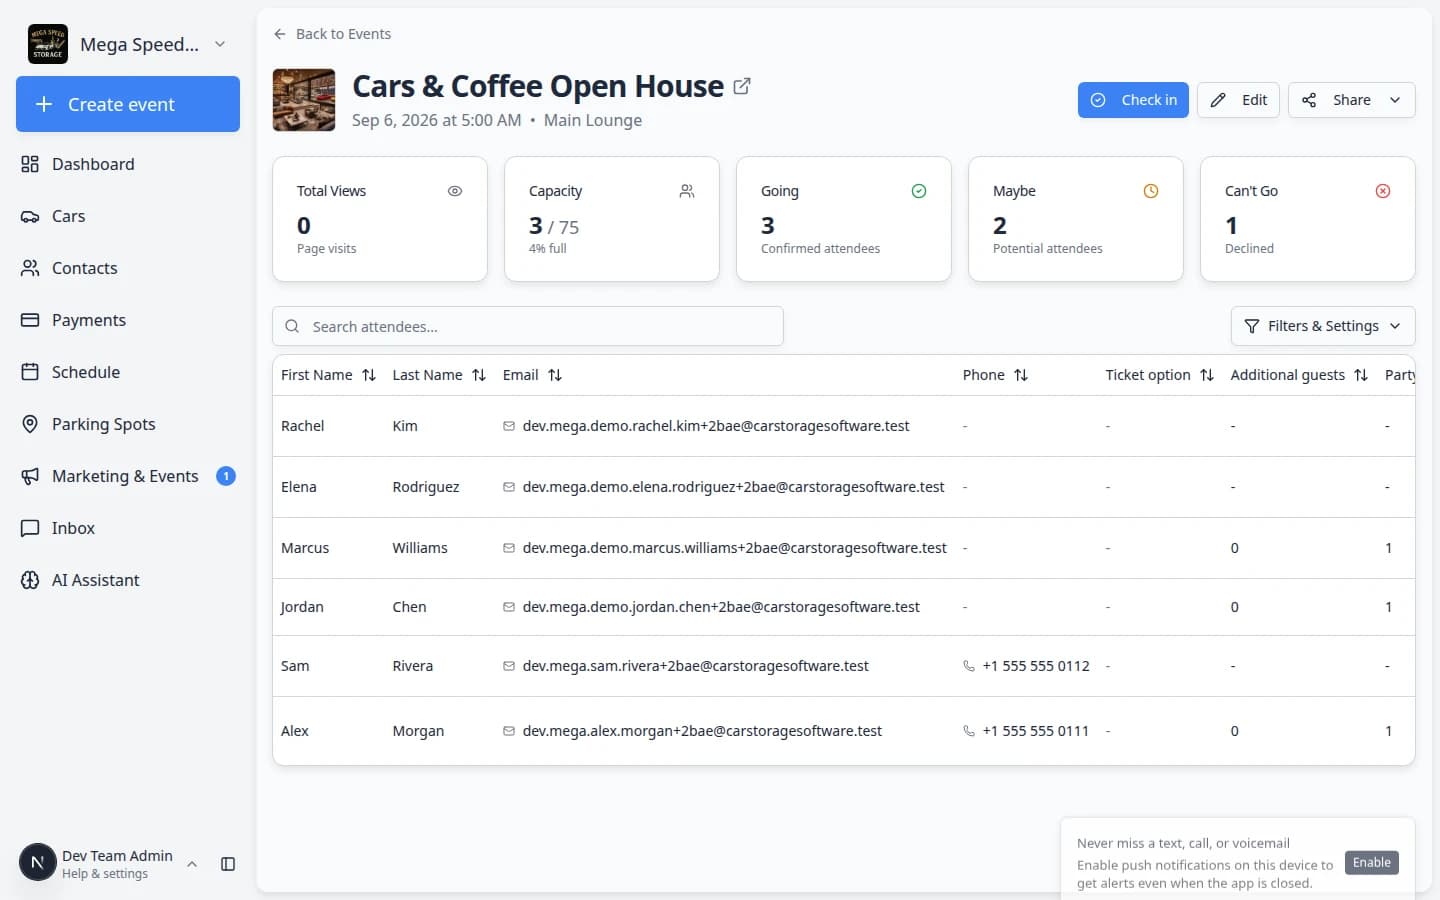
On the Calendar tab, click the event name (for example Cars & Coffee Open House). You can also use the search box or filter to Events if the calendar is busy.
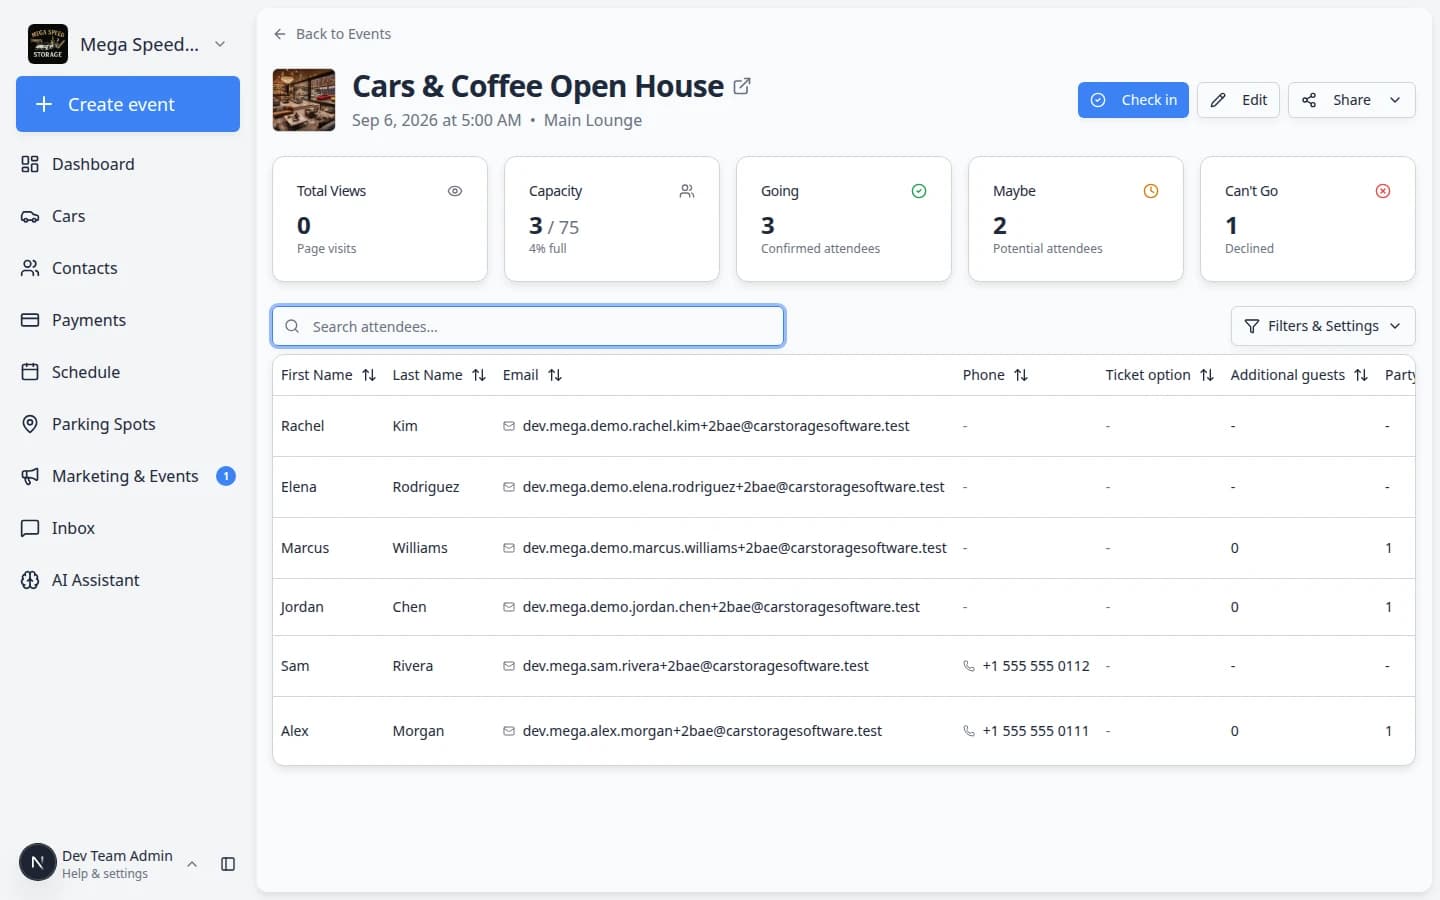
Expected result: You land on the event detail page with the event title at the top and summary cards for Going, Maybe, and Can't Go.
- Confirm you are on the right page
The page shows attendance numbers, an attendee table, and buttons such as Check in, Edit, and Share.
The web address looks like
/dashboard/social-events/followed by the event id.If you need a QR poster for the entrance, click Share and choose QR code before guests arrive. See Review social event RSVPs and attendees for sharing options.
- Open check-in
Click Check in.
Expected result: You see the check-in screen for this event (not the general marketing calendar).
Step 2: Choose scan or manual entry
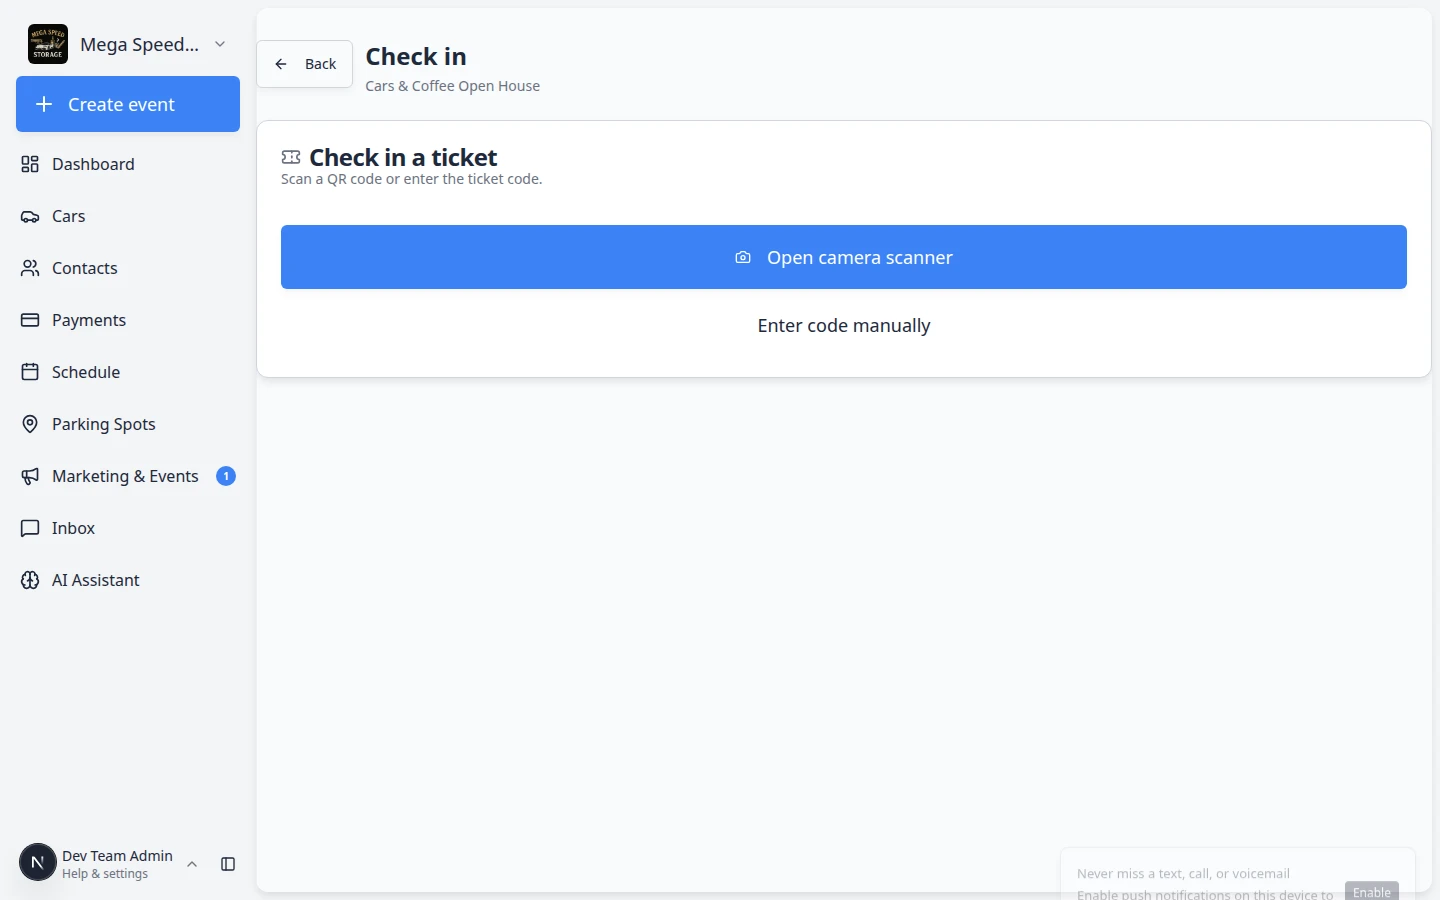
The check-in screen offers two paths. Both work—the best choice depends on your device and lighting.
- Use Open camera scanner when possible
Tap Open camera scanner (or similar wording). Point the camera at the customer's QR code.
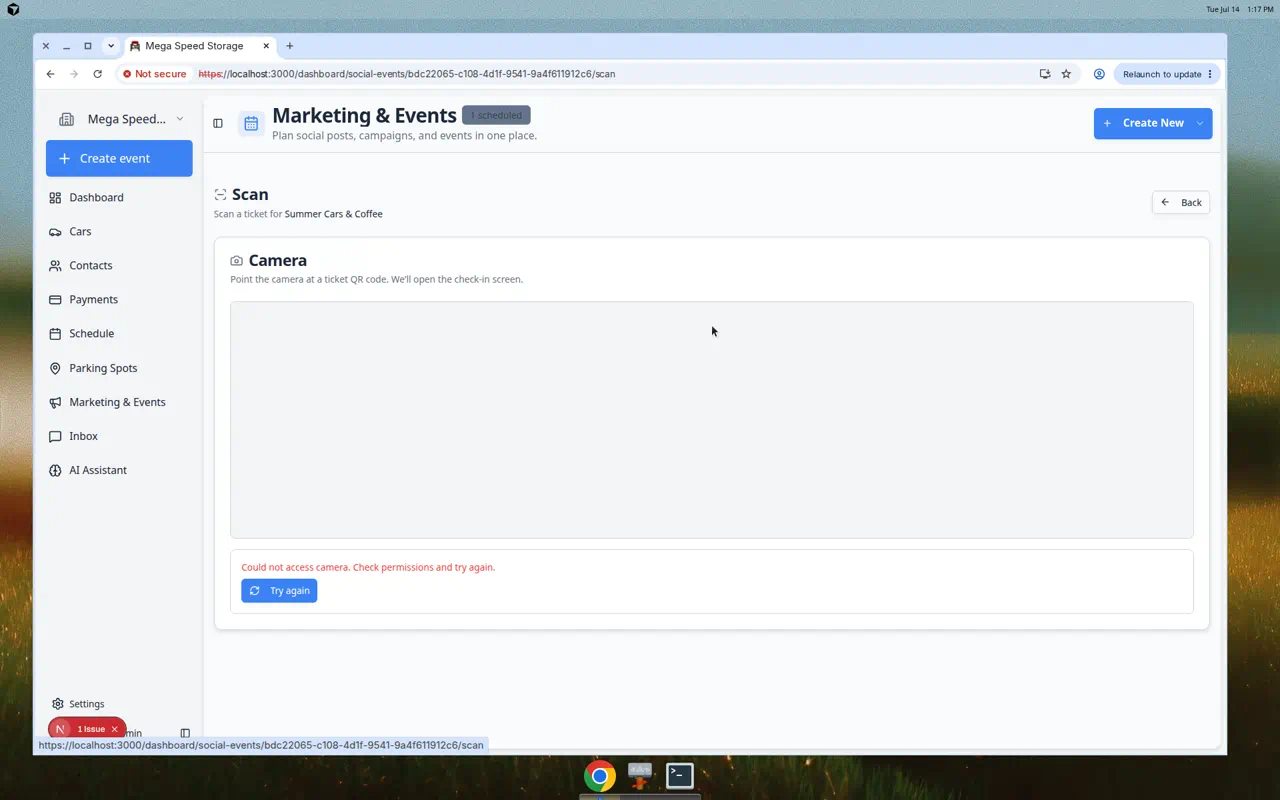
When the browser asks to use your camera, tap Allow. Hold the QR code steady inside the box on the screen.
Why this matters: Scanning is faster when many guests arrive at once.
- Use Enter code manually as a backup
Tap Enter code manually when the camera fails, the code is worn, or the customer shows a code from email instead of a QR image.
Expected result: A text box appears where you can type the ticket code.
Enter a ticket code by hand
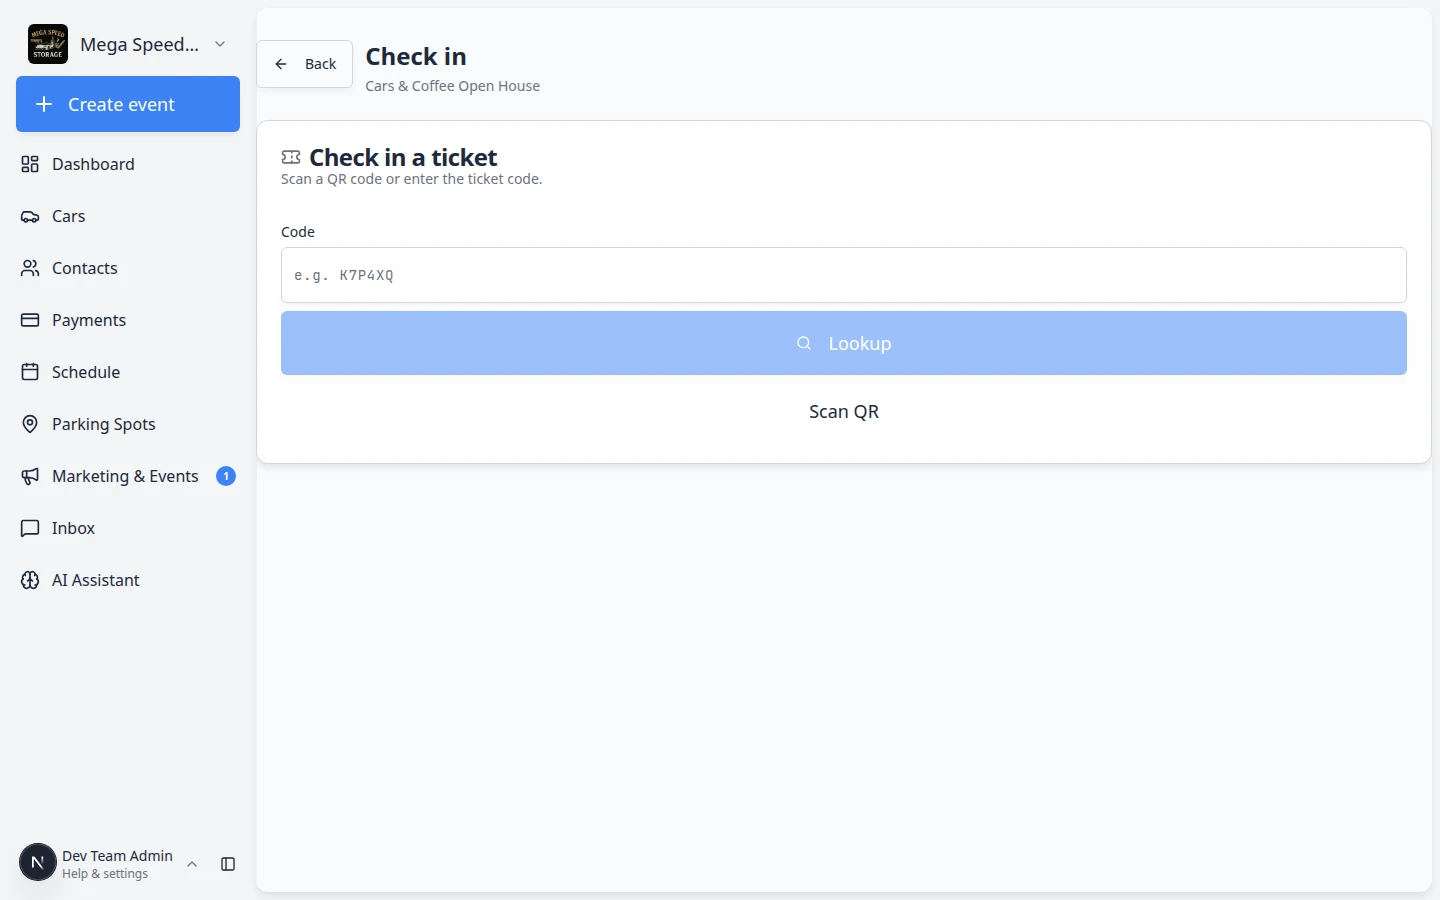
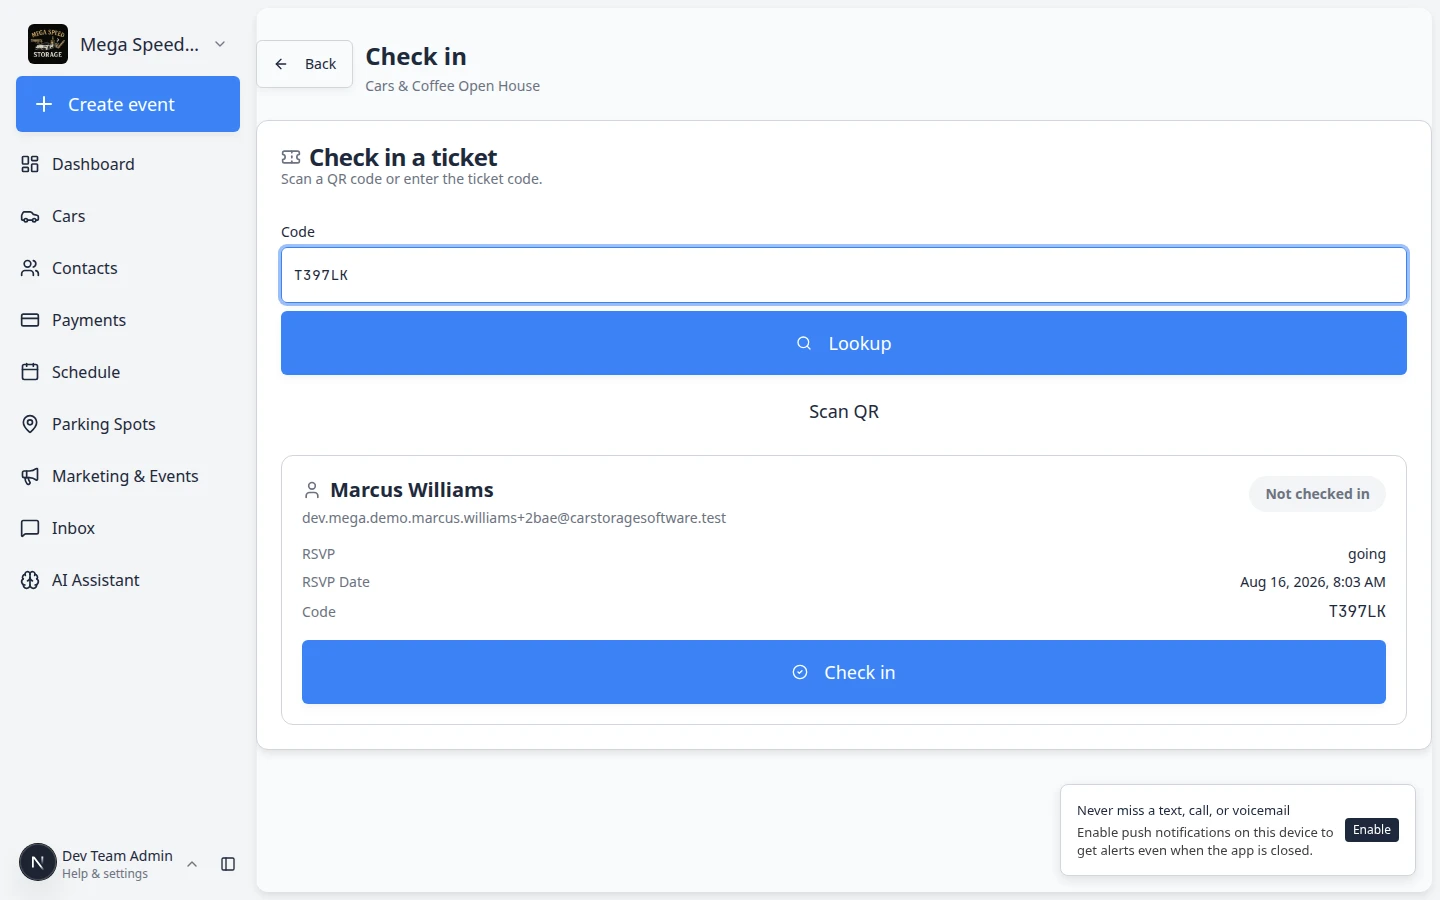
When you choose Enter code manually, you see a Code box and a Lookup button.
- Type the code exactly as the guest received it
The code is usually short letters and numbers (for example CCN3W6). Copy it from the customer's RSVP email or text. Do not add spaces.
Why this matters: One wrong character makes the system say the ticket was not found.
- Click Lookup
Click Lookup (or press Enter on your keyboard).
Expected result: A card appears with the guest's name, email, RSVP status, and whether they are already checked in.
Step 3: Check in one attendee
- Look up the ticket
After a scan or after you click Lookup, the screen shows a card with the guest's name, email, RSVP status (going, maybe, and so on), and a badge such as Not checked in or Checked in.
Read the name out loud or point to the screen and ask, "Is this you?" before you continue.
Why this matters: The badge tells you whether this ticket was already used at the door.
- Click Check in
Click the blue Check in button on the guest card when the person in front of you matches the name on the screen.
Expected result: The badge changes to show the guest is checked in, or you see a short success message. When you return to the event detail page, that guest appears as checked in in the attendee list.
Why this matters: A clear success message tells door staff the scan worked before the next guest steps up.
- Check the next guest
After each successful check-in, the scanner or manual entry screen is ready for the next person.
Why this matters: During busy arrivals, staff should confirm one guest at a time so ticket codes are not mixed up.
- Handle already checked in
If the screen says the ticket was already used, pause. The guest may have entered earlier, or someone else may have used the same code. Ask a manager before allowing another entry.
If the attendee does not have a QR code
- Go back to the event detail page
Use Back or open the event again from Marketing & Events.
- Search the attendee list
Use Search attendees... and type the person's name or email.
- Check RSVP status
Confirm they appear as Going (or the status your facility uses for confirmed guests).
- Use manual code entry when available
Open Check in again, choose Enter code manually, and type the short code from the customer's email exactly as shown (usually letters and numbers, no spaces).
- Ask a manager before making exceptions
If the person is not on the list, pause and ask a manager. Do not add walk-ins unless your facility policy allows it.
After check-in
- Watch Going and capacity numbers so your team knows how full the event is.
- Refresh the event page occasionally if multiple staff are checking people in.
- After the event, send a thank-you campaign or review request to attendees who had a good experience.
What success looks like
- Guests with valid tickets are marked checked in within a few seconds.
- Staff can answer "how many people are here?" from the event page without paper lists.
- Duplicate or invalid tickets are caught before guests enter restricted areas.
Common mistakes to avoid
- Do not check someone in without confirming their name matches the ticket.
- Do not let one staff member use scan while another uses manual entry on the same ticket at the same time—refresh the page if counts look wrong.
- Do not add walk-in guests without a manager unless your facility policy allows it.
Troubleshooting
What to do next
Send a follow-up with Create a campaign, or ask for feedback with Request and manage reviews.