Schedule
Track work in the Progress view
Use the Progress view to see what is waiting, active, blocked, or done.
What you will accomplish
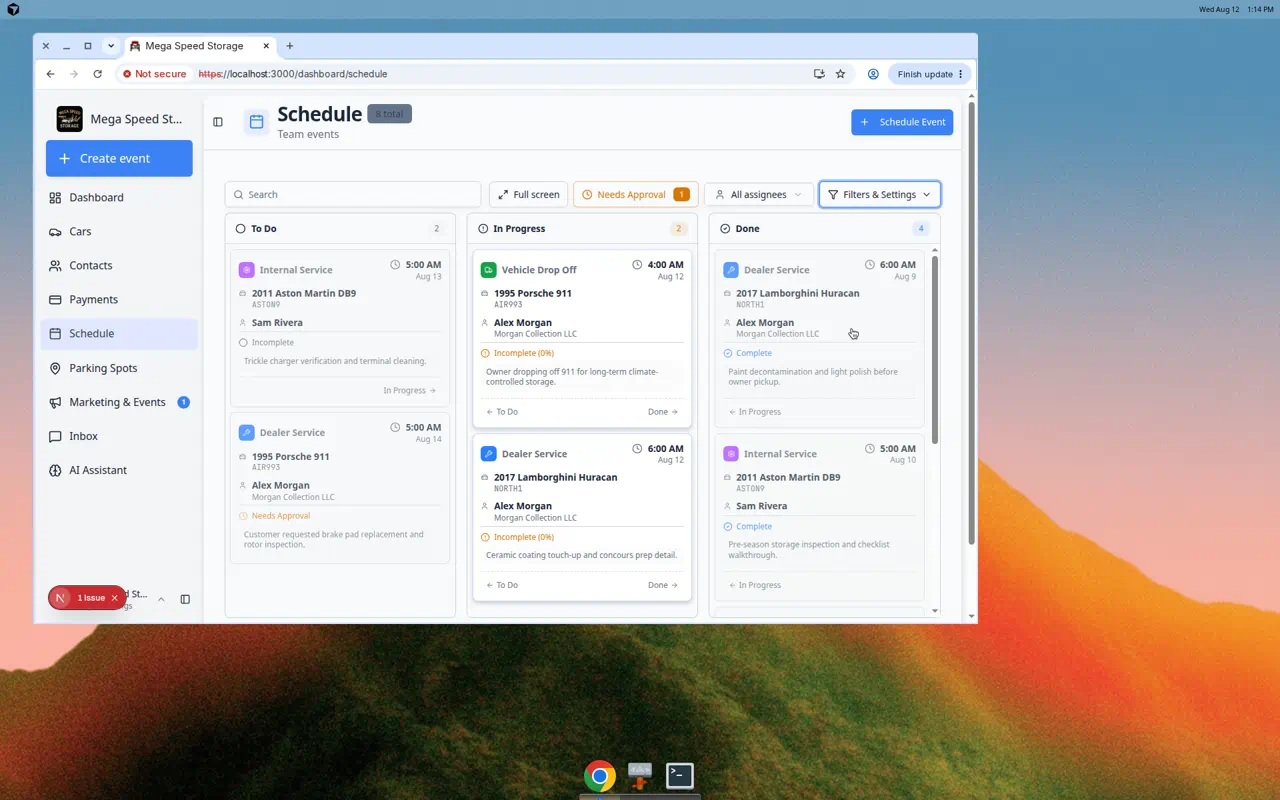
You will open the Progress view on Schedule and use it like a simple job board: work waiting to start, work in progress, and work finished.
When your team keeps this view updated during a busy day, everyone can answer “What still needs to be done?” without walking the floor or sending group texts.
When to use Progress view (instead of Calendar)
- Your shop has many same-day jobs and you care more about status than exact clock times.
- Managers run a morning stand-up and want columns such as To Do, In Progress, and Done.
- You already scheduled work on the calendar and now need to track completion as the day moves forward.
Before you start
- Open Schedule.
- Make sure the events you want to track are already scheduled.
- If your team uses assignments, assign events to the right team members so each person can filter to their own work.
- If your team uses custom statuses, confirm those statuses are set up in Settings > Events & schedule.
Open Progress view
Schedule may open in Calendar, Table, Whiteboard, or Progress depending on what you used last. If you see time columns instead of a board, open Filters & Settings first and choose Progress.
- Click Filters & Settings
Click Filters & Settings near the top-right area of Schedule. The settings panel slides open.
- Choose Progress
In View Mode, click Progress. The calendar grid disappears and a board with columns appears in its place.
- Choose a date range
If date range options appear (such as Today, This Week, or This Month), choose the range that fits what you are working on right now.
Use Today for daily operations — seeing what needs to get done before end of day. Use This Week when you are planning or reviewing upcoming work. Use This Month when managers want a wider snapshot of work still open across several weeks.
Expected result: Columns such as To Do, In Progress, and Done fill with cards for that date range. Event counts may appear on each column tab (for example 2 To Do).
Understand the columns
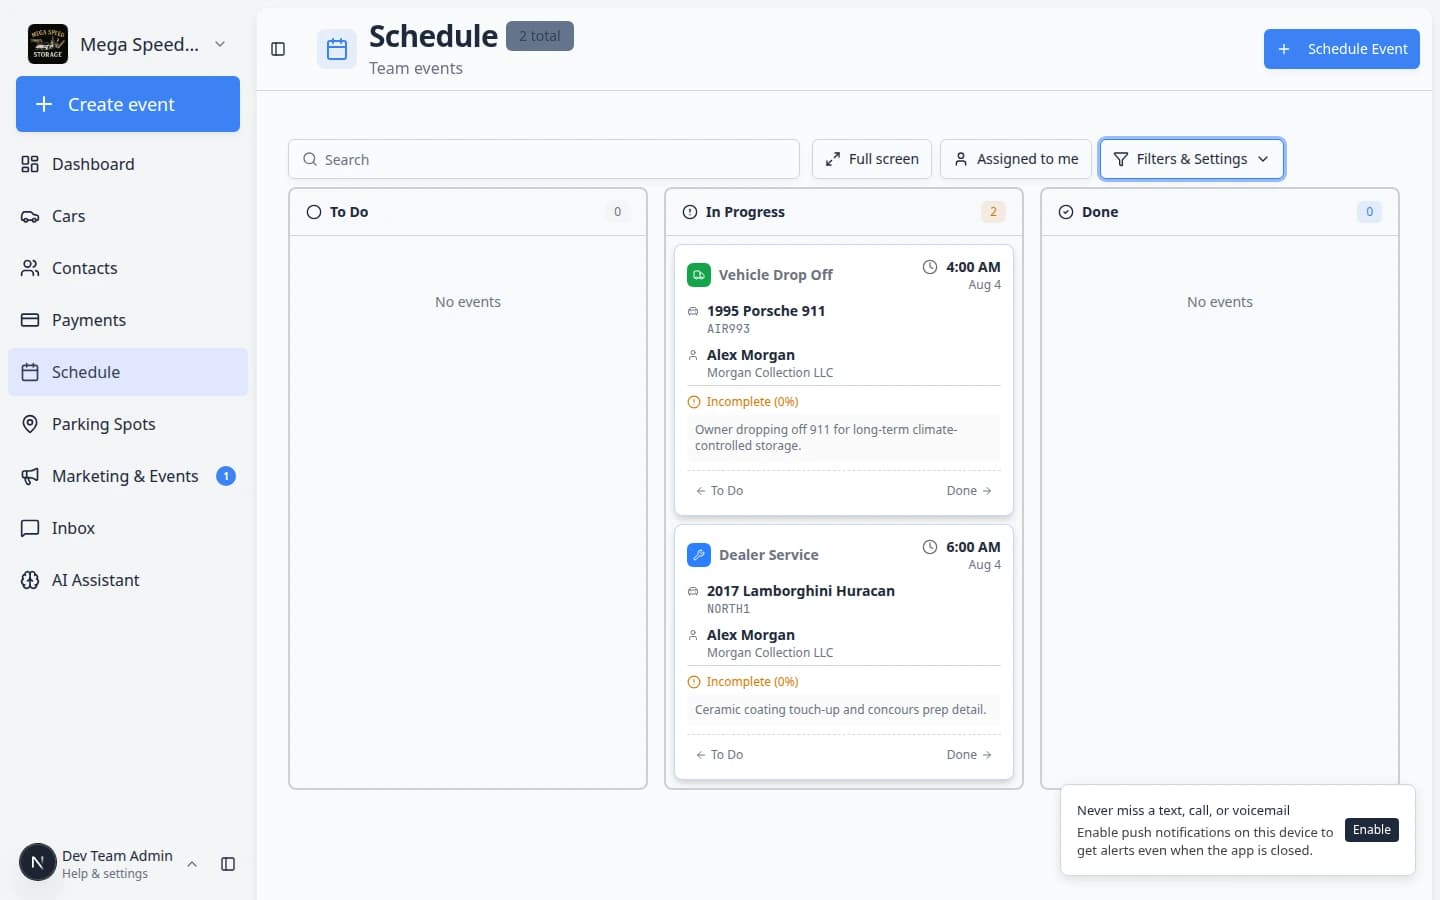
Most teams see columns like To Do, In Progress, and Done. Each column contains event cards that match that status.
- To Do means the event is scheduled but work has not started yet.
- In Progress means someone is actively working on this event.
- Blocked appears only when at least one event is blocked. It may show when work cannot continue until something else happens (parts, customer approval, bay space).
- Done means the work is complete. On the calendar and in Table view, finished work may also show as Complete.
Some teams use custom status names, such as Waiting on Parts, In the Bay, Quality Check, or Ready for Pickup. When one event type uses custom statuses, Progress may show one column per status instead of only the three default columns. Those names come from your team's event type setup in Settings > Events & schedule.
Change status without opening Edit Event
You can update status from the event detail panel when you only need to mark work as started or finished.
- Click the event card
Open the event from the Progress board.
- Use the status control at the top
Next to the event title, click the current status (for example Scheduled or To Do).
Expected result: A list of allowed statuses appears.
- Pick the status that matches reality
Choose In Progress when work has started, or Complete when the job is done.
Why this matters: The Progress columns stay honest for the whole shop — managers can trust the board during busy afternoons.
- Or use the links on the card
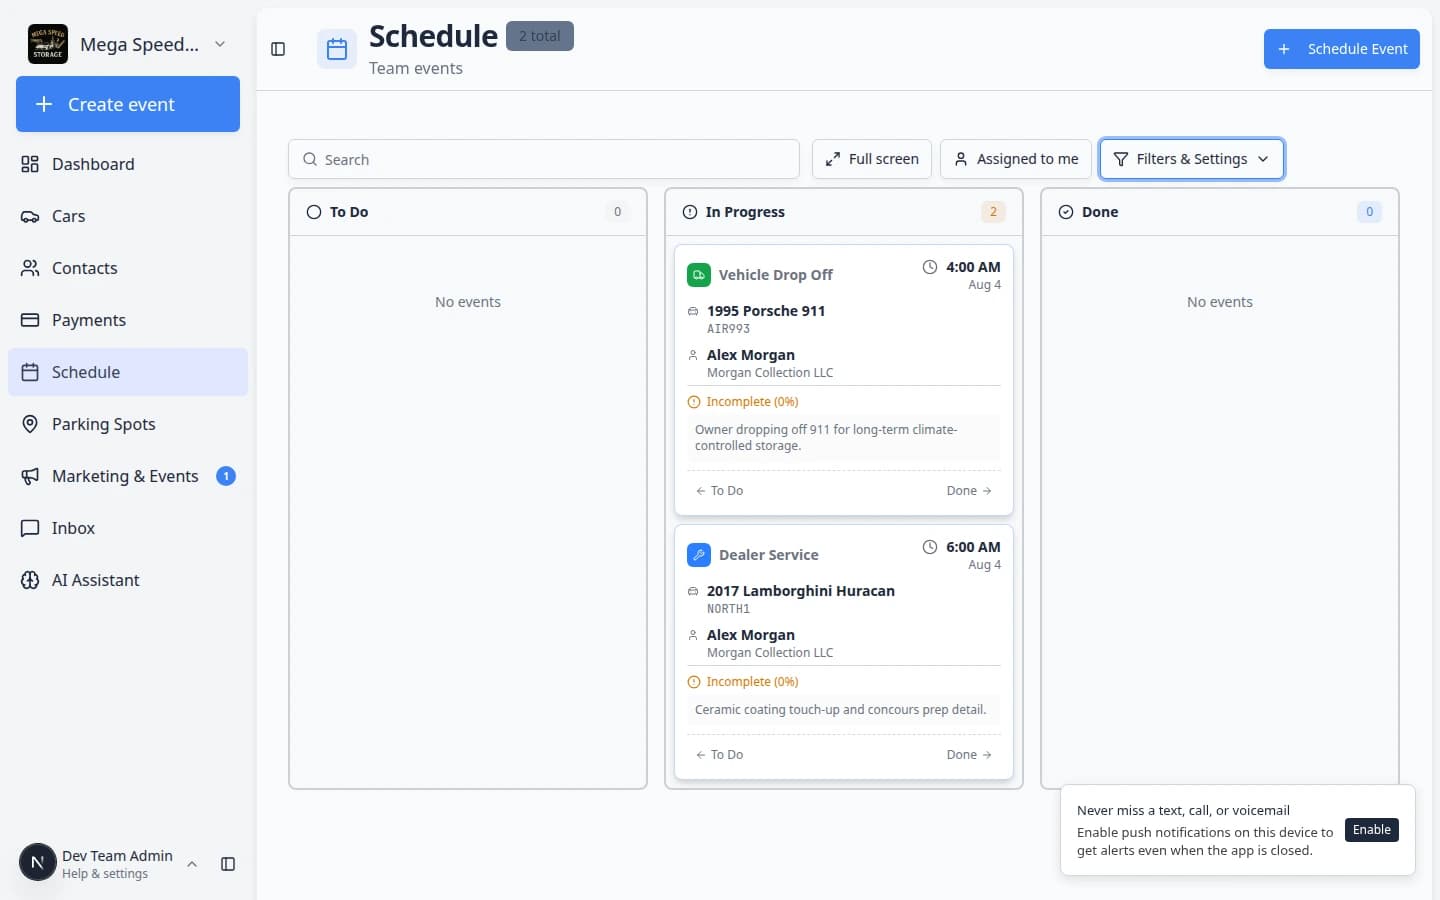
Some cards show small links at the bottom (for example Done → or Next → with a custom status name). Click those links to move the card to the next column without opening the full panel.
A workflow percentage on the card means linked checklists or photos are partly finished—open Open Event when the number is below 100%.
Expected result: The card jumps to the next column and the count badges on each column update.
Move work forward
- Find the event card
Look for the customer name, vehicle, event type, or assigned team member on the card. Each card shows key details so you can identify it quickly.
- Open the card if you need details
Click the card to open the event details panel.
Review the notes, customer, vehicle, time, and current status before changing anything. This confirms you are updating the right event.
- Move the card to the next status
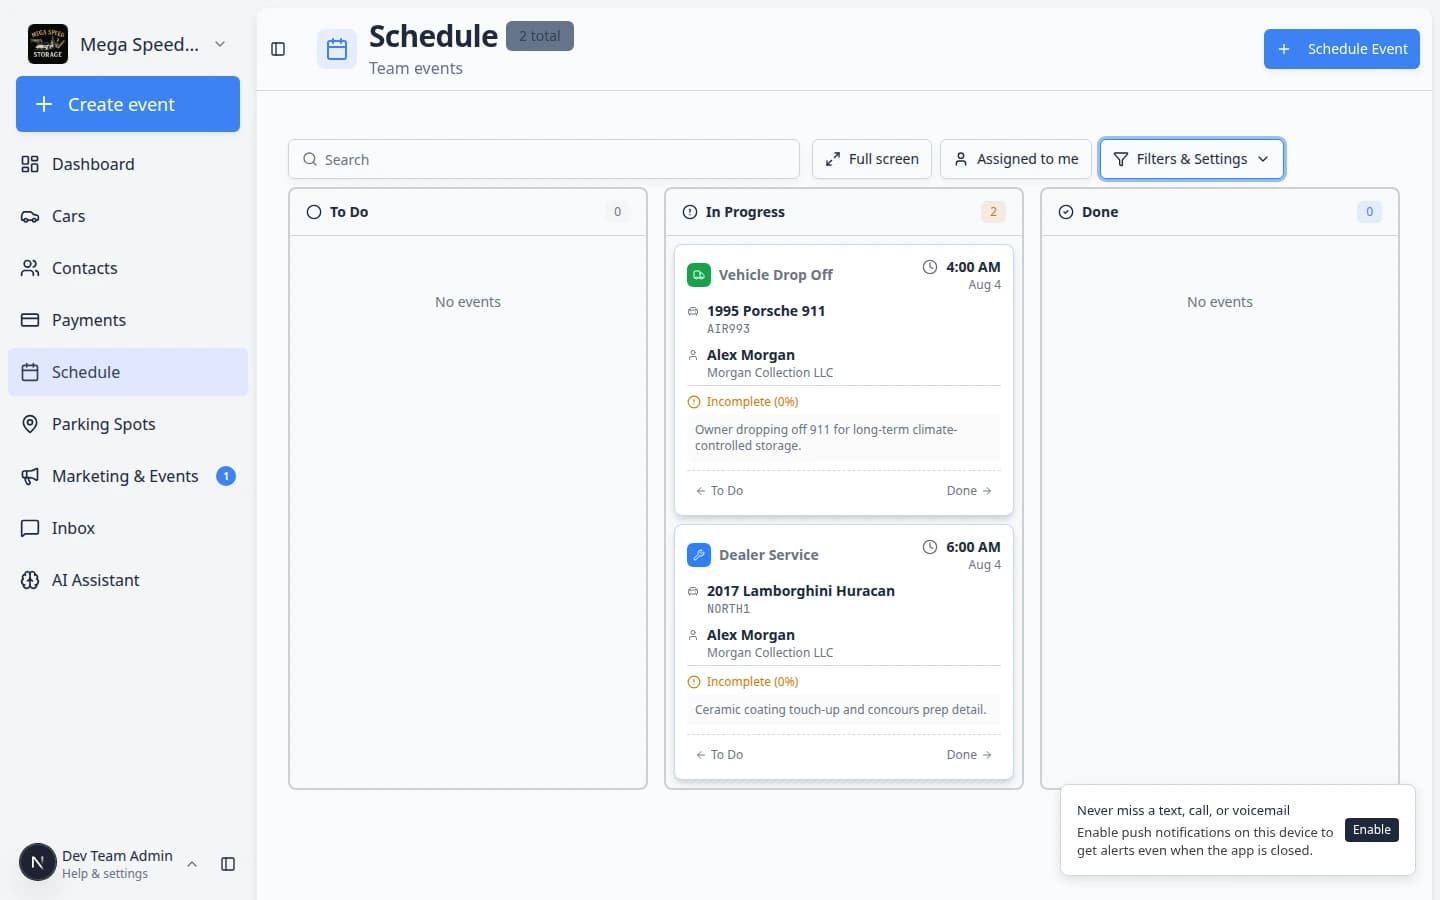
On a wide screen, click and drag the card into the next column (for example from To Do to In Progress). Let go when the card sits in the new column.
On smaller screens, use the status label on the card or open the card and use the status menu from the step above.
Move the card only when the work has truly changed status. For example, move to In Progress when someone actually starts the work, not when you plan to start later.
Expected result: The card appears in the new column and the status label on the card updates.
Why this matters: The board is how your shop answers “What still needs to be done?” without walking the floor or sending group texts.
- Confirm the status change
If a Change status? window appears, read it and click Confirm.
Confirmation helps prevent accidental moves that might confuse the team or notify the wrong person.
Expected result: The card moves to the new column and the status label on the card updates.
Mark work complete
- Open the event
Click the event card to see its full details.
- Review the work
Confirm the work is actually finished. Check notes, photos, customer expectations, and any billing impact before completing. Once marked complete, the event is considered done.
- Change the status to complete
Use the status control in the event details panel, or move the card to Done if your Progress view supports drag and drop.
- Confirm the result
The event should show as complete or appear in the Done column. This gives your team confidence that no follow-up is needed.
Use filters with Progress view
- Search when the board is busy
Use the Search field to narrow the board by customer, vehicle, event type, or notes. Only matching cards remain visible.
- Use Assigned to me
Click Assigned to me to see only your own work. This is helpful when the board has many team members' events mixed together.
- Use Needs Approval when it appears
Click Needs Approval to review customer requests before they become confirmed work.
What success looks like
After using Progress view:
- Staff can see at a glance what is waiting, active, blocked, or done.
- Completed work is marked complete instead of being left open — no one has to ask "Is this finished?"
- Events that need attention are easy to spot because they remain in the To Do or In Progress columns.
- The team spends less time asking "Has this been started yet?" because the board answers that question visually.
Common mistakes to avoid
Troubleshooting
Run the full workflow from a card
When a technician needs to take photos, record odometer readings, or complete checklists—not just change status—open the card and click Open Event. Follow Run event workflow from Schedule for the full floor workflow screen.
What to do next
If a card needs a date or assignment change, click it and follow Update, assign, or reschedule an event. If the work is no longer happening, follow Cancel or delete a scheduled event. To scan all events as a list, try Use Table view on Schedule.