Parking Spots
Assign parking during a Schedule event
Park a vehicle in the right spot or zone when you finish a scheduled drop-off, intake, or service visit from the calendar workflow.
What you will accomplish
You will assign a parking spot or zone while completing a scheduled visit on Schedule—so the calendar workflow and the Parking Spots map stay in sync.
When you finish:
- The event workflow is marked complete (or ready to complete).
- The vehicle shows Spot: or Zone: on its Cars record.
- Staff can find the car on the map without a separate parking step later.
When to use this guide
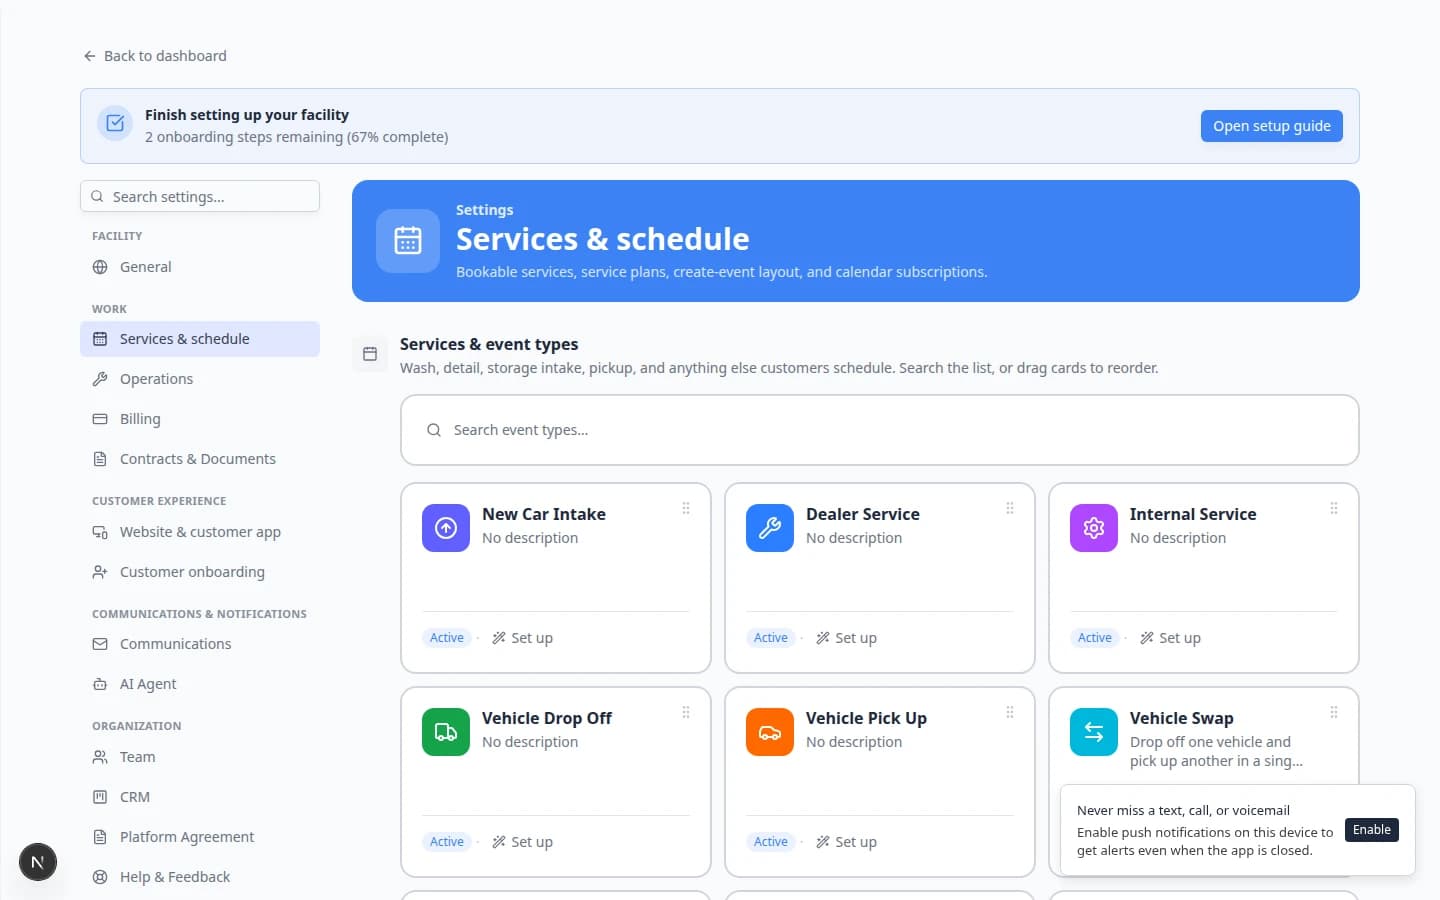
Use this when your facility sets When this event completes to Ask where the car is going for an event type such as Vehicle Drop Off, Storage Intake, or Detail Appointment.
Before you start
- The visit is on Schedule today (or in progress).
- The event is linked to the correct vehicle.
- Parking spots and zones already exist on your map. If not, an admin should follow Set up parking spots and zones first.
- You know where the car will sit after the visit (numbered spot, zone, or—if it leaves—an outside vendor).
Step 1: Open the event from Schedule
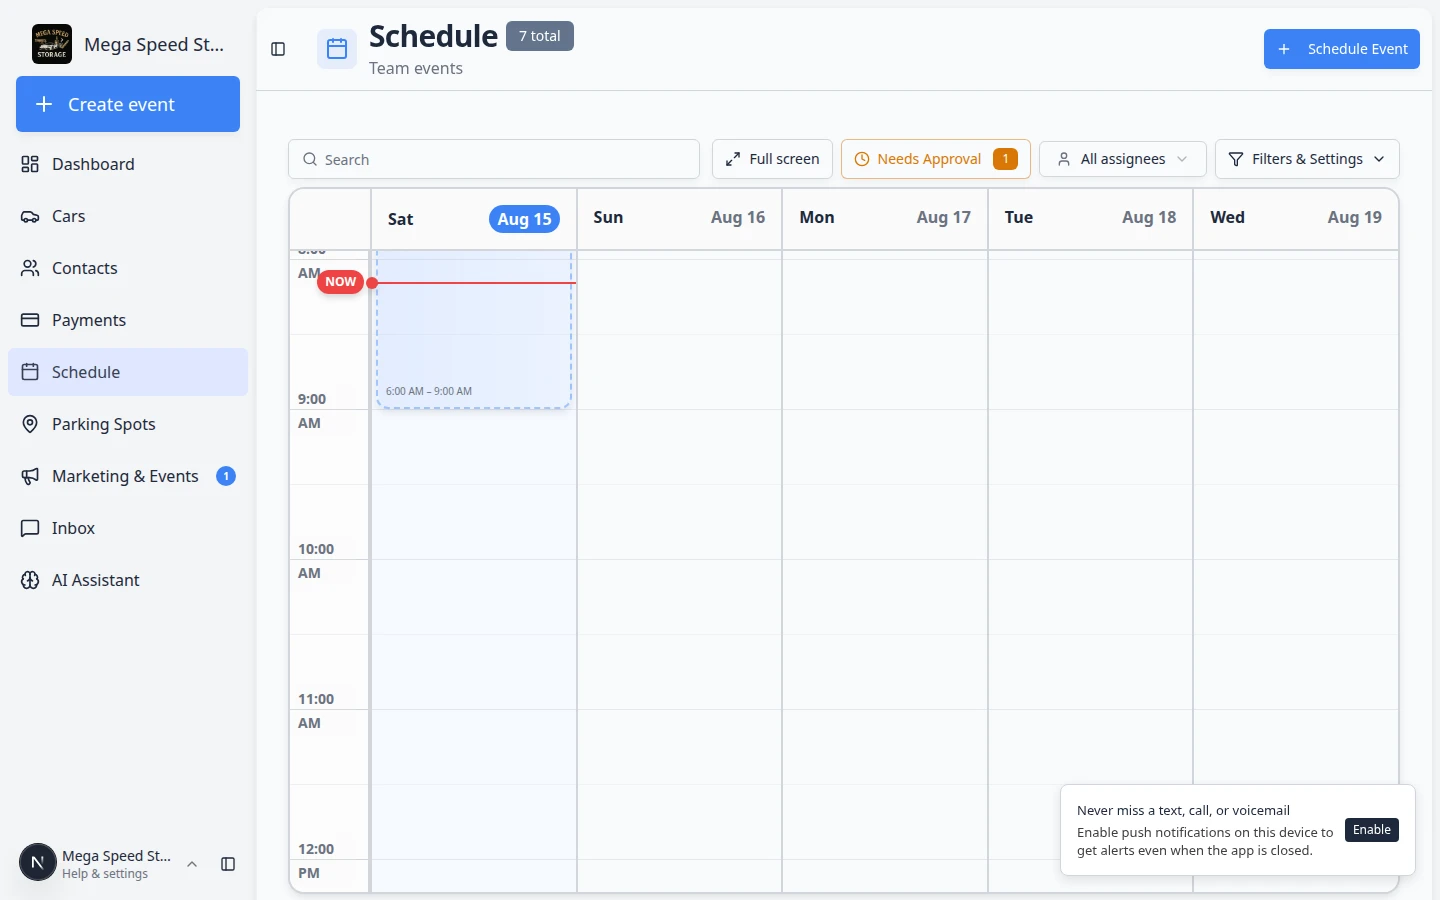
- Open Schedule
Click Schedule in the left sidebar, or go to Schedule.
Expected result: You see the calendar with colored appointment blocks for today and upcoming days.
- Click the visit
Click the colored block for the drop-off, intake, or service appointment.
Expected result: A detail panel opens on the right with the customer name, vehicle, time, and action buttons at the top.
- Click Open Event
Click the blue Open Event button near the top of the panel.
Why this matters: Edit Event only changes the plan (time, notes). Open Event starts the workflow where photos, checklists, and parking live.
Expected result: The app opens the workflow page. The web address includes
/dashboard/session/.
For a full tour of the workflow screen, read Run event workflow from Schedule.
Step 2: Finish required workflow steps first
Most visits ask for photos, vehicle readings, or checklist items before parking.
- Complete photos and checklists
Follow any prompts on the workflow page—All Photos, STATUS, and ACTIVITY sections.
Why this matters: Parking is usually the last step so the car is in its final location when you assign it.
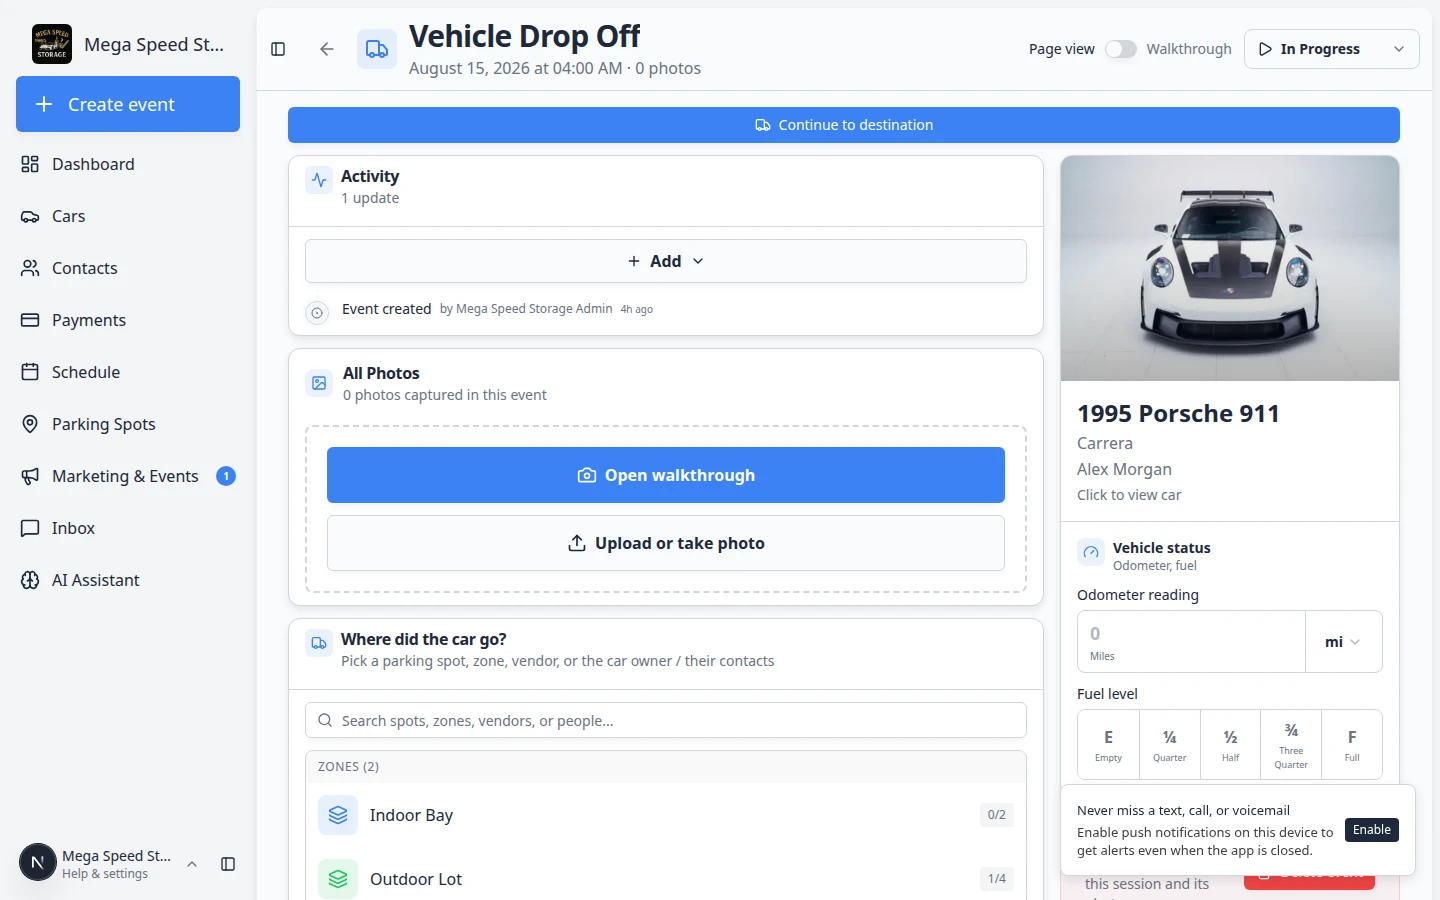
- Look for Continue to destination
When parking is required and not assigned yet, the main action button near the top may say Continue to destination instead of Mark as Complete.
Expected result: You understand you must pick a location before the visit can finish.
Step 3: Pick a spot or zone
- Open the parking step
Click Continue to destination (or follow the parking section on the workflow page).
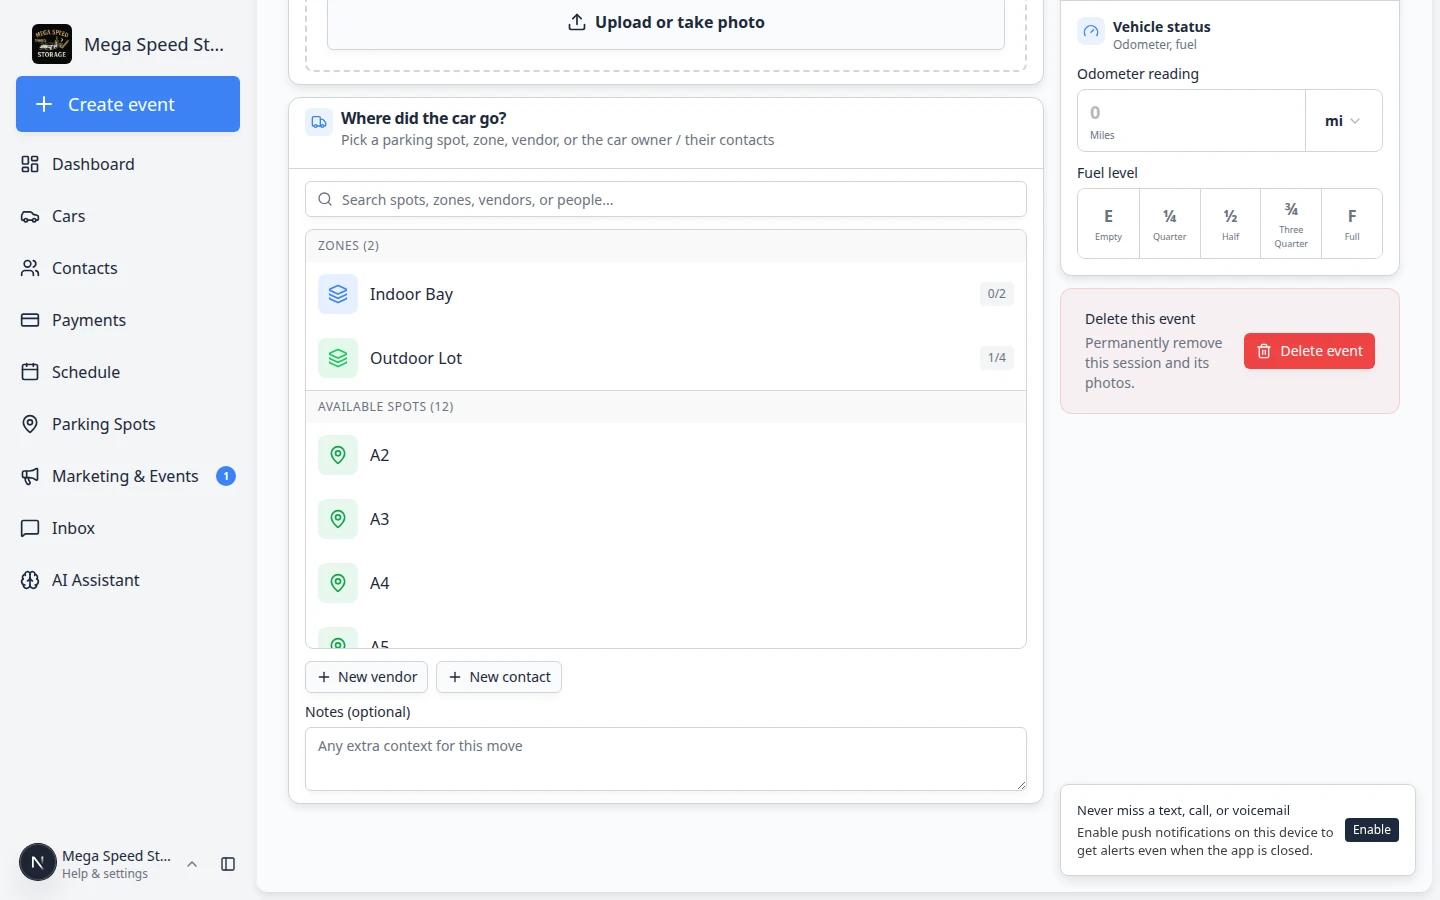
Expected result: You see a list of Spots and Zones with availability hints—often right on the same workflow screen.
- Search if the list is long
Type a spot name (for example A3), zone name (for example Outdoor Lot), or scroll until you find an Available row.
Why this matters: Assigning the first open row without reading the label is a common mistake on busy intake days.
- Select the destination
Click the spot or zone where the car is parked right now.
Expected result: The row highlights or shows as selected.
- Save the assignment
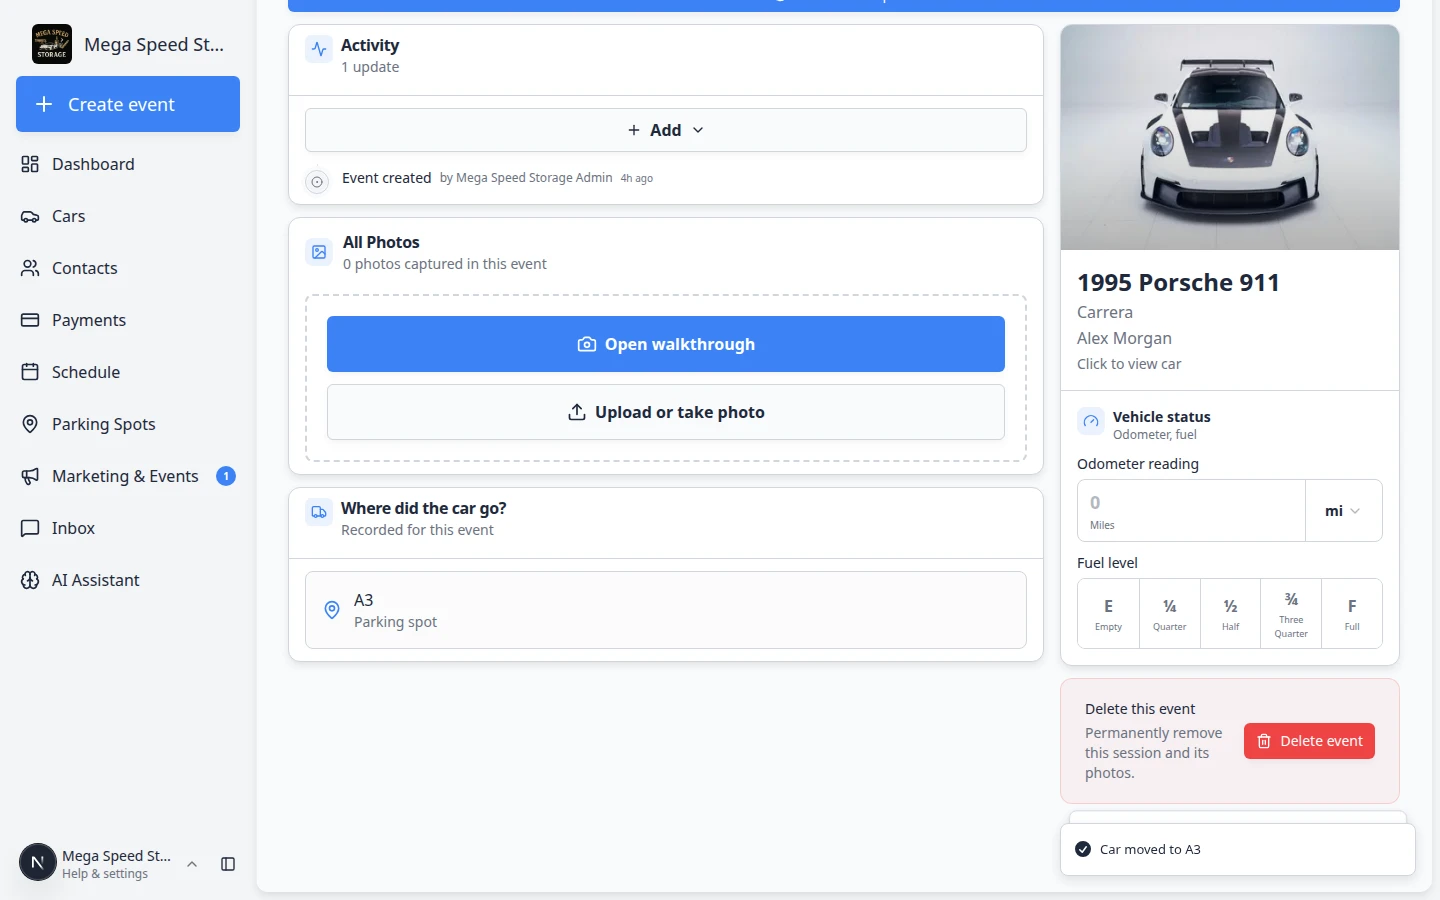
Confirm or save the parking choice. The workflow should show the spot or zone name near the vehicle card.
Expected result: The car record updates to Spot: or Zone: without a separate trip to the map. On Cars, the parking button at the top of the page should match what you picked.
Step 4: Mark the visit complete
- Review the vehicle card
Confirm the parking label on the workflow page matches where the car sits physically.
- Click Mark as Complete
When parking is assigned, click Mark as Complete (or Complete).
Expected result: Status moves to Done. Progress view and the calendar show the visit as finished.
- Spot-check the map (optional)
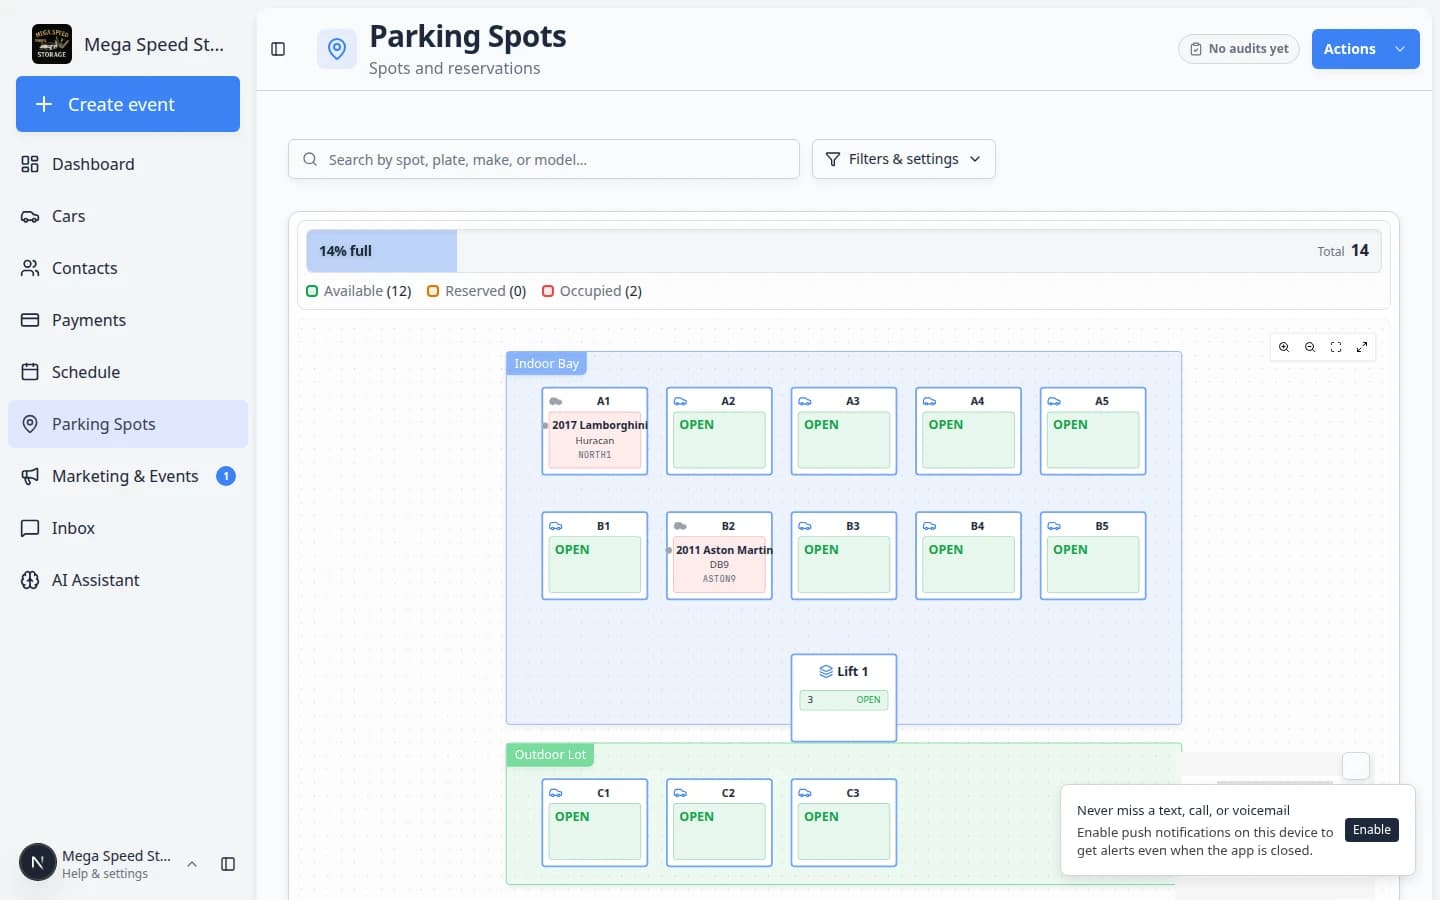
Open Parking Spots and search for the vehicle. The map should match what you picked in the workflow.
Why this matters: A 10-second map check prevents “where did we park it?” calls later the same day.
If the car leaves for an outside vendor instead
When transport or a partner shop takes the vehicle off-site, do not assign a facility spot.
- Finish or pause the workflow
Complete any required photos and notes on the workflow page.
- Update location on the car record
Open the vehicle in Cars, click the parking button, and choose the vendor under Vendors. Click Send to vendor.
Expected result: The record shows Vendor: and the company name. The facility map no longer shows the car in a spot.
Read Send a car to an outside vendor for full step-by-step help.
Common mistakes to avoid
- Do not click Mark as Complete before choosing parking when the button says Continue to destination—the app may block completion until a location is set.
- Do not assign a spot while the car is still on a lift or in a wash bay if it will move again—wait until it is in its final resting place.
- Do not skip parking because “we will do it later”—later often means a wrong spot on the map by end of day.
- Do not open the wrong event when two similar cars arrive at once—read the vehicle card every time.
- Do not click Parking Spots in the sidebar thinking it saves the assignment—you must pick a destination inside the workflow (or update the car record afterward).
Troubleshooting
What success looks like
- The Schedule event shows Complete (or Done in Progress view).
- The car record shows the correct Spot: or Zone: at the top.
- Parking Spots shows the vehicle as Present or Occupied in that location.
- Front desk staff can answer “where is this car?” without walking the building.
What to do next
- Practice finding the car with Find parking spots and available spaces.
- If parking was only promised ahead of time, see Reserve a parking spot.
- For off-site transport, read Send a car to an outside vendor.
- Return to the Parking Spots overview.