Marketing & Events
Add campaign message, audience, and publish
Finish an email, text, or push campaign after you create it—write the message, choose who receives it, schedule send time, and publish safely.
What you will accomplish
Use this guide after you have already created a campaign record from Create a campaign.
When you finish, your campaign will have:
- A clear message customers will see (subject line, email body, text, or push text)
- The right audience selected so the message goes to the intended customers
- A send date and time your team agrees on
- A published or scheduled status your team can track on the calendar
Before you start
- You already clicked Create Campaign and landed on the campaign detail page.
- You know what you want to say and who should receive the message.
- If you plan to send texts, confirm text messaging is ready in Settings > Communications.
- Ask a teammate to review the message before you publish if your facility requires a second set of eyes.
Open your campaign
- Go to Marketing & Events
Open Marketing & Events from the left sidebar.
- Find your campaign
On the calendar, click your campaign in Upcoming schedule, or click its day on the month view.
You can also open the campaign directly if you saved the link from Create a campaign.
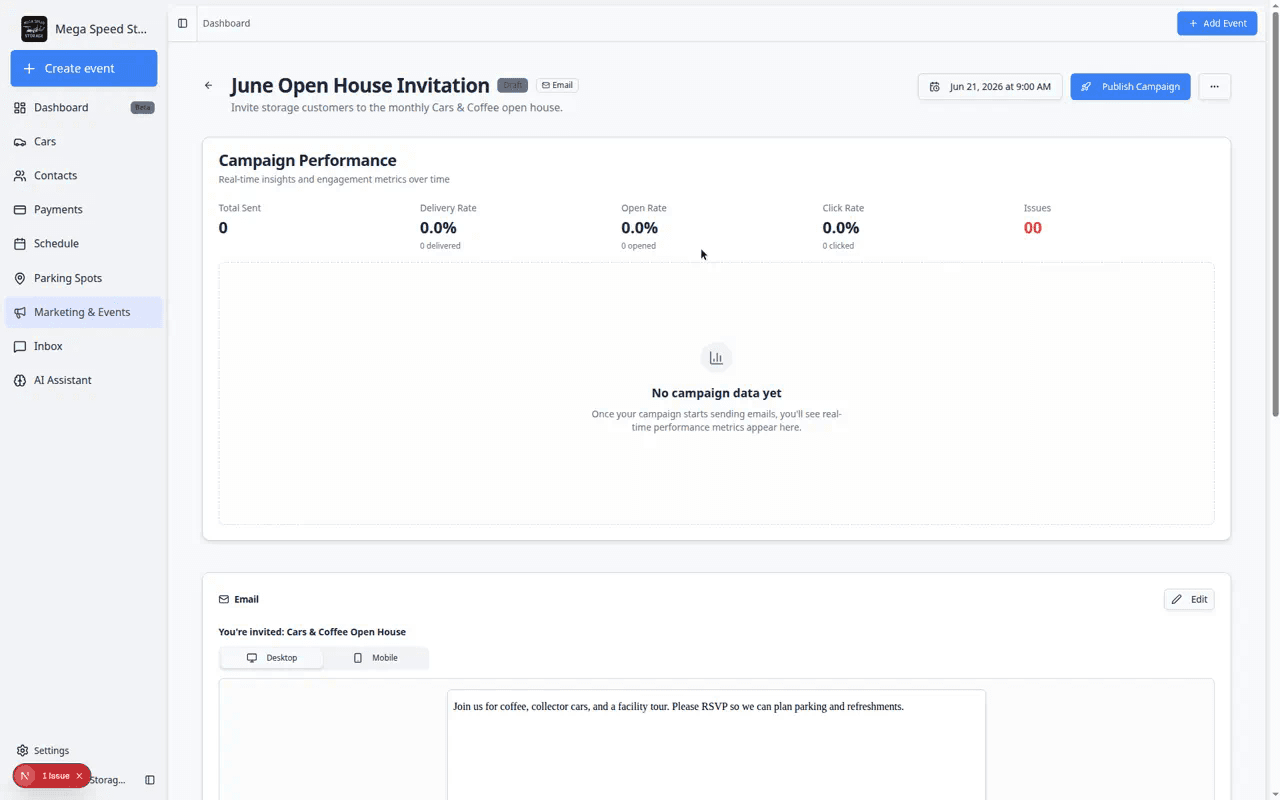
Expected result: You see the campaign name at the top, a draft status badge, and buttons such as Schedule send and Publish Campaign.
Write the customer-facing message
- Review the message preview card
Scroll to the message card on the campaign page. It shows a preview for Email, SMS, Push, or Social depending on what you created.
If the card says there is no content yet, you need to add the message next.
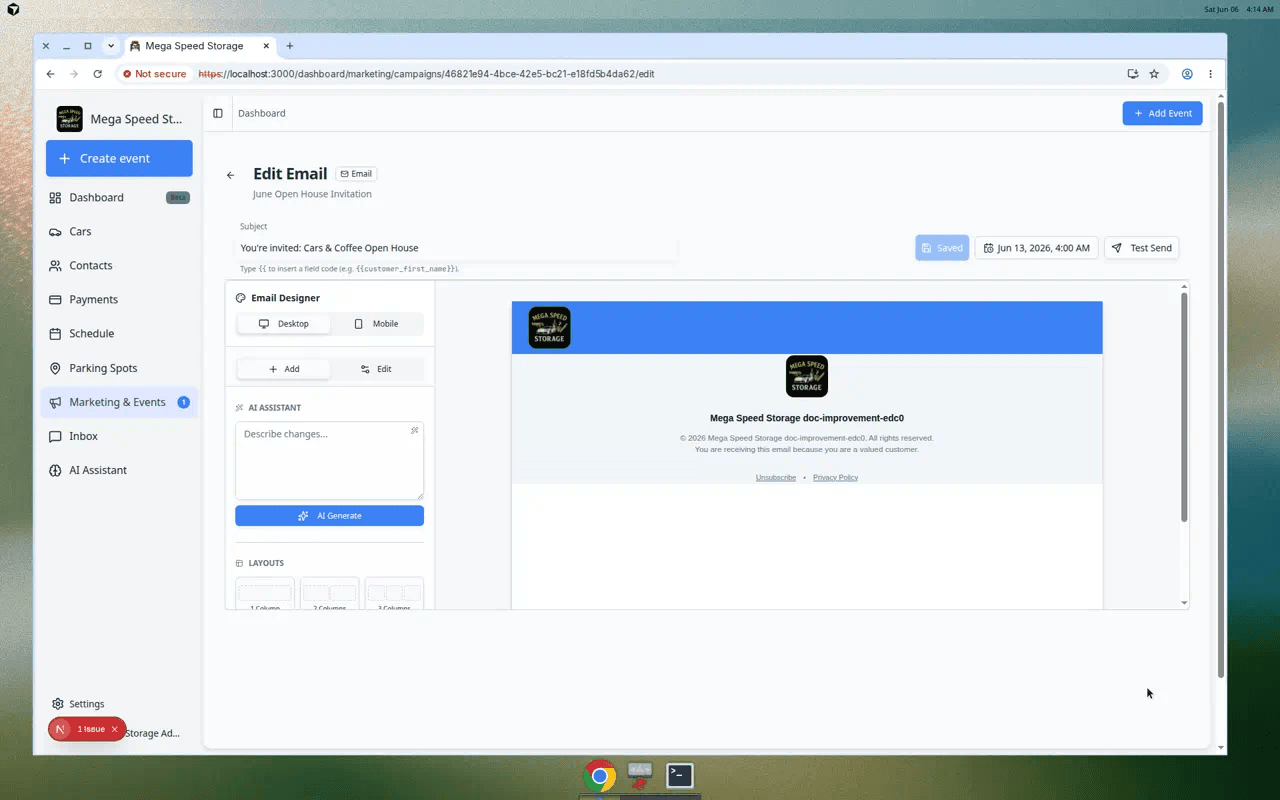
- Click Edit
Click Edit on the message card. The edit screen opens for that channel.
- Add the message details
Fill in the fields your team needs:
- Email: add a Subject and the body text (or designed email content).
- SMS: add the short text customers will receive on their phone.
- Push: add the notification title and message shown in the app.
Use plain language. Tell customers what is happening, why it matters, and what to do next.
Example: "Join us Saturday for Cars & Coffee. RSVP so we can plan parking and refreshments."
- Save your work
Save or return to the campaign page when the preview looks correct.
Expected result: The campaign page preview shows your subject and message (for email) or your text (for SMS or push).
Choose who receives the campaign
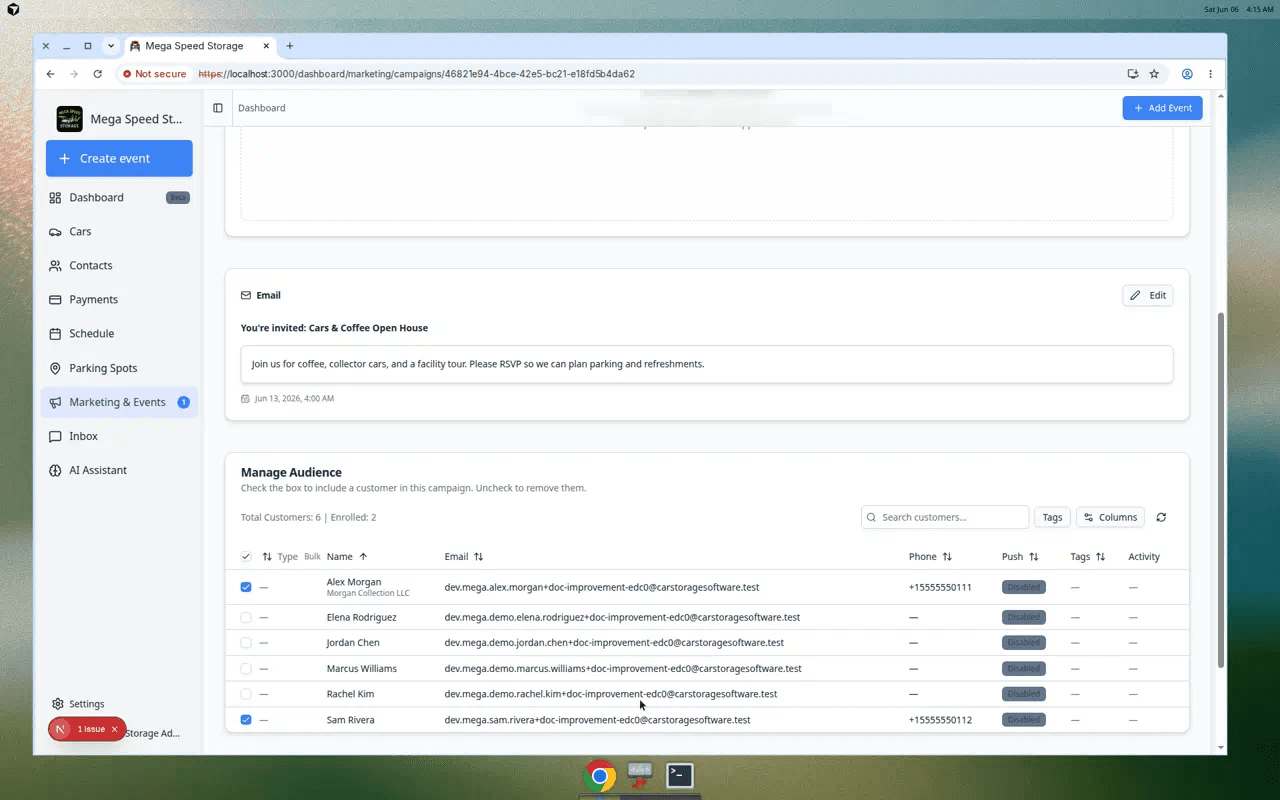
Email, SMS, and push campaigns include an Audience section below the message preview.
- Scroll to Audience
On the campaign detail page, scroll to the Audience section.
- Search for customers
Use the search box to find a customer by name, email, or phone number.
- Add or remove people
Check the box next to each customer who should receive this campaign. Uncheck anyone who should not receive it.
Why this matters: Publishing without the right audience can send a storage reminder to event-only guests, or miss the people you meant to reach.
- Confirm the recipient count
Before you publish, note how many customers are selected. If the count is zero, customers will not receive the message.
Set when the message should go out
Schedule send picks the date and time. Publish Campaign turns the message on so it can go out to the audience you selected.
You can set the schedule first, then publish—or publish only after the schedule looks right. Customers still do not receive anything until you publish.
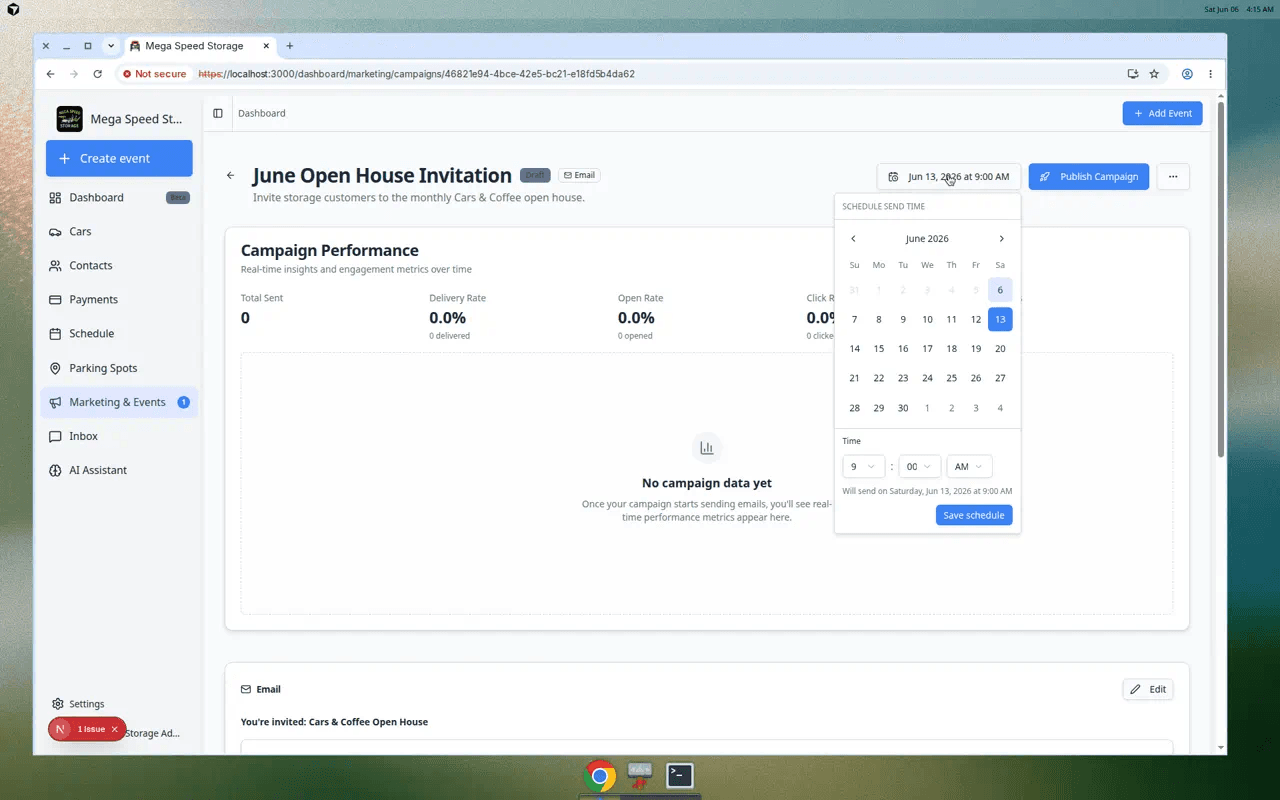
- Click Schedule send
At the top of the campaign page, click the Schedule send button (it shows a small calendar icon).
Expected result: A panel opens on the page with a calendar and time fields—not a separate full-screen page.
- Pick a date
Choose the date customers should receive the message.
- Pick a time
Set the hour, minute, and AM or PM. Double-check morning vs. evening—this is a common mistake.
- Click Save schedule
Click Save schedule so the send time is stored on the campaign.
Expected result: The Schedule send button shows the date and time you chose.
Publish the campaign
Publishing tells the system it may send the message to the selected audience at the scheduled time.
- Review one last time
Confirm:
- The message preview looks right
- The audience includes the right customers
- The schedule shows the date and time you expect
- Click Publish Campaign
Click Publish Campaign at the top of the page.
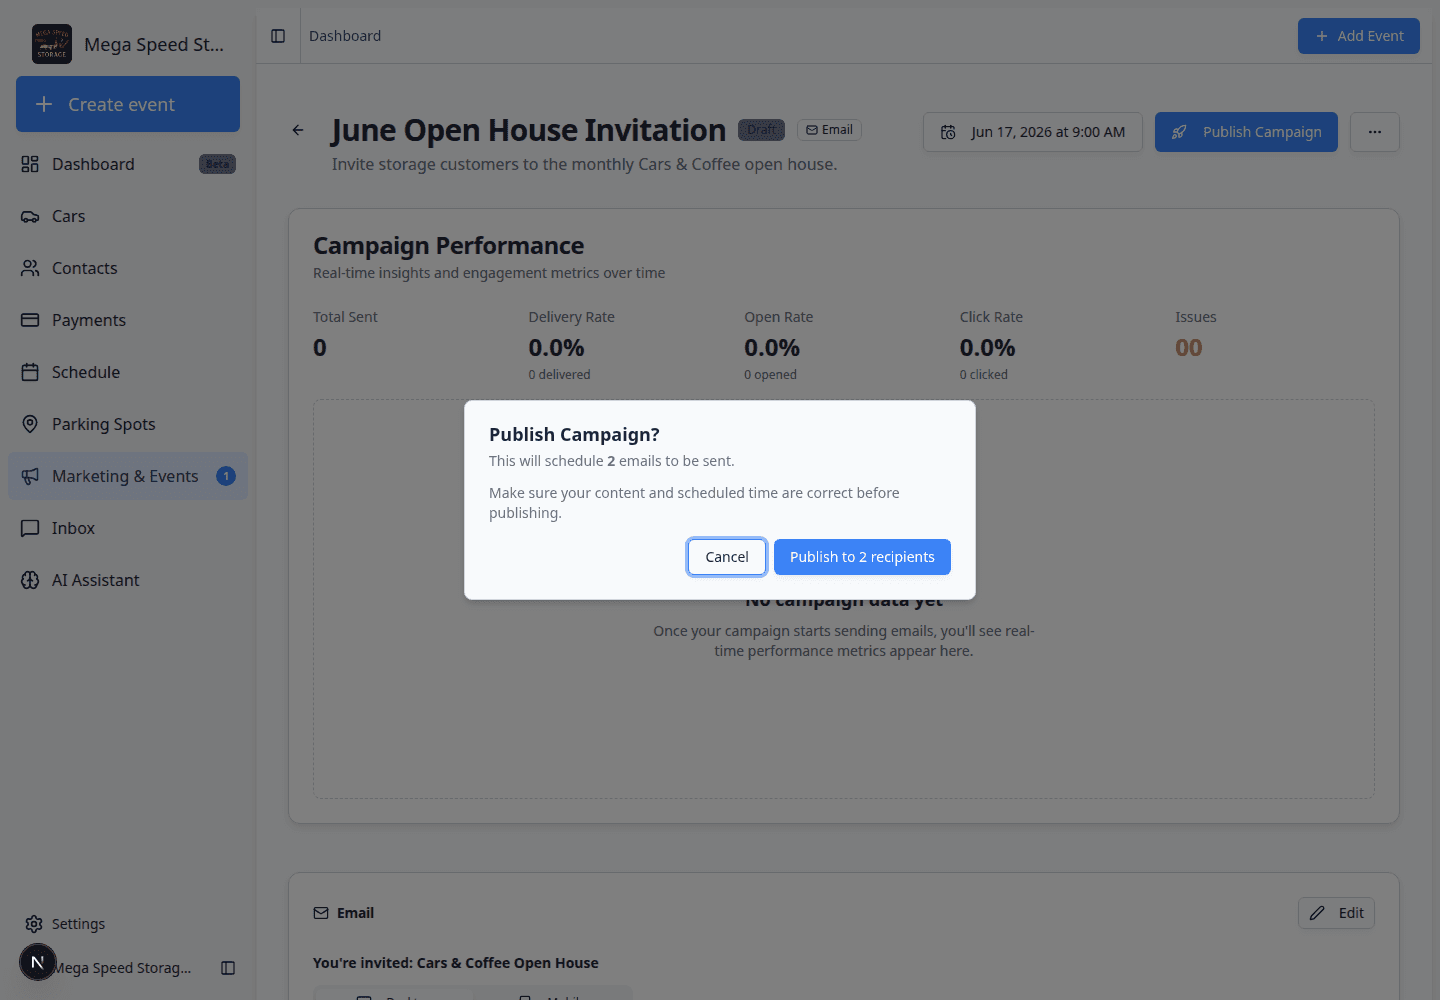
- Read the confirmation window
A window appears and shows how many recipients will receive the message. Read this number carefully.
If it says zero recipients, go back to the Audience section and add customers before you continue.
- Confirm publish
Click the publish button in the confirmation window when the recipient count looks correct.
Expected result: The campaign status changes from draft to active, and the item appears on the Marketing & Events calendar for the scheduled day.
After you publish
- The campaign appears on the Marketing & Events calendar on the scheduled date.
- The status badge at the top changes from draft to active (or scheduled, depending on timing).
- Email and SMS campaigns show delivery and engagement stats on the campaign page after messages go out.
Pause, duplicate, or fix a published campaign
Sometimes you need to stop a send, copy a campaign for next month, or fix a typo after publishing.
- Open the campaign from the calendar
Go to Marketing & Events and click the campaign in Upcoming schedule or on its calendar day.
Expected result: You see the campaign detail page with its current status (active, paused, or similar).
- Pause before you edit
If the campaign is active and you need to change the message, click Pause Campaign at the top first.
Why this matters: Active campaigns cannot be edited until they are paused. Pausing prevents customers from receiving a message while you fix it.
Expected result: The status badge changes from active to paused, and Edit Email (or Edit SMS) becomes available again.
- Duplicate for a similar send later
Click the More menu (three dots) near the top-right and choose Duplicate Campaign.
Expected result: A new draft copy opens with the same message and audience. Change the name, schedule, and wording before you publish the duplicate.
Why this matters: Duplicating is safer than retyping a long email when you run the same open house invite every quarter.
Troubleshooting
What to do next
- If the campaign promotes an in-person gathering, continue with Create a social event and Review social event RSVPs and attendees.
- On event day, use Check in social event attendees.
- To ask happy customers for a Google review afterward, use Request and manage reviews.