Events
Set up bookable resources
Configure facility resources such as bays, lifts, rooms, staff, and equipment for scheduled events.
What you will accomplish
You will create a list of limited spaces, equipment, or people—then connect them to event types so Schedule does not double book them.
A resource can be a detail bay, wash bay, lift, conference room, trailer, photographer, specialist, or any other item your team cannot use for two appointments at once.
This guide helps you create the resource list and add individual bookable instances. After that, you attach resources to event types in Configure scheduling and booking options.
Before you start
- List the things that limit scheduling capacity, such as bays, lifts, rooms, staff, or equipment.
- Decide how many individual instances exist. Example: one resource named Detail Bay may have instances named Bay 1 and Bay 2.
- Know whether any instance should be linked to a specific staff user.
- Decide which event types should require this resource.
- Make sure you have admin access to Settings > Events & schedule.
Understand resources and instances
A resource is the general thing customers or staff book. Example: Detail Bay.
An instance is the specific bookable item inside that resource. Example: Bay 1 and Bay 2.
If you only have one detail bay, create one resource named Detail Bay and one instance named Bay 1.
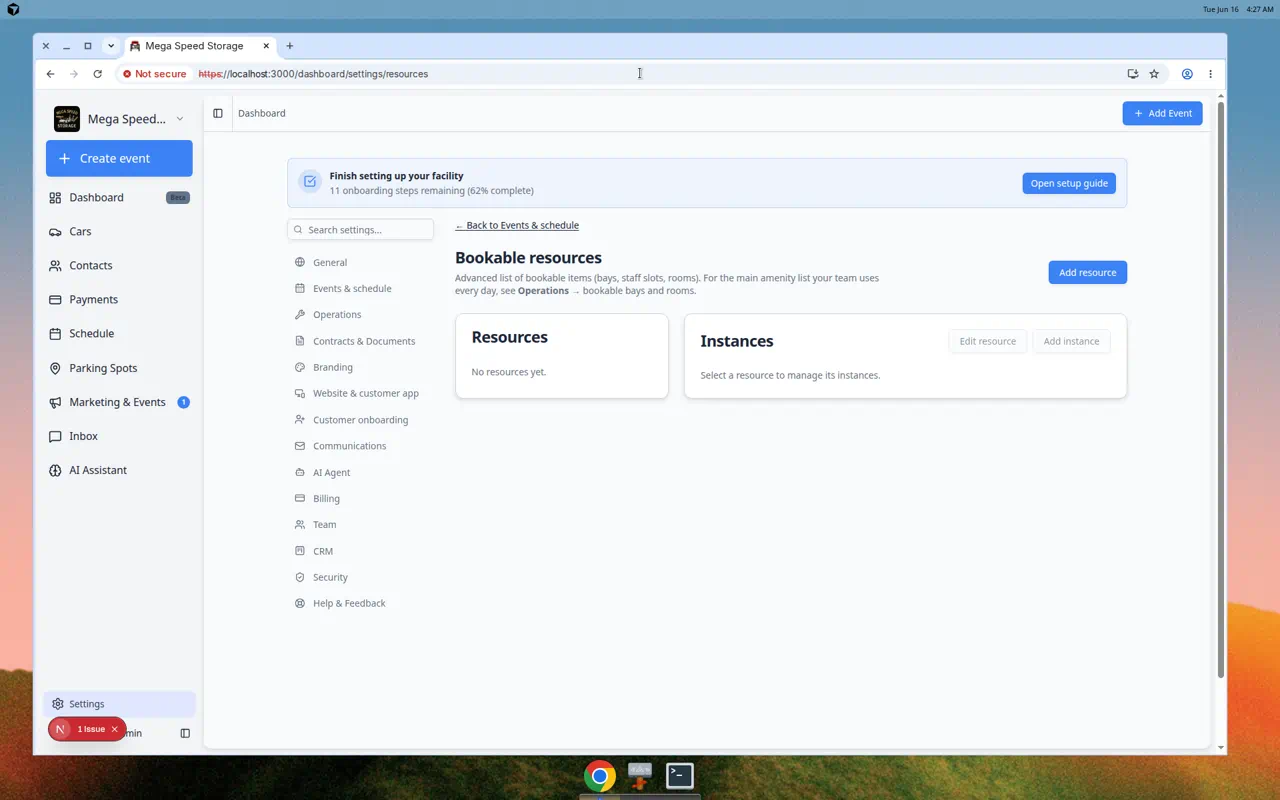
Open Bookable resources
- Open Events & schedule
Go to Settings > Events & schedule.
- Open Bookable resources list
On that page, click Bookable resources list.
You can also open Settings > Bookable resources directly from the sidebar under Settings.
Expected result: You see resources on the left (for example Detail Bay) and Instances on the right (for example Bay 1).
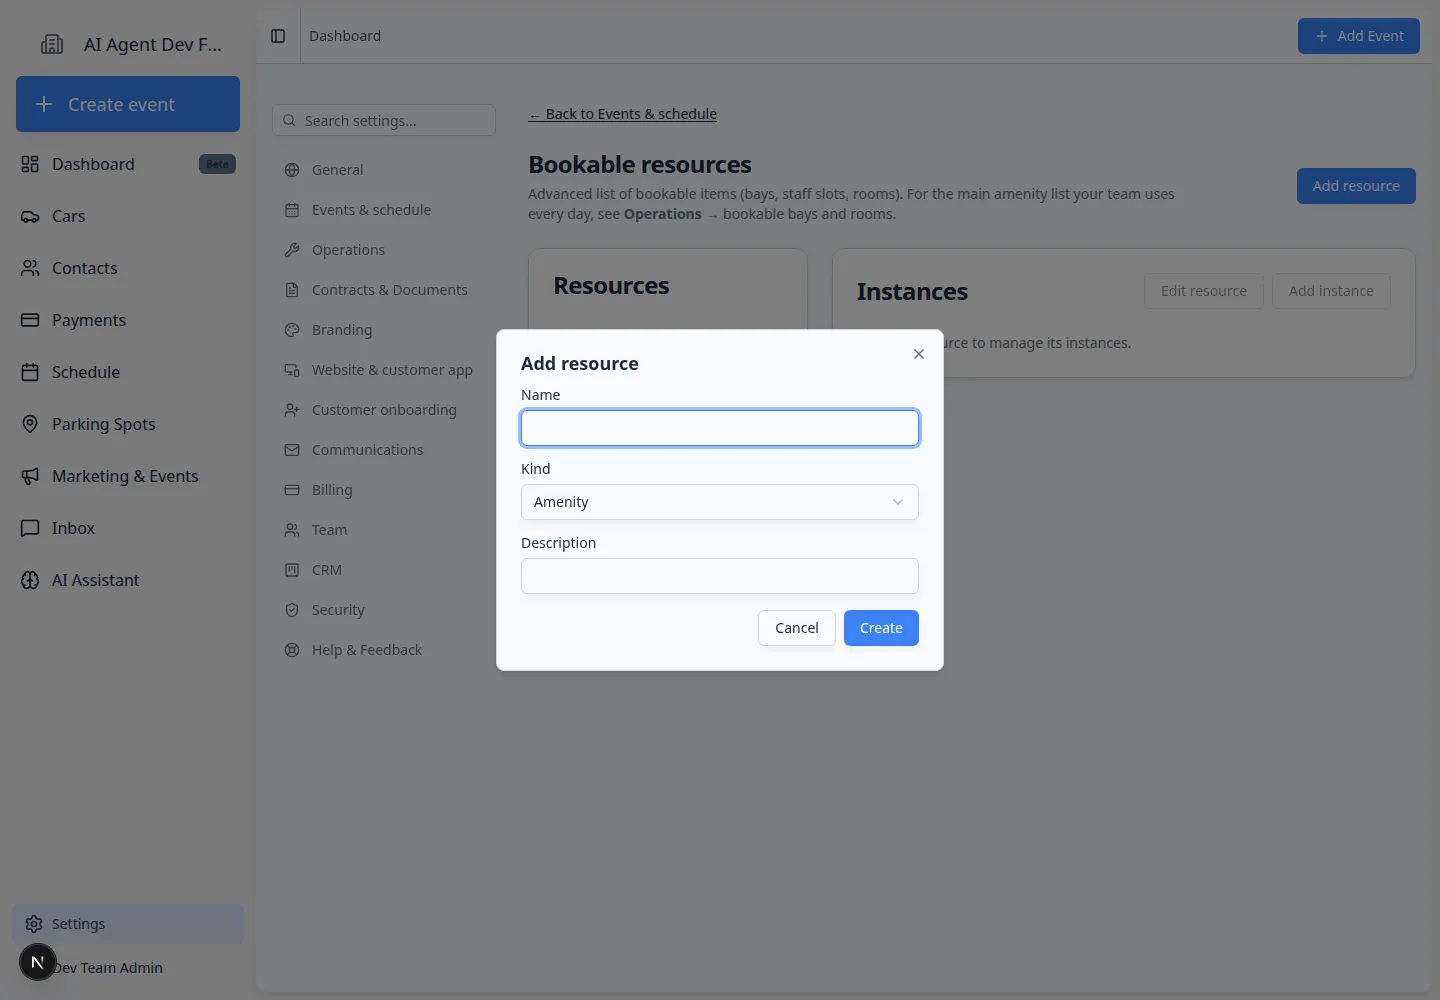
Add a resource
- Click Add resource
On the Bookable resources page, click Add resource.
A window named Add resource opens.
- Enter the resource name
In Name, type the general resource name.
Examples: Detail Bay, Wash Bay, Lift, Conference Room, Transport Trailer, or Lead Technician.
- Choose the kind
Use Kind to describe what type of resource it is.
If you are not sure, choose the closest option. This helps your team understand the resource later, but the name is usually what staff notice first.
- Add a description
Use Description for simple notes that help staff understand when to use the resource.
Example: "Use for customer detail appointments and inspection work."
- Click Create
Click Create. The resource is added to the list.
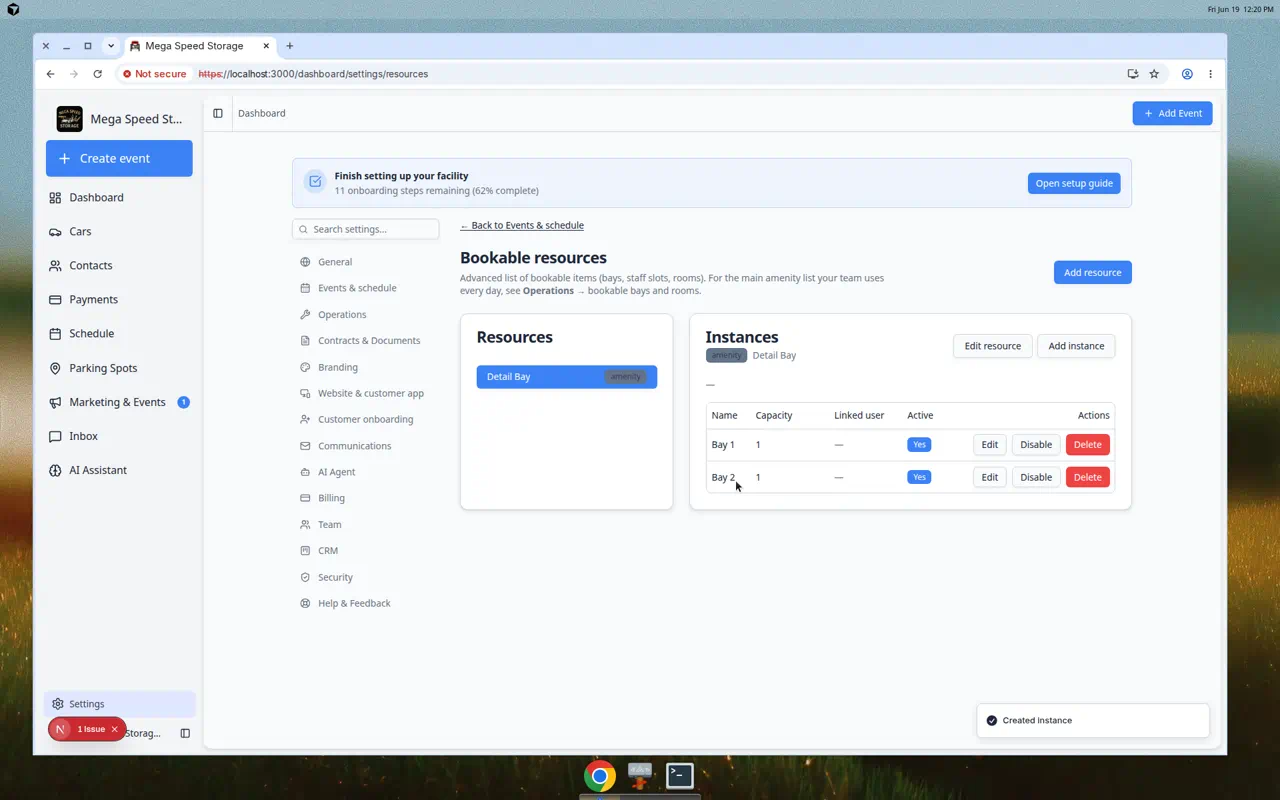
Add an instance
- Select the resource
Click the resource name in the left column.
The Instances panel appears on the right.
- Click Add instance
Click Add instance.
- Enter the instance name
In Name, type the specific item or slot.
Examples: Bay 1, Bay 2, Lift A, Conference Room, or Trailer 1.
- Set capacity
Use Capacity to show how many appointments can use that instance at once.
Most physical items should have capacity 1. Use a higher number only when more than one booking can safely share the same instance.
- Link a user if needed
Use Linked user (optional) only when the instance is a person or belongs to a specific teammate.
If the resource is a room, bay, lift, or equipment, leave this as None unless your process requires a specific staff owner.
- Click Create
Click Create.
Expected result: The instance appears in the Instances table on the right, with its name, capacity, and status shown.

Attach the resource to an event type
Creating the resource list is the first part. The second part is telling an event type to use that resource.
- Open Events & schedule
Go to Settings > Events & schedule.
- Edit the event type
Click Edit next to the event type that needs the resource.
Example: If detail appointments need a detail bay, edit Detail Appointment.
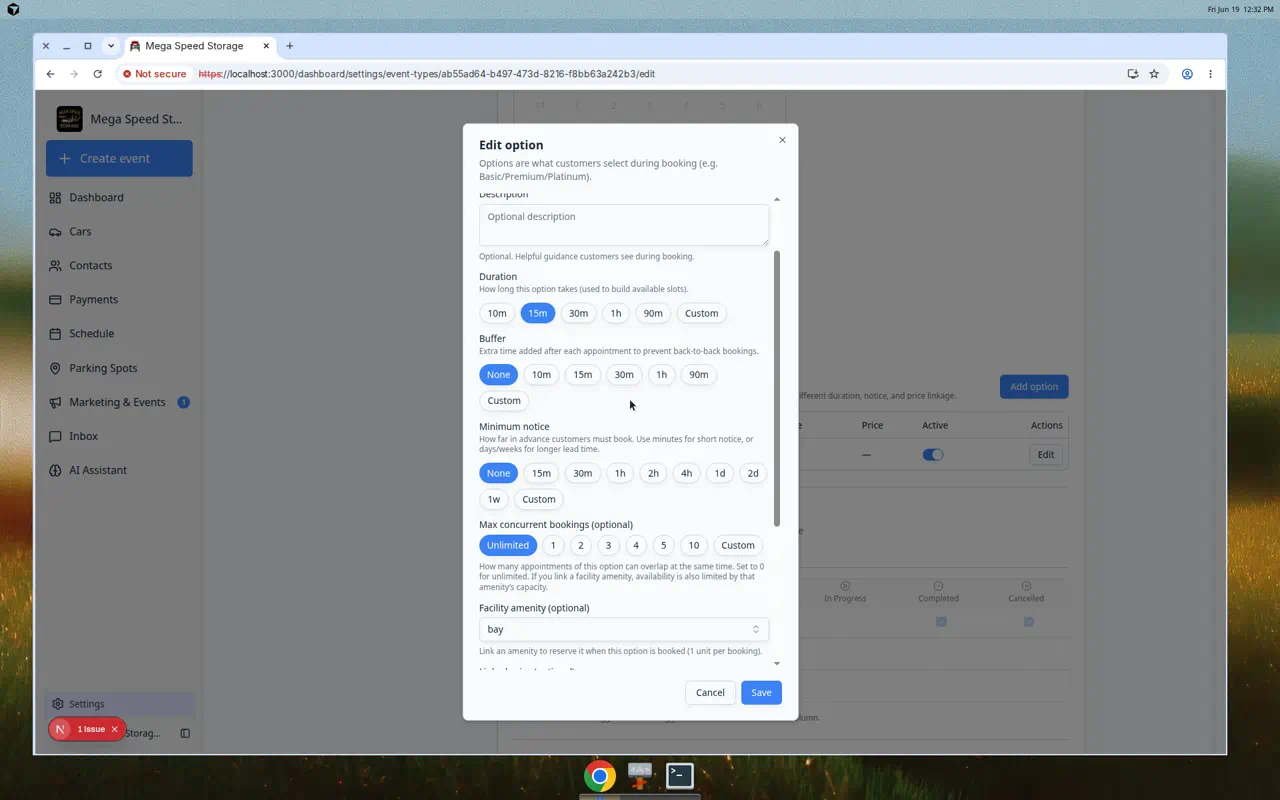
- Open Booking Options and edit the option
Scroll to Booking Options on the same edit page. Click Edit on the option that should reserve the resource (or click Add option first).
Expected result: The Add option or Edit option window opens.
- Choose Facility amenity (optional)
In that window, open Facility amenity (optional) and pick the instance this appointment should reserve—such as Bay 1 under Detail Bay.
This tells the calendar to check availability before the event is booked.
Expected result: The amenity name appears in the dropdown before you save the option.
- Save and test
Click Save Changes, then create a test appointment from Schedule. Confirm the appointment uses the expected resource and does not allow unavailable capacity.
If no resources exist yet, the Bookable resources page shows No resources yet until you add your first bay, lift, or room.
What success looks like
After setup:
- The resource appears on Settings > Bookable resources.
- Each resource has at least one active instance.
- The event type that needs the resource is configured to check it.
- Test appointments respect the resource's capacity.
- Staff can see which limited space, item, or person is being used.
Common examples
Detailing: Resource: Detail Bay. Instances: Bay 1, Bay 2.
Maintenance: Resource: Lift. Instances: Lift A, Lift B.
Customer tours: Resource: Showroom or Conference Room. Instances: Main Showroom, Upstairs Conference Room.
Staff-based work: Resource: Technician. Instances: Jordan, Taylor, Casey. Link each instance to the matching team user if helpful.
Troubleshooting
What to do next
Run Test an event setup to confirm the resource blocks double booking. If the event also needs photos, review Configure photo rules.